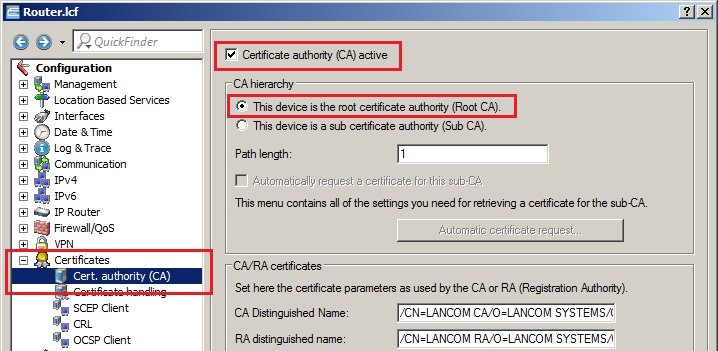
Description: This document describes how certificates created by LANCOM Smart Certificate are used for a certificate-based VPN client connection. 1) Enable the CA function in the LANCOM router 1.1) In LANconfig, open the configuration dialog for the LANCOM router and switch to the menu item Certificates → Cert. authority (CA). 1.2) Set a check mark for the option Certificate authority (CA) active. The LANCOM router functions as the root certificate authority (root CA).
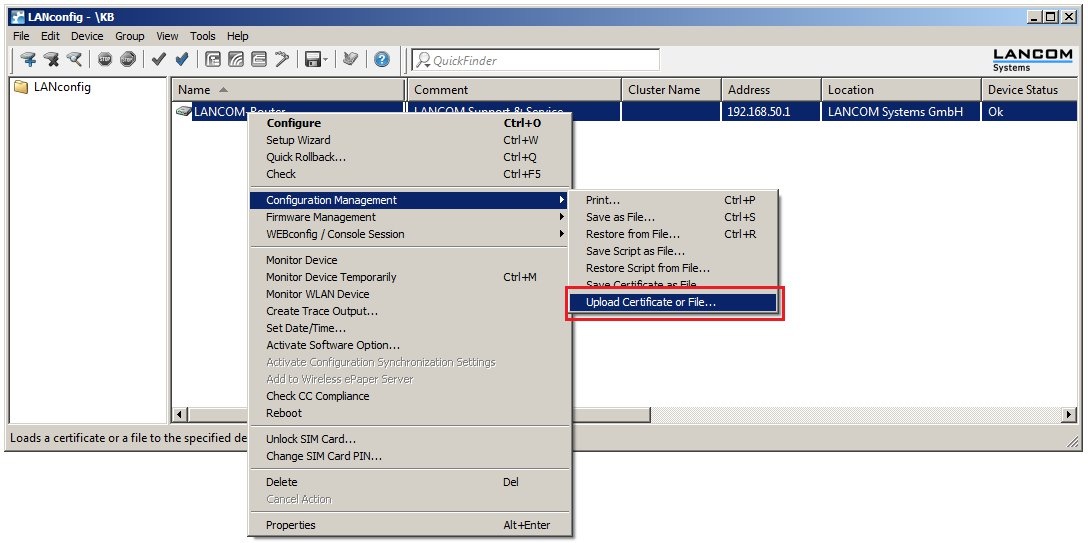
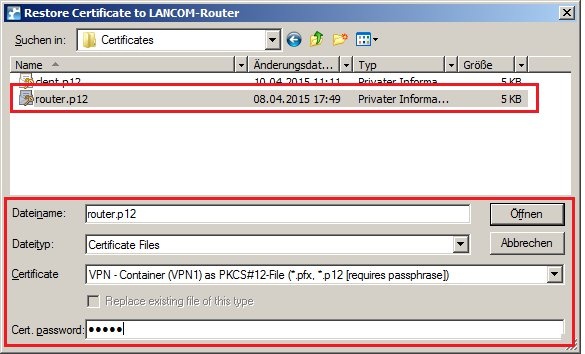
2) Upload of the router certificate to the LANCOM router 2.1) Right-click on the LANCOM router in LANconfig and select the option Configuration management → Upload certificate or file. 2.2) In the following dialog select the certificate file intended for the LANCOM router. 2.3) In the certificate type field, select a VPN container. 2.4) In the Cert. password box enter the password for the certificate file. Click on Open to start the upload.
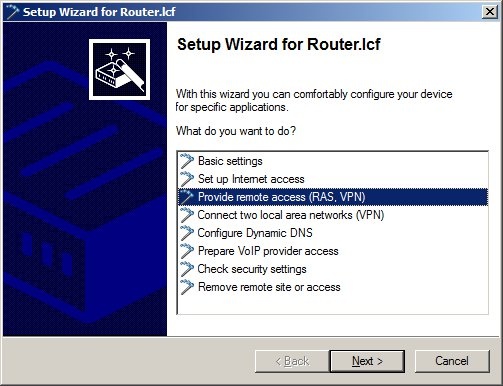
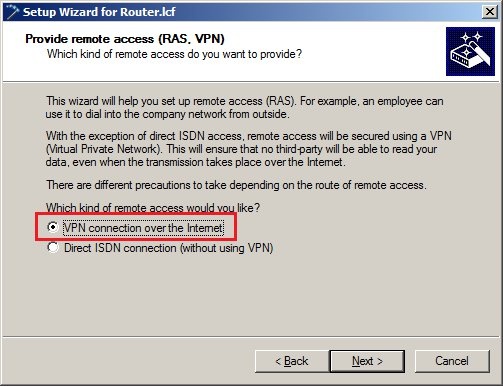
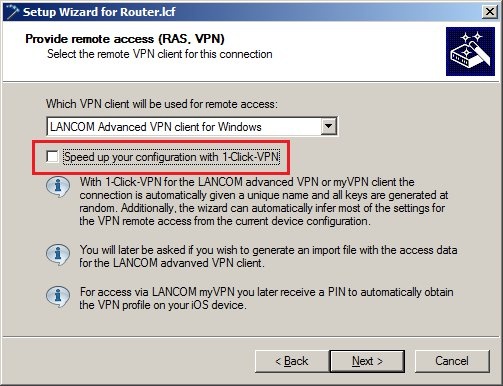
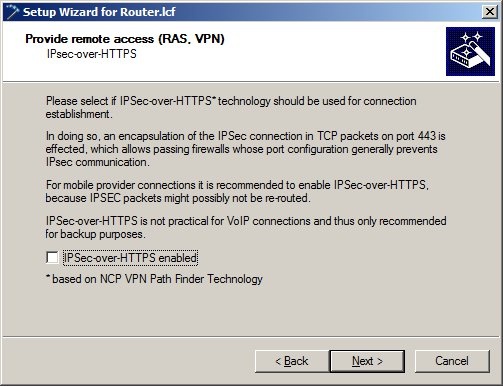
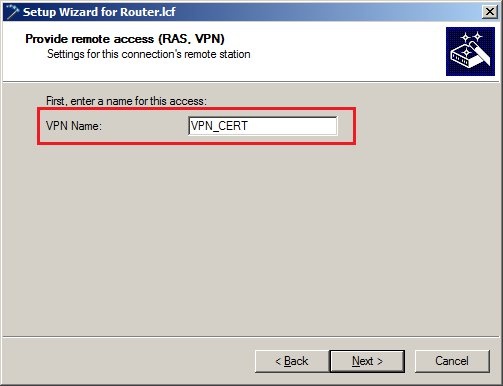
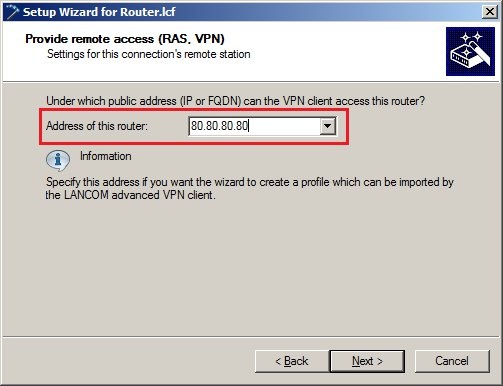
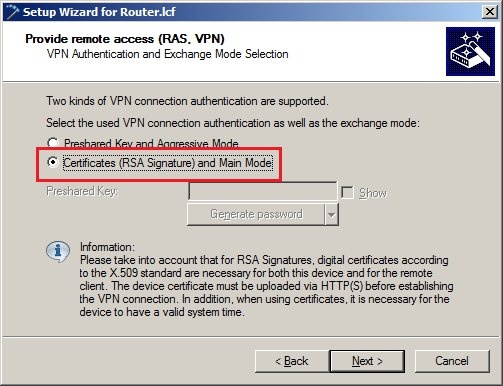
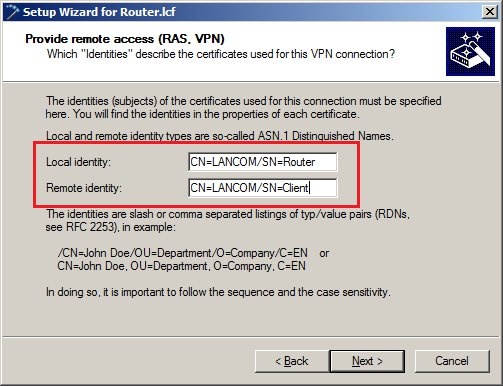
3) Configure the certificate-based VPN client connection on the LANCOM router 3.1) Start the Setup Wizard in LANconfig and select the option Provide remote access (RAS, VPN). 3.2) Select the option VPN connection over the Internet. 3.3) Disable the option ... 1-Click VPN. 3.4) In this example, we do not use IPSec-over-HTTPS. 3.5) Enter a name for the new VPN connection. 3.6) In the next dialog, specify the public IP address or DNS name of the LANCOM router. 3.7) For this connection, select the option Certificates (RSA signature) and Main mode for VPN connection authentication. 3.8) In the next dialog box you enter the identities of the certificates. - As the local identity, enter the name of the certificate in the LANCOM router.
- As the remote identity, enter the name of the certificate in the VPN client.
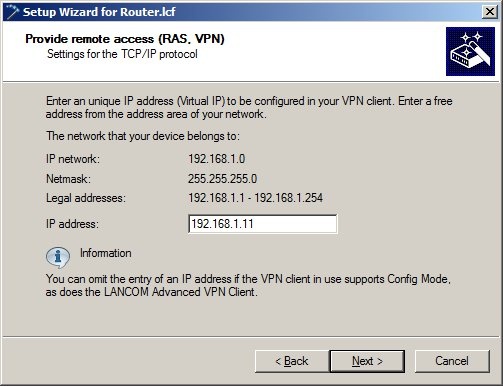
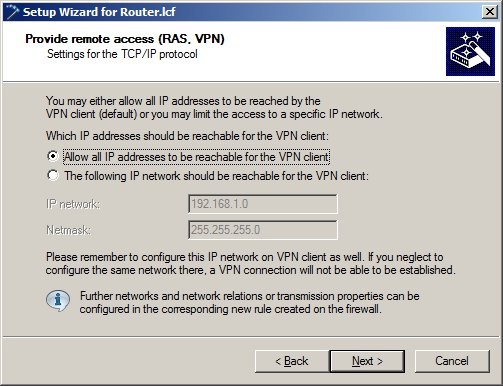
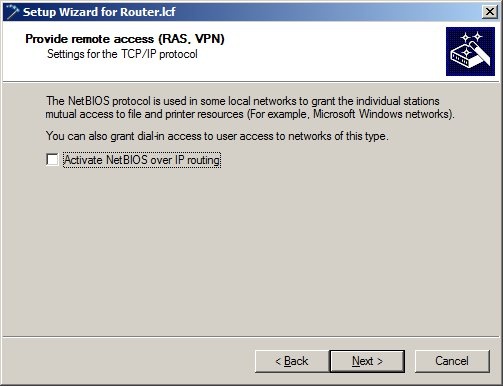
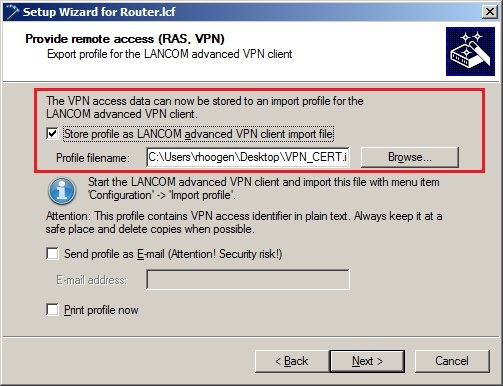
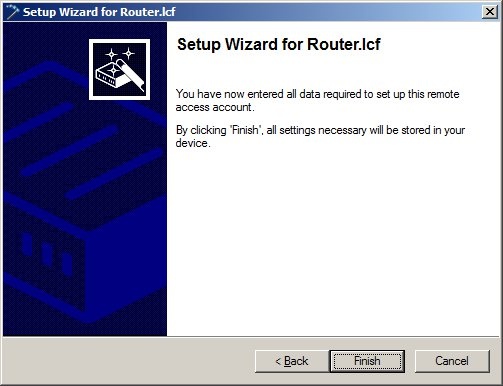
3.9) Enter a local IP address for the LANCOM Advanced VPN Client. 3.10) In this example, all of the local IP addresses should be available to the VPN client. 3.11) NetBIOS is not used in this example. 3.12) In the dialog that follows, specify the path where the VPN profile file (*.ini) is to be stored. 3.13) Click on Finish to conclude the Setup Wizard. The configuration is written back to the LANCOM router, the VPN profile file is created and saved to the specified directory.
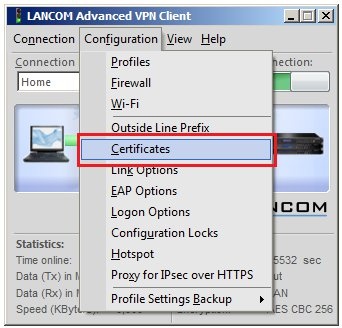
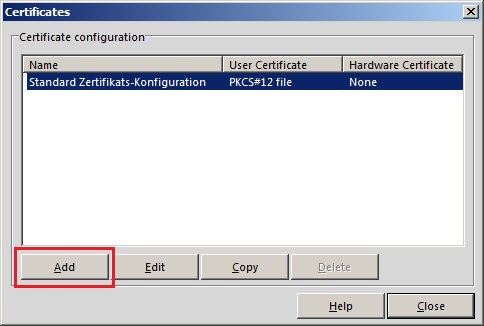
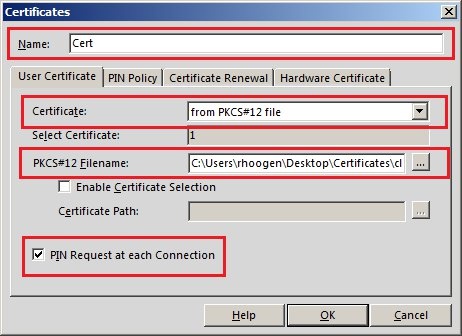
4) Importing the VPN client certificate into the LANCOM Advanced VPN Client 4.1) In the LANCOM Advanced VPN Client, open the option Configuration → Certificates. 4.2) Create a new certificate configuration using the Add button. 4.3) Enter a name for the new certificate configuration. - In the Certificate field, select the option from PKCS#12 file
- In the PKCS#12 file name field, set the path to the certificate file for the VPN client.
- For better security, this example requires the password of the VPN client certificate to be entered before each connection over VPN.
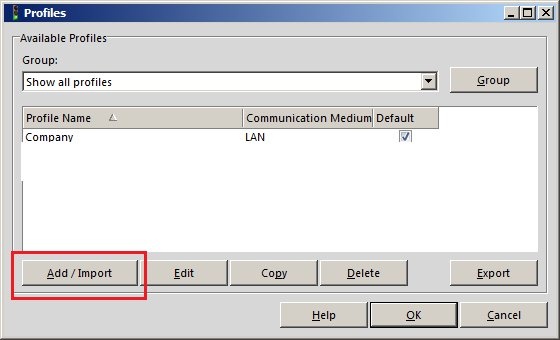
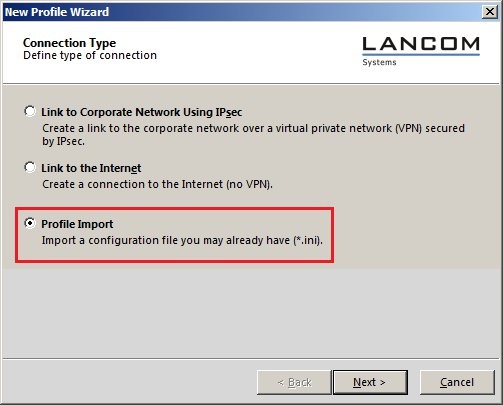
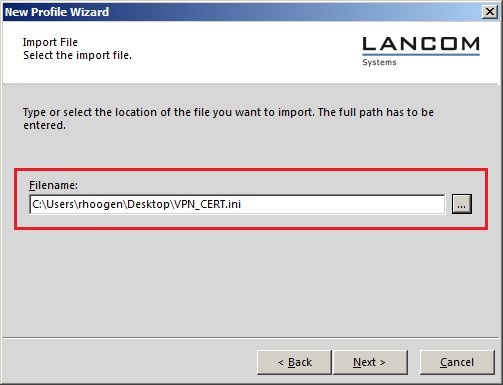
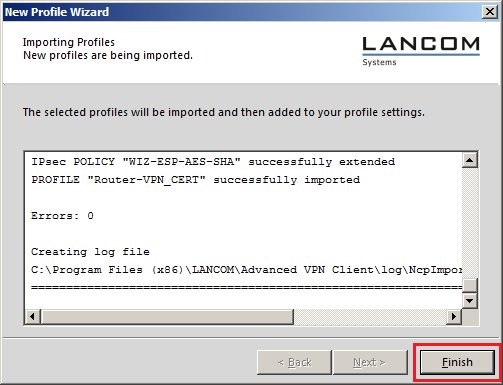
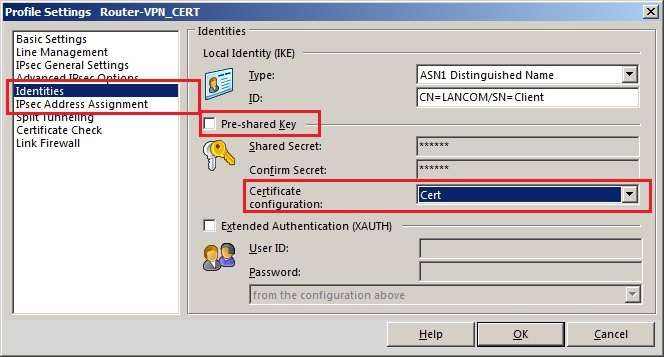
5) Import the *.ini file and the configuration of the VPN connection into the LANCOM Advanced VPN Client 5.1) In the LANCOM Advanced VPN Client open the option Configuration → Profiles and click Add/import. 5.2) Select the option Profile import. 5.3) Set the path to the VPN profile file that was created in the step of 3.13. 5.4) Click on Finish to conclude the import. 5.5) Select the imported profile and then click Next. 5.6) Change to the Identities menu and deselect the Pre-shared key option. 5.7) You need to set the Certificate configuration to the certificate configuration created in step 5.3 (in this case: Cert). 5.8) This concludes the configuration. Close the dialogs of the LANCOM Advanced VPN Client with OK.
6) Function check: 6.1) In the LANCOM Advanced VPN Client, click the Connection button. 6.2) Enter the password that you assigned to the VPN-client certificate. 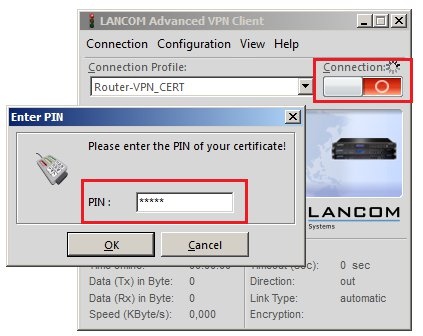 6.3) The VPN connection will be established and is ready for use. |