Description: This document describes how to setup an IPSec-secured VPN connection between LANCOM routers and Android devices with the VPN client built into Android. Requirement:
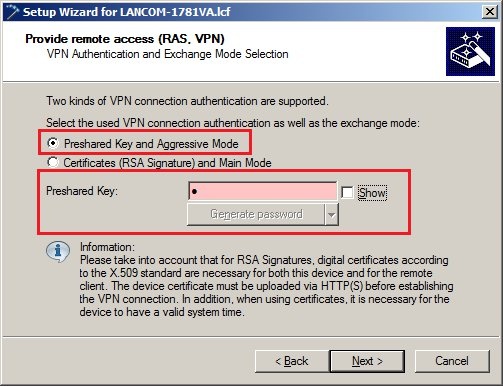
Procedure: 1) Set up the VPN connection on the LANCOM router: Setting up the VPN connection on the LANCOM router is initially done with the Setup Wizard in LANconfig. This is followed by a number of manual adjustments to the configuration of the LANCOM router. 1.1) Start the Setup Wizard and choose the option Provide remote access (RAS, VPN). 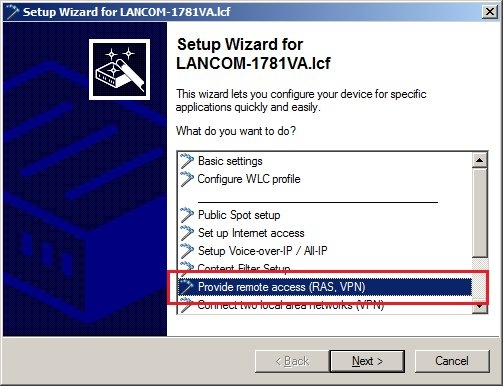 1.2) Set the Kind of remote access to VPN connection over the Internet. 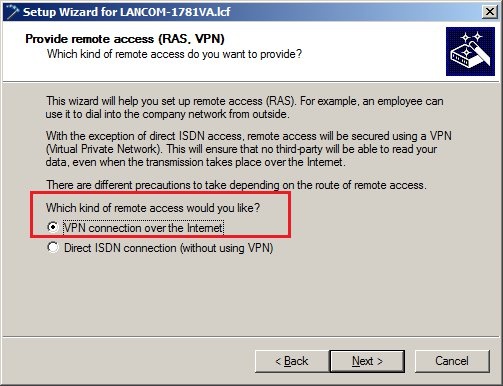 1.3) In the next dialog box, select the option VPN client with user-defined parameters. 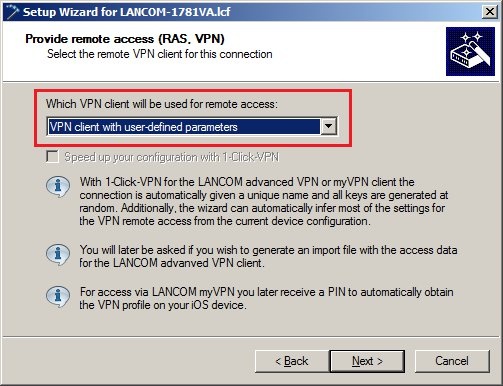 1.4) Enter a name for the VPN connection. 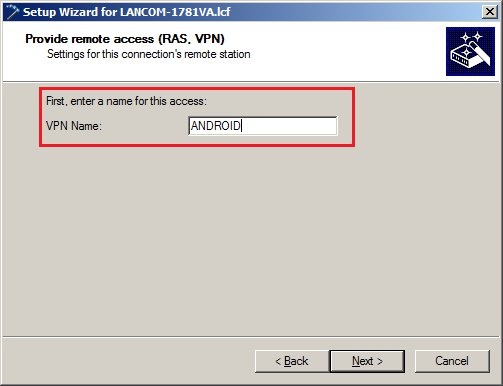 1.5) In the following dialog, select the option Preshared key and aggressive mode. In the input fields you then set a preshared key. Note:
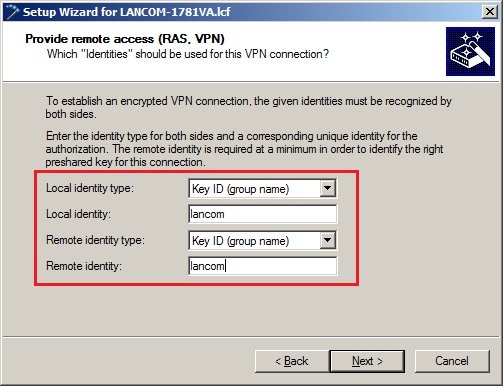
 1.6) In this example we use the default IKE parameters, so nothing is changed in this dialog. 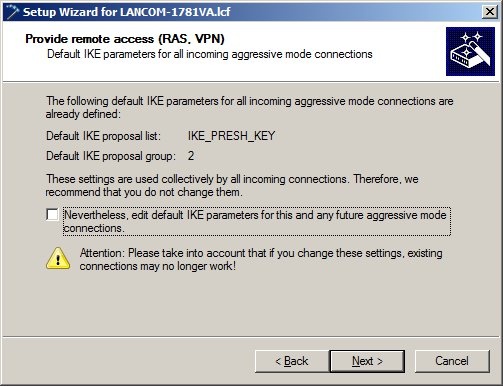 1.7) As the identity type, the Local identity type and the Remote identity type are each set to the Key ID (group name). Below each input box, enter a name. Information:
 1.8) The PFS algorithm is not required, so please disable the option in this dialog box. 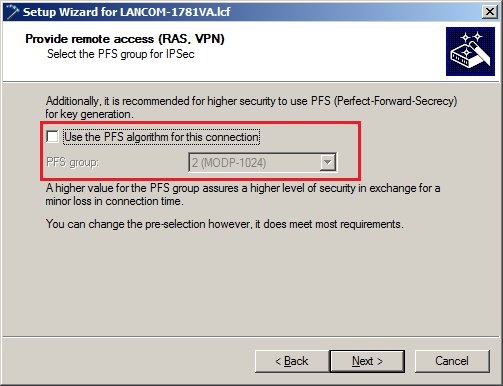 1.9) The encryption settings can be left as the default values. 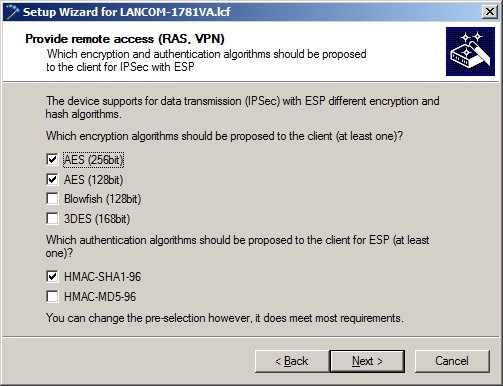 1.10) Similarly, no authentication header (AH) and no data compression are used. 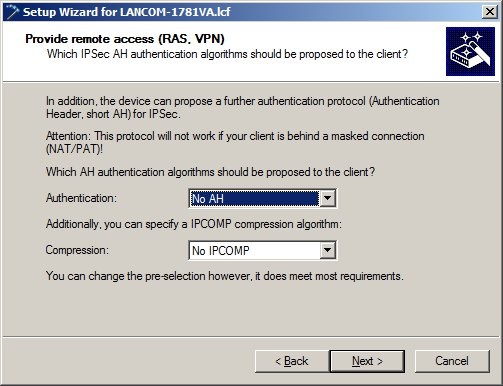 1.11) In the next dialog you enter the local IP address to be assigned to the client. 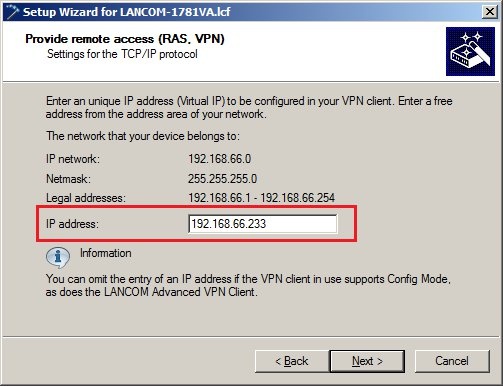 1.12) Accept the default settings in this dialog. 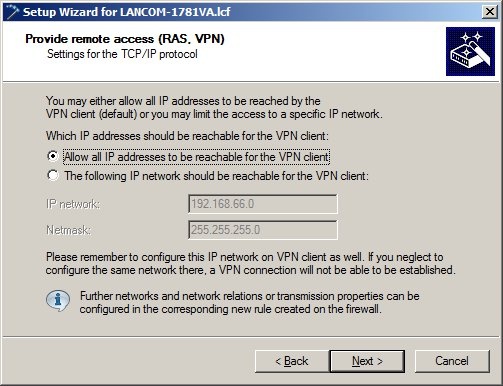 1.13 The function Activate NetBIOS over IP routing is not used. 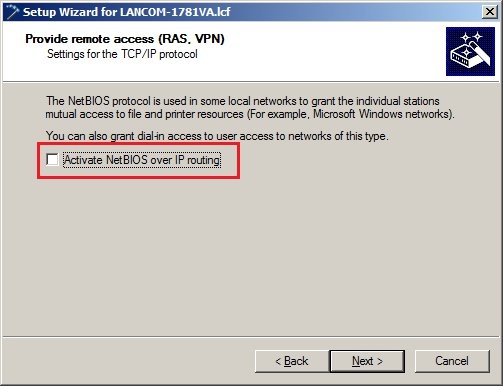 1.14) Click Finish to exit the Setup Wizard and write the configuration back to the LANCOM router. 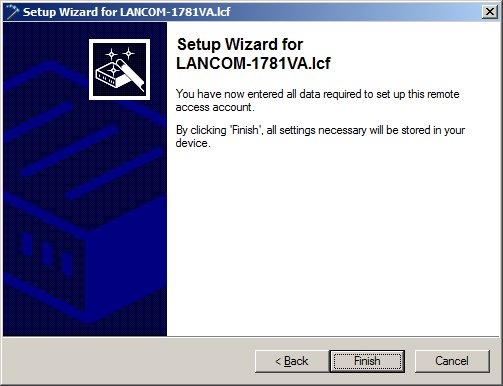 1.15) Use LANconfig to open the configuration for the LANCOM router and switch to the menu item Configuration -> VPN -> General -> Connection list. 1.16) Open the entry for the new VPN client connection with a double click of the mouse. 1.17) For the XAUTH option, select the setting Server. Save the change with the OK button. 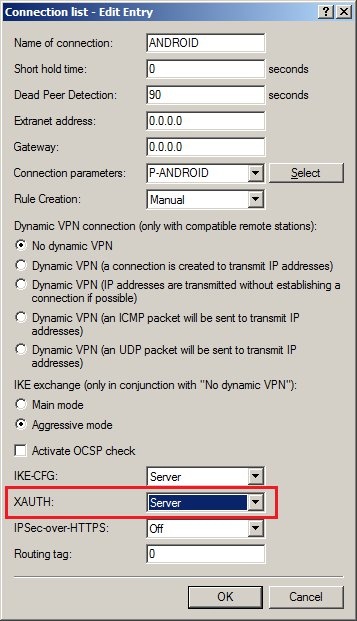 1.18) Change to the menu Configuration -> Communication -> Protocols -> PPP list. 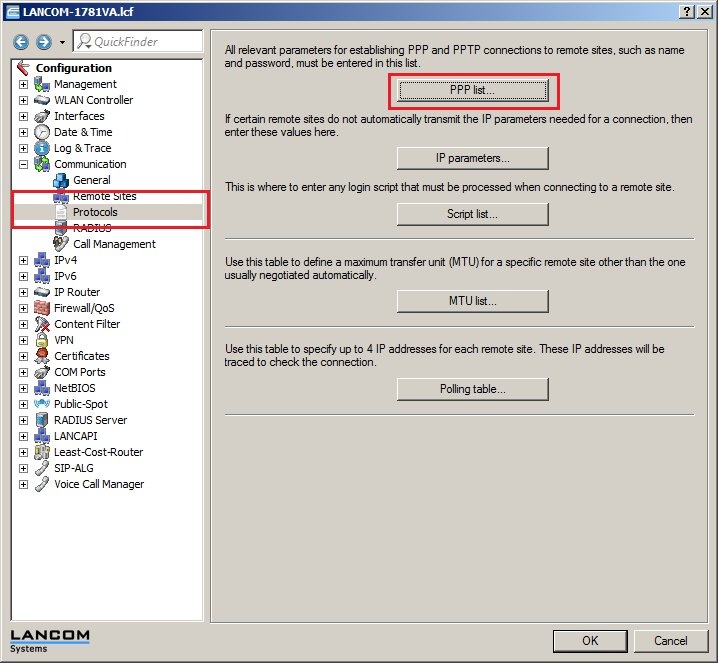 1.19) Add a new entry.
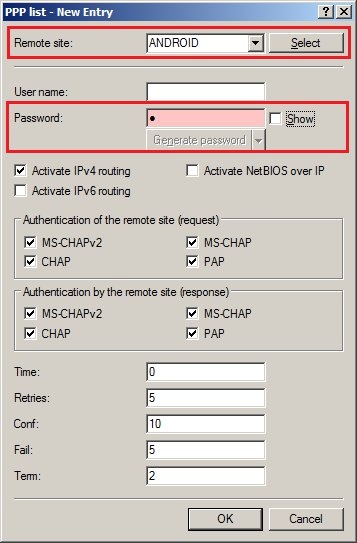 1.20) Save the configuration by clicking the OK button and then write the changes back to the LANCOM router. This concludes the configuration of the LANCOM router. 2) Set up the VPN connection on the Android device: 2.1) Open the Settings menu and select the menu item More settings.... 2.2) In the More networks... menu select the option VPN. 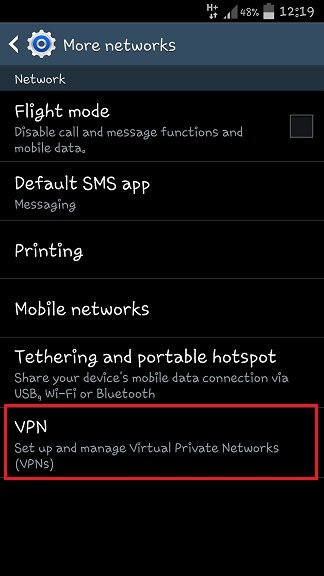 2.3) Tap on the option Add VPN (+). 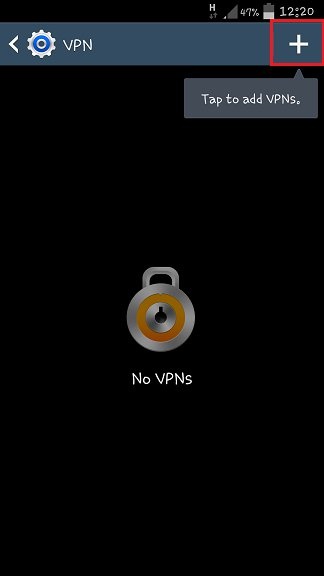 2.4) In the next dialog box, enter the following settings:
2.5) Tap Save to store the configured VPN profile. 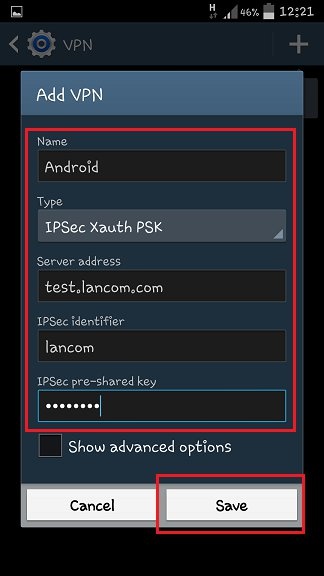 2.6) To start the VPN connection, just tap the newly created VPN profile. 2.7) In the fields Username and Password you now enter the values that you set when configuring the LANCOM router in step 1.19.
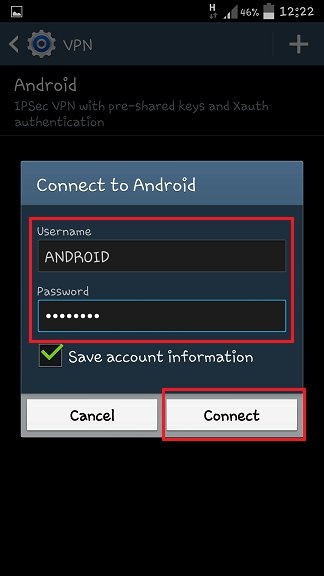 2.8) Tap Connect to establish the VPN connection to the LANCOM router. This concludes the configuration steps on the Android device. |