Description: This document describes how to use the Setup Wizard in LANconfig to set up a basic configuration for a WLC cluster featuring configuration synchronization. Requirements:
Scenario:
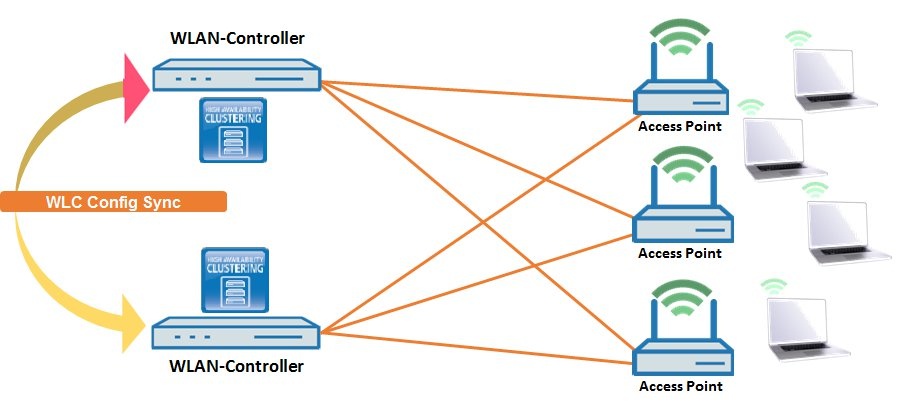 Procedure: In this configuration example, device WLC_1 is the WLAN controller, which is already fully functional and managing the existing LANCOM access points. The device WLC_2 is added to the local network by means of a basic configuration. A WLC cluster should now be configured using both devices.
1) By clicking and keeping the left-hand mouse button pressed, pull the device with the lesser configuration and drop it onto the one which is already functionally configured. In this example we pull the device WLC_2 using drag-and-drop onto the device WLC_1. 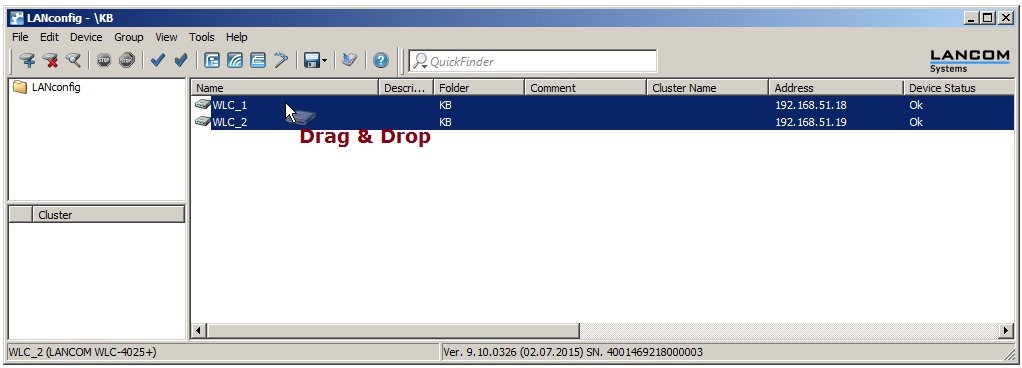 2) This launches the Setup Wizard for setting up a cluster. Select the option 1-Click WLC High Availability Clustering Wizard. 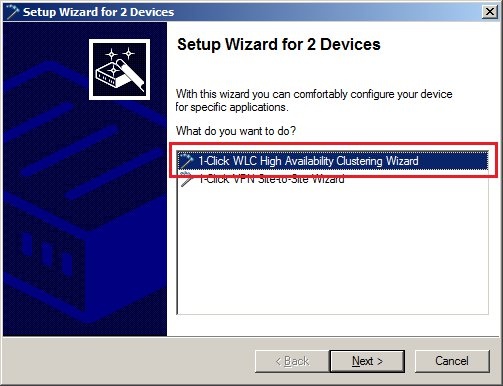 3) In the following dialog you enter a name for the WLC cluster. Optionally you can change the local IP addresses of the devices involved by clicking on the button Device addresses. 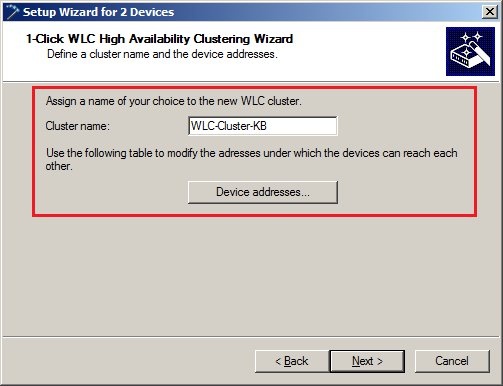 4) Click on Finish to close the Clustering Wizard and write the configurations back to the involved devices. 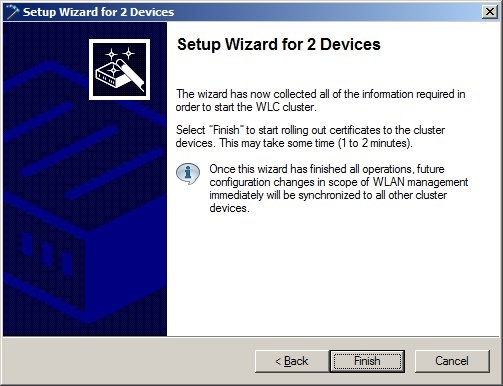 5) The certificate delivery and validation starts on the devices now. This can take a few minutes to complete. 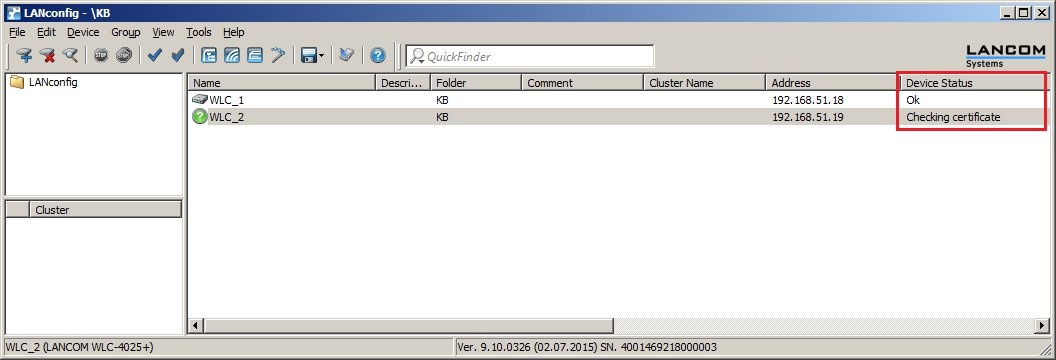 6) After a successful delivery and validation of the certificate, the two devices are marked with the Cluster icon. The Cluster section displays the name of the newly created WLC cluster. Clicking on the entry displays all of the devices that are associated with this cluster. 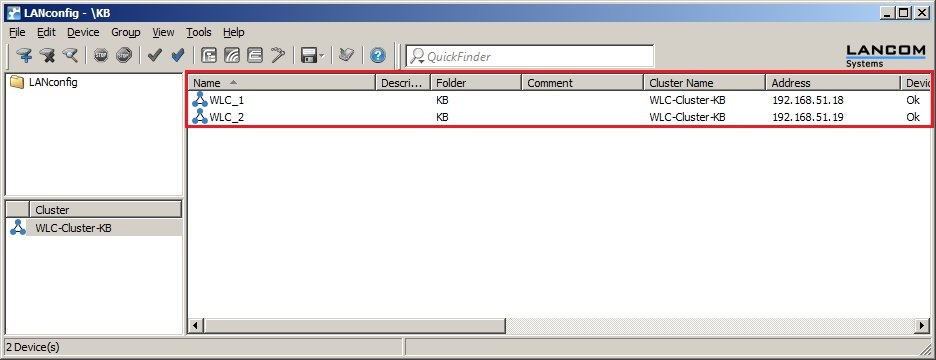 7) Now start the cluster on the device that should initially distribute its configuration to the other cluster members. In this example this is the WLAN controller with the device name WLC_1. Do this by selecting the device context menu option Activate configuration synchronization settings. 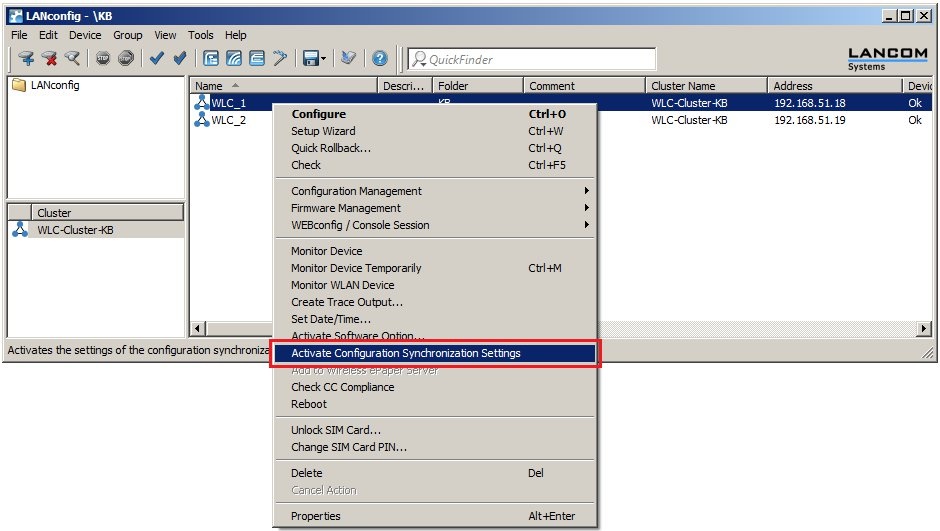
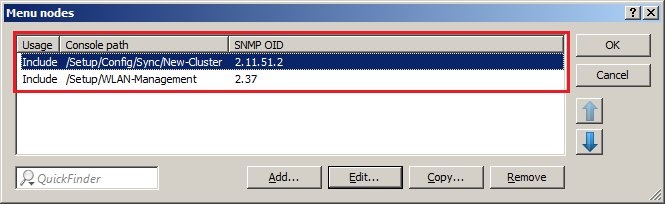
From now on, configuration changes made on any cluster member are synchronized to the other members of the cluster.  If you open both WLAN Controllers in LANmonitor you see in the path WLAN controller → WLC connections that both devices in the cluster are connected. 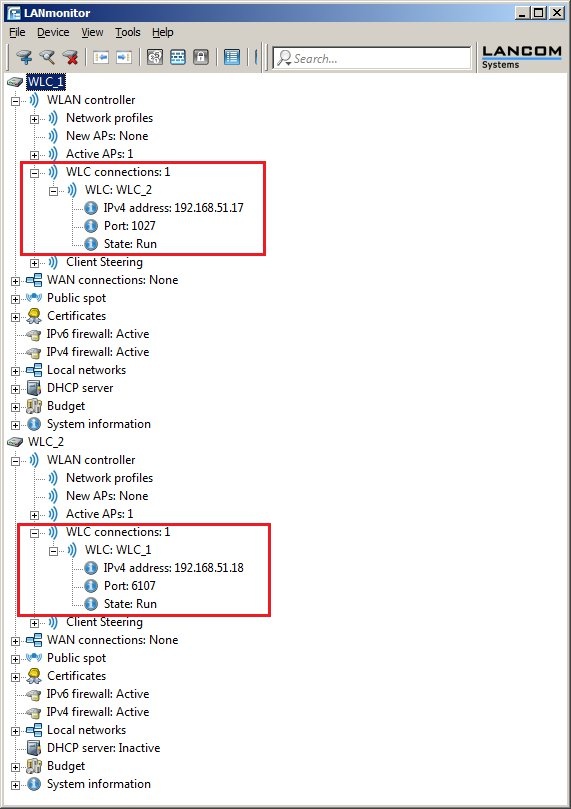 |