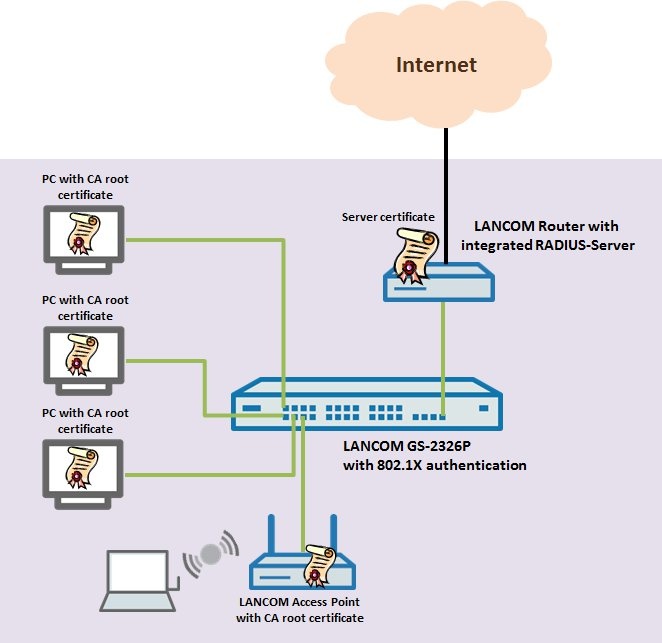
Description: This document describes how to set up certificate-based (IEEE 802.1X) access control for network clients using a LANCOM switch (e.g. the LANCOM GS-2326P) and a RADIUS server provided by a LANCOM router. In this example, authentication between the network client and the LANCOM switch uses the Extensible Authentication Protocol (EAP) and the Protected Extensible Authentication Protocol (PEAP). For EAP-based authentication, a RADIUS server is always required to act as an authentication server. Since all LANCOM routers feature an integrated RADIUS server, this document describes the use of the LANCOM router's RADIUS server for authentication. The ports of the LANCOM switch should only be activated for data transfer after a network client has successfully authenticated at the RADIUS server. In this scenario, the LANCOM switch serves as the authenticator. Requirements:
Scenario:
 Configuration steps on the LANCOM router: 1) Upload the server certificate
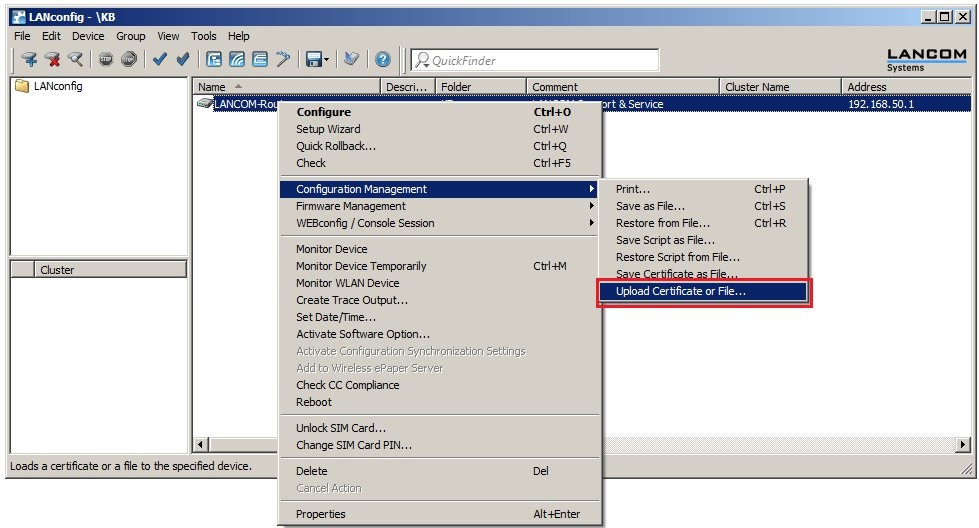
1.1) In LANconfig, right-click on the LANCOM router and select the option Configuration management → Upload a certificate from file.
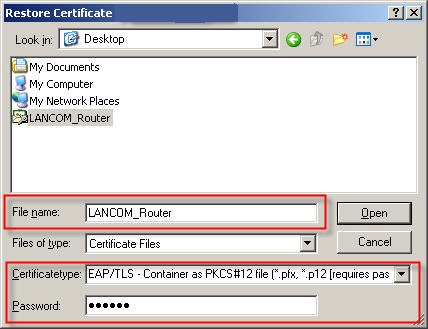
1.2) In the following dialog select the certificate file intended for the LANCOM router. This example uses the name LANCOM_Router.p12. 1.3) In the Certificate type box, select the setting EAP/TLS - container as a PKCS#12 file. 1.4) In the Password field, enter the certificate password. The password in this example is lancom. 1.5) Click on Open to load the certificate into the LANCOM access point.
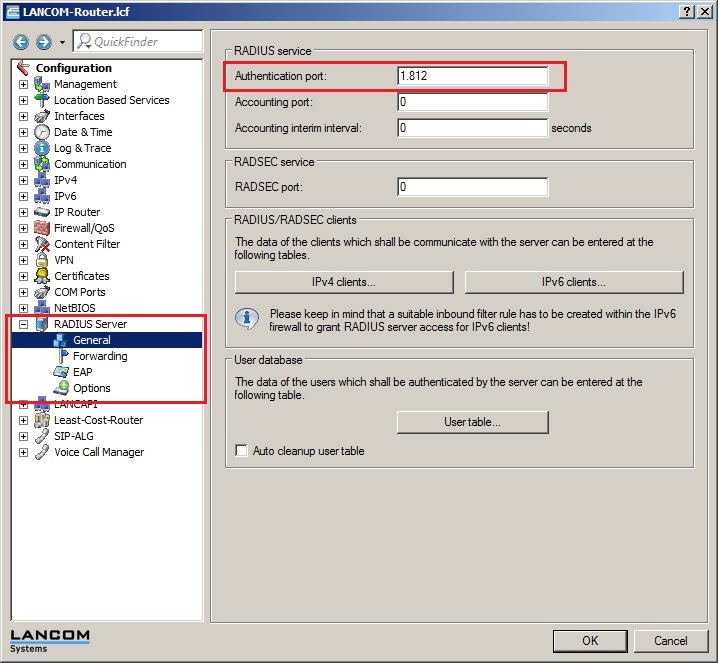
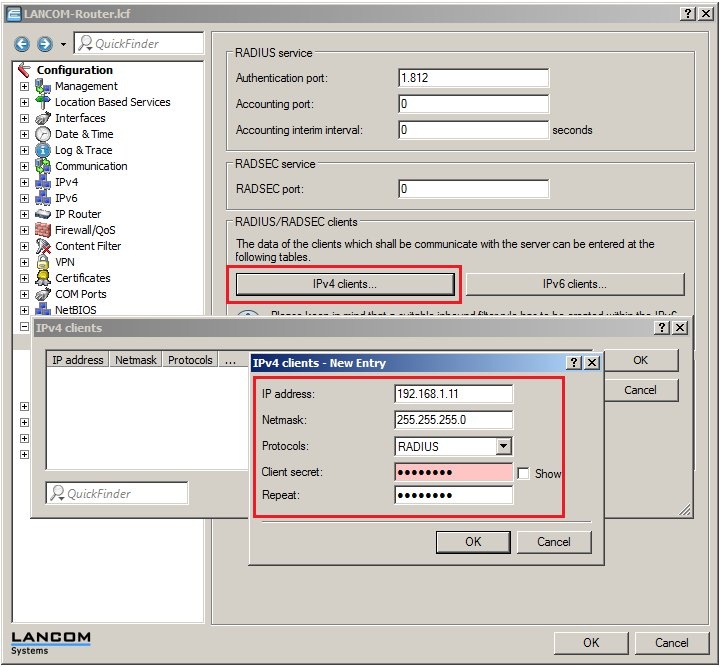
2.1) Open the menu item Configuration → RADIUS server → General. 2.2) Enter the value for the authentication port of the internal RADIUS server (1812).
2.3) Click the button IPv4 clients and add the LANCOM switch to enable it to communicate with the RADIUS server.
 2.4) Click the button user table and supplement the list with one or more entries for the network clients that require authentication. 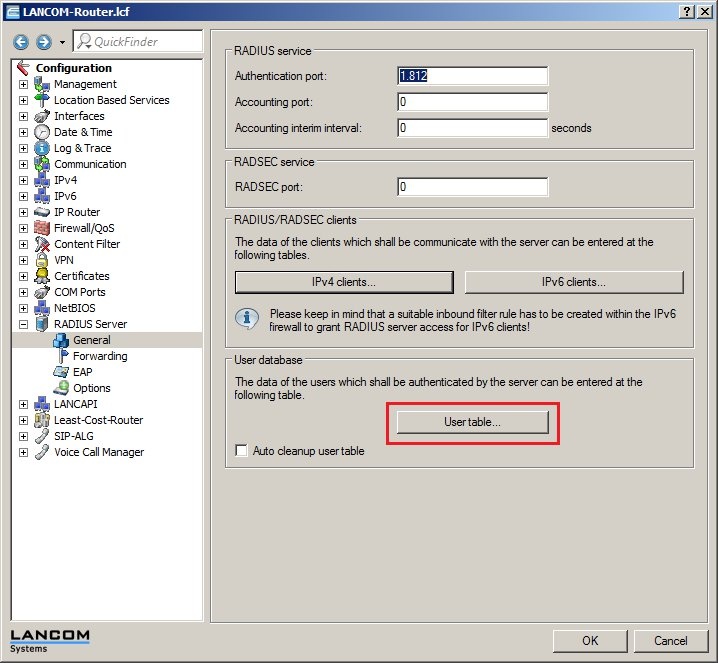 2.5) In this example, a PC with the user name PC1 is created and given the password lancom. 2.6) In the section Protocol restriction for authentication you need to select at least the protocols EAP and MSCHAPv2. If there is no need of a time limit on the PC's access, set the Expiry type to the value Never. 2.7) Now close the dialog with the OK button. You can optionally create further user accounts for network clients now.  2.8) Move to the item Configuration → RADIUS server → EAP. 2.9) In the selection box Default method select the value PEAP. 2.10) In the selection box PEAP default, set the value to MSCHAPv2. 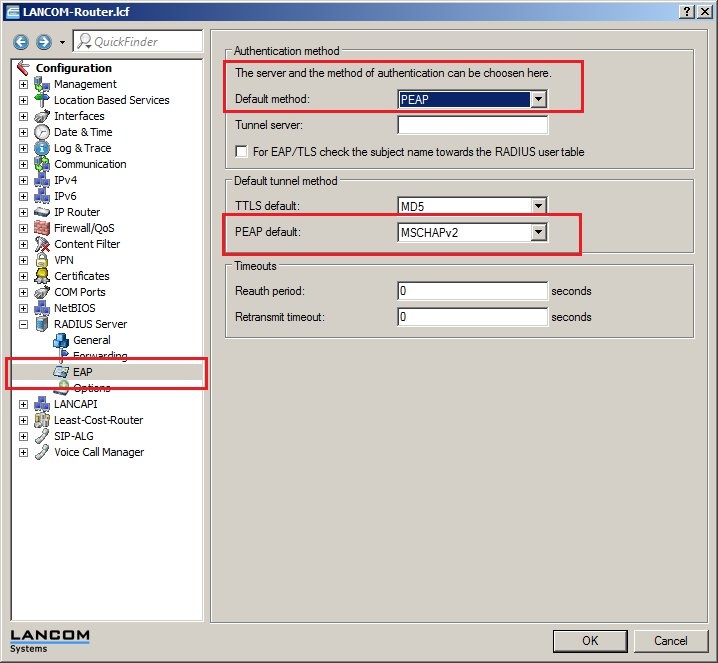 2.11) Click on OK to accept the settings and to save them to the LANCOM router. Configuration steps on the LANCOM switch: 3.1) Open the configuration interface for the LANCOM switch and navigate to the menu item Security → NAS → Configuration.
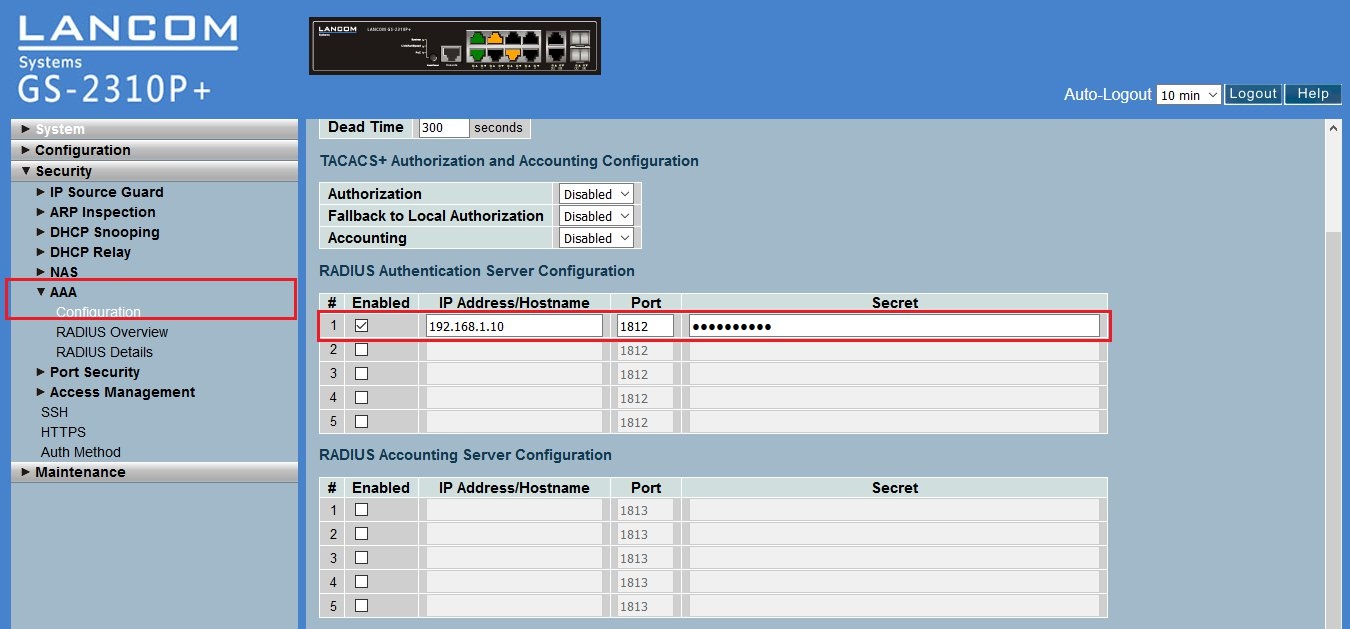
3.2) Scroll to the end of the configuration page and click on apply to accept the new settings. 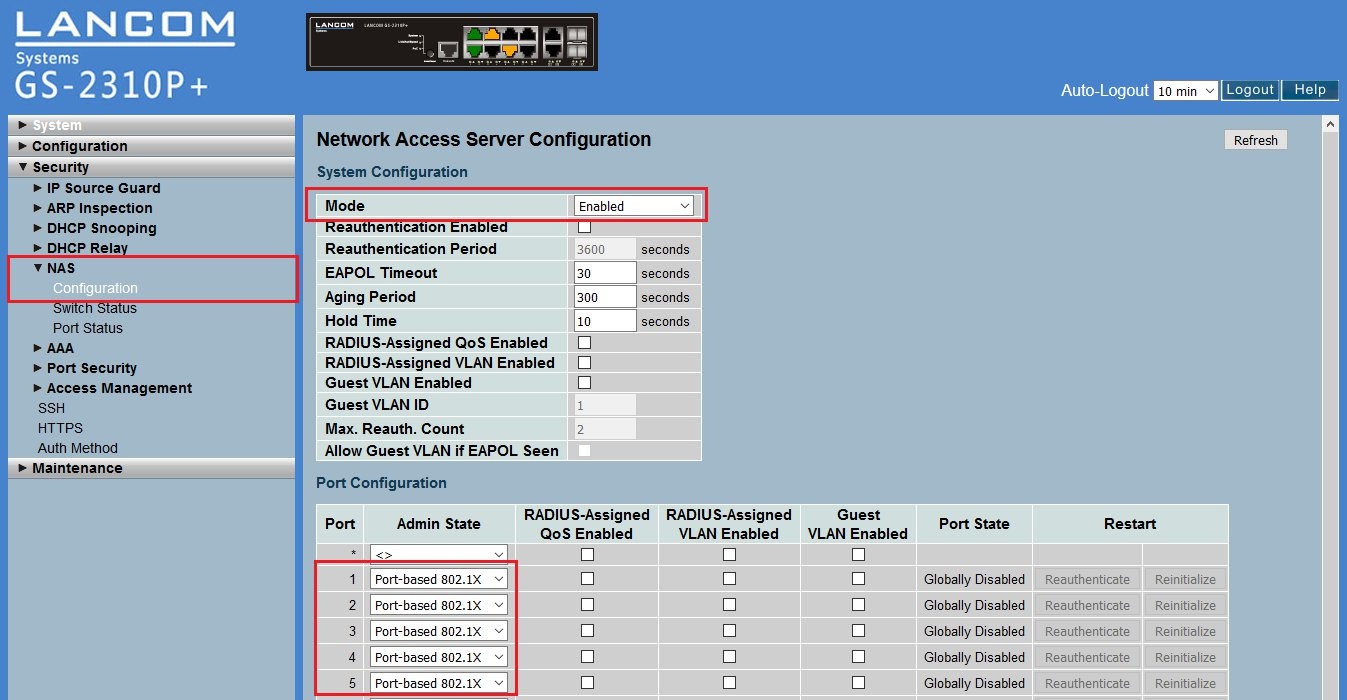 3.3) Switch to the menu Security → AAA → Configuration. In the section RADIUS authentication server configuration, set the option in the first line to Enabled.
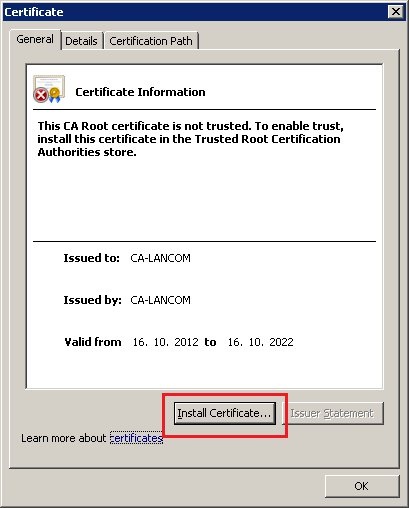
 3.4) Scroll to the end of the configuration page and click on Apply to accept the new settings. This concludes the configuration of the LANCOM switch. Configuring a network client (PC): Importing the client certificate into Windows Vista and Windows 7: Note: A guide to creating X.509 certificates with the XCA application is included in this KnowledgeBase document (only available in german). 4.1) Double click on the Root certificate of the CA. This example uses the CA-LANCOM.cer file. 4.2) Click on Install certificate.
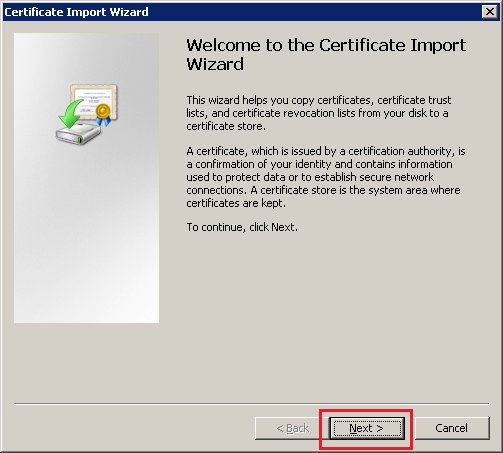
4.3.) Click on Next.
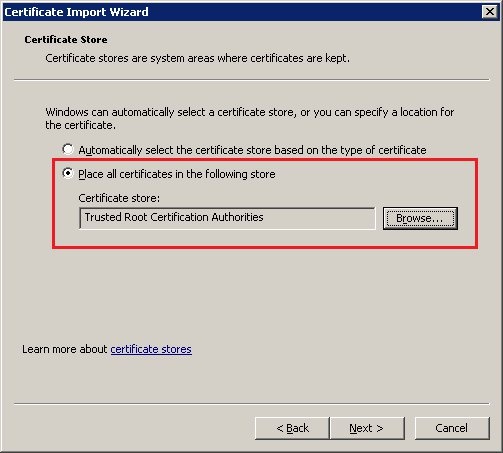
4.4) The certificate is saved to the certificate store Trusted root certification authorities.
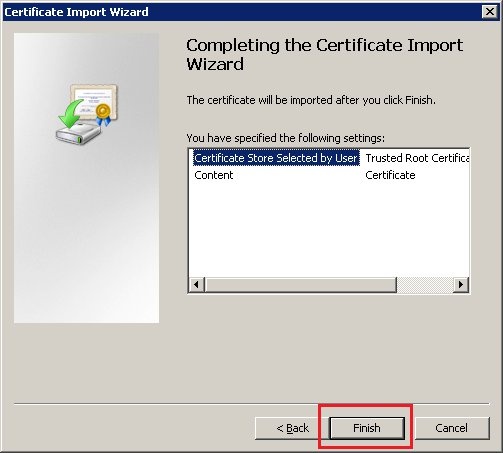
4.5) Click on Finish to conclude the import of the certificate.
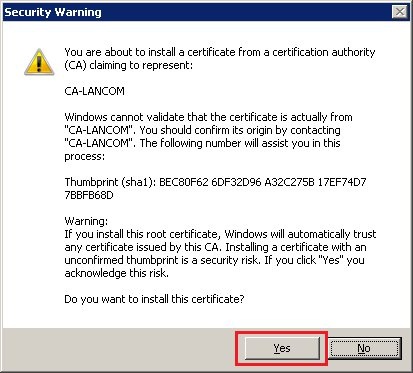
4.6) Confirm the subsequent security warning with Yes.
4.7) A message is displayed to indicate that the certificate was successfully imported.
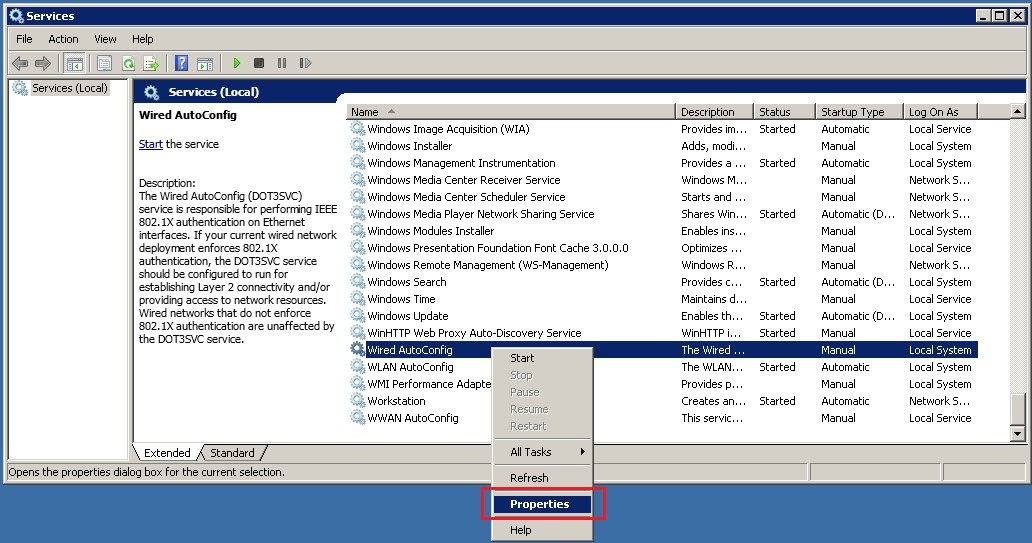
5.1) Start the Services Manager in Windows and open the Properties dialog of the service Wired AutoConfig.
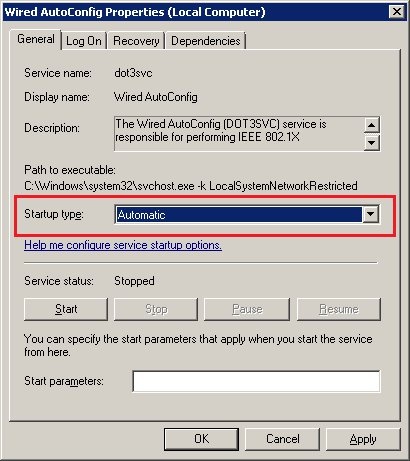
5.2) Set the Startup type to Automatic and close the dialog with OK.
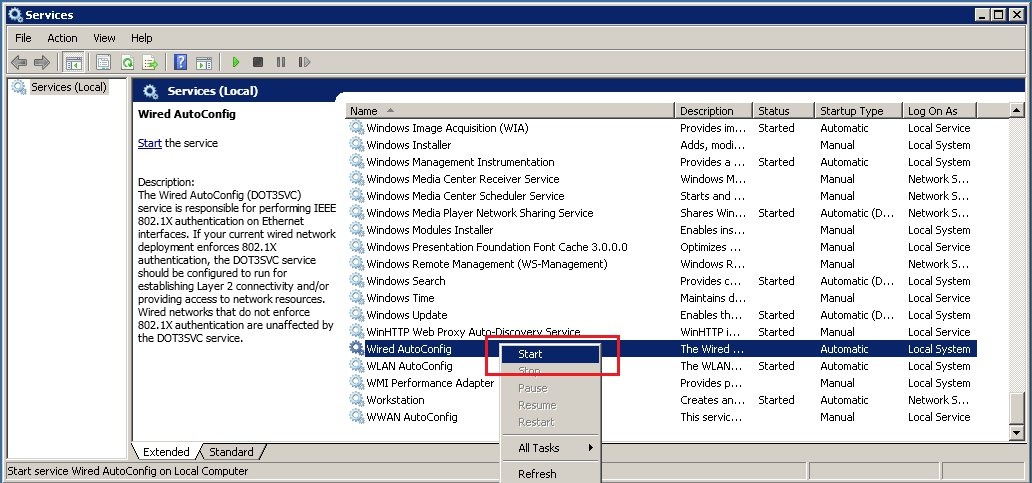
5.3) Start the service once, manually. After restarting the PC, the service starts automatically.
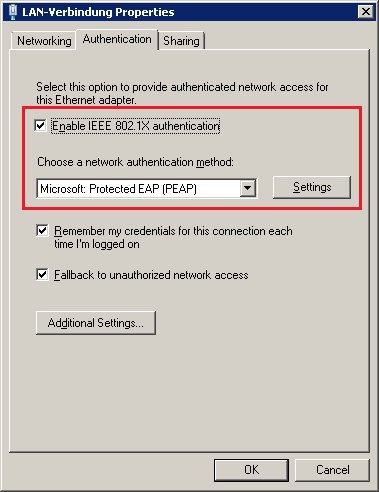
5.4) In the Network and sharing center, open the Properties dialog for your network adapter. On the Authentication tab, enable the option IEEE 802.1X authentication and set the authentication method to Protected EAP (PEAP).
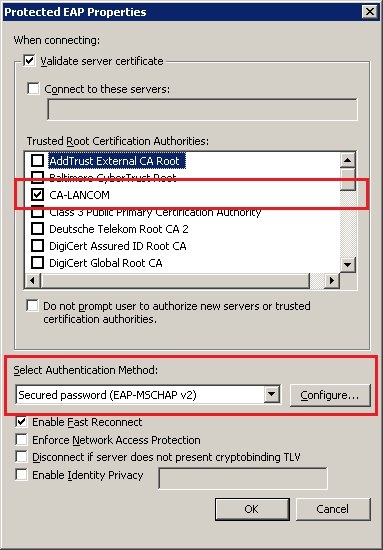
5.5) Click the Settings button. 5.6) Enable the option Validate server certificate and, in the box below, select the relevant Trusted root certification authority for the certificate from the list. In our example this is CA-LANCOM. For the Authentication method select Secure password (EAP-MSCHAPv2).
5.7) Then click the Configure button.
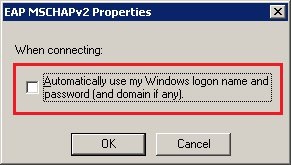
5.8) Disable the option Automatically use my Windows logon name and password. 5.9) Click OK to accept your settings. 5.10) On the Authentication tab, click the Additional settings button. 5.11) In the 802.1X settings dialog, enable the Specify authentication mode option and select the method User or computer authentication.
5.12) Now close the configuration dialogs with the OK button. This concludes the configuration of the PC. 6.1) Make sure that the PC is connected to the switch port that you have configured with access control as per IEEE 802.1X. 6.2) Restart your PC and logon to the system as usual. 6.3) While the PC attempts to connect to the network, you see a note in system tray that additional credentials are required to establish of the network connection. 6.4) Click on this note to open a window where you can authenticate for the network by entering a user name and password. 6.5) At this stage you enter the user data that you entered into the LANCOM RADIUS server user table in configuration step 2.5. In this example is user name is PC1 and the password is lancom. 6.6) After you click OK, the PC authenticates and the switch port that the PC is connected to is activated for data transfer. |