Description: This document describes how to set up WLAN access restrictions on a LANCOM WLAN router or access point where the MAC addresses of the authorized WLAN clients are entered into a RADIUS server. This configuration example uses the internal RADIUS server on the LANCOM WLAN router or access point. An external RADIUS server can be used as an alternative. Requirements:
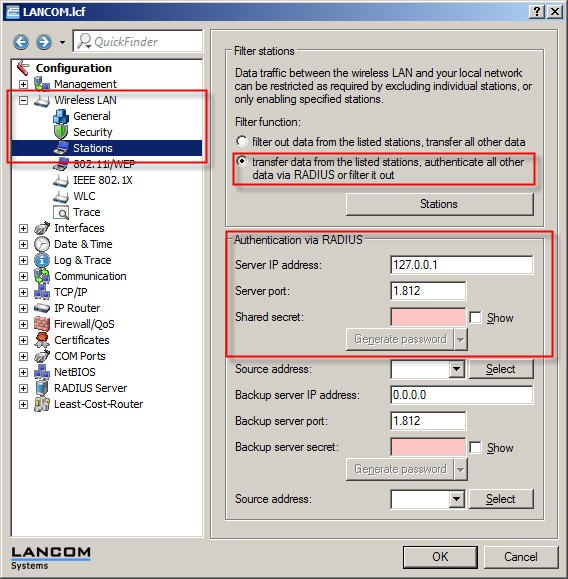
Procedure: 1) Open the configuration of the LANCOM router or access point with LANconfig. 2) Switch to the menu item Wireless LAN → Stations. Here you activate the option Transfer data from the listed stations. 3) In the section Authentication via RADIUS, enter the IP address of the RADIUS server and the server port 1812.
 4) Switch to the menu item RADIUS server → General. 5) In the Authentication port field, enter the value 1812. 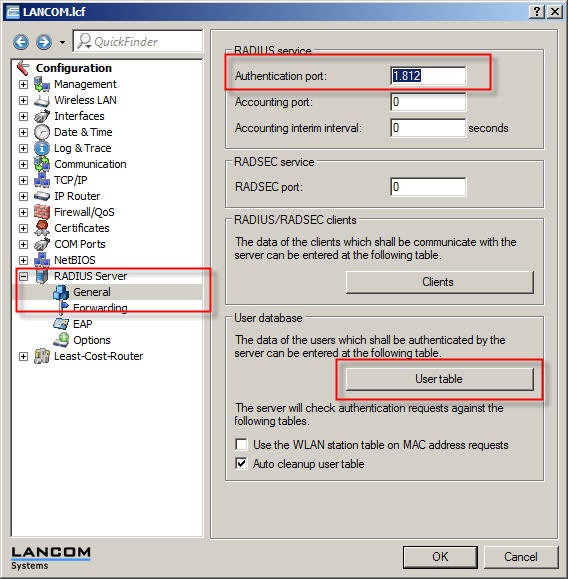 6) Click on the User table button in order to set the MAC addresses of the authorized WLAN clients in the following dialog. 7) In the field Name/MAC address, enter the MAC address of an authorized WLAN client with the following syntax: aabbcc-ddeeff. 8) In the field Password, enter the MAC address of an authorized WLAN client with the following syntax: aabbcc-ddeeff.
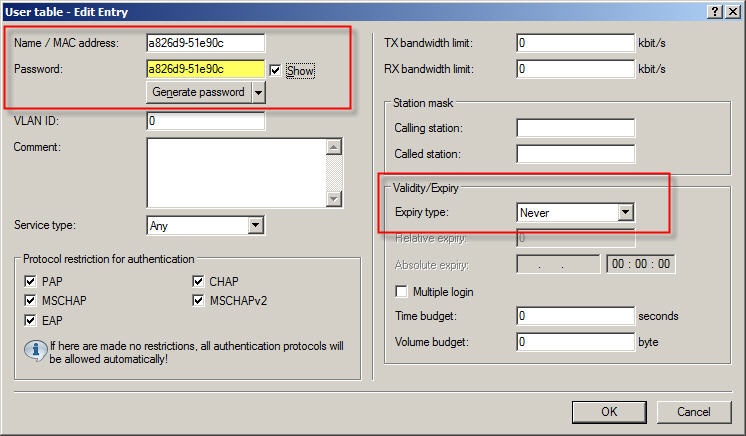 9) Once you have entered all authorized WLAN clients into the user table, you can write the configuration back to the LANCOM WLAN router or access point.
10) Using WEBconfig, open the configuration of the LANCOM WLAN router or access point and navigate to the menu LCOS menu tree → Setup → WLAN → RADIUS access check → Password source. 11) Change the value from Secret to MAC address and click the button Send. 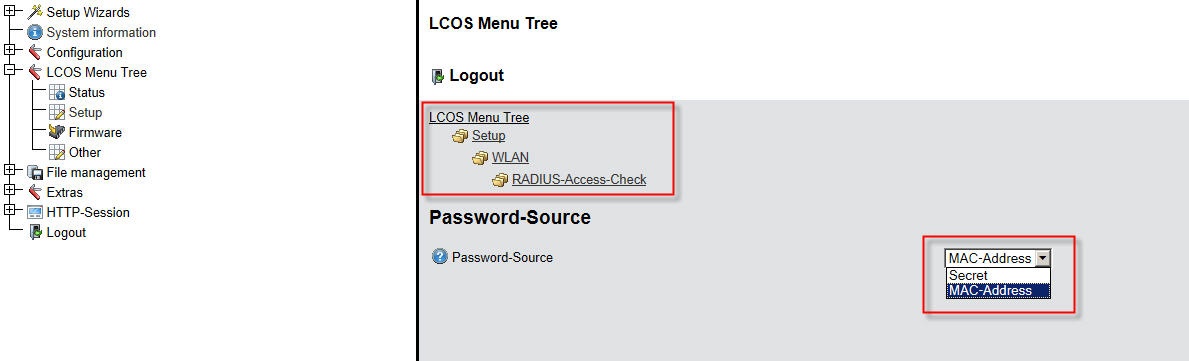 |