Description: The document describes how to connect a WLAN client to a network operating the 802.1X protocol in a WLC scenario.
Access credentials are checked against the
RADIUS server of a Windows 2008 R2 NPS server.
With this 2nd alternative, all requests to the external RADIUS server are sent via the LANCOM access points to the LANCOM WLAN controller, which forwards the requests to the NPS server. Requirements: - The LANCOM access points have a default configuration that connects them to the local network, and they can be managed by the LANCOM WLAN controller.
- A functional installed Windows Active Directory and a Windows CA (certificate server).
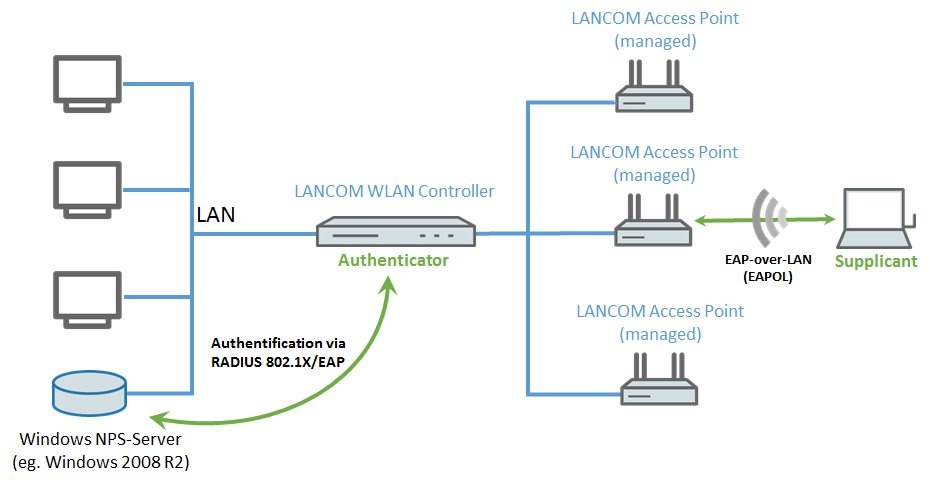
Scenario: The WLAN client establishes a connection to the LANCOM access point, which is managed by a LANCOM WLAN controller. In this case, authentication does not use a password set on the access point and the WLAN client. Instead, a session is set up to a downstream central RADIUS server running on a Windows NPS server.
The server checks the access credentials (name and password) against a central database. This method allows the RADIUS server to operate as a central login service for large numbers of access points.
- The RADIUS server is a Windows 2008 R2 NPS server. In this example configuration, the NPS server has the local IP address 192.168.10.1.
- The authenticator is a LANCOM WLAN controller, which is managing the LANCOM access points.
The supplicant is a
notebook running the Windows operating system.
Procedure:
1) Configuration steps on a LANCOM WLAN controller:
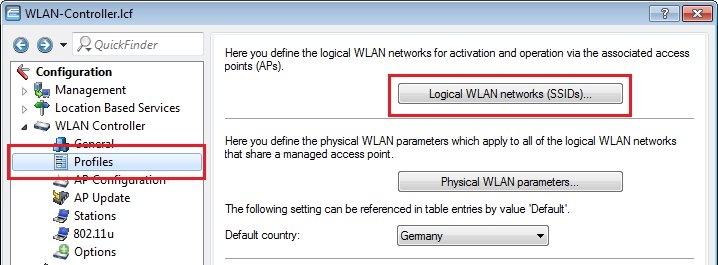
1.1) Open the configuration of the WLAN controller in LANconfig and navigate to the menu WLAN controller -> Profiles -> Logical WLAN networks (SSIDs).
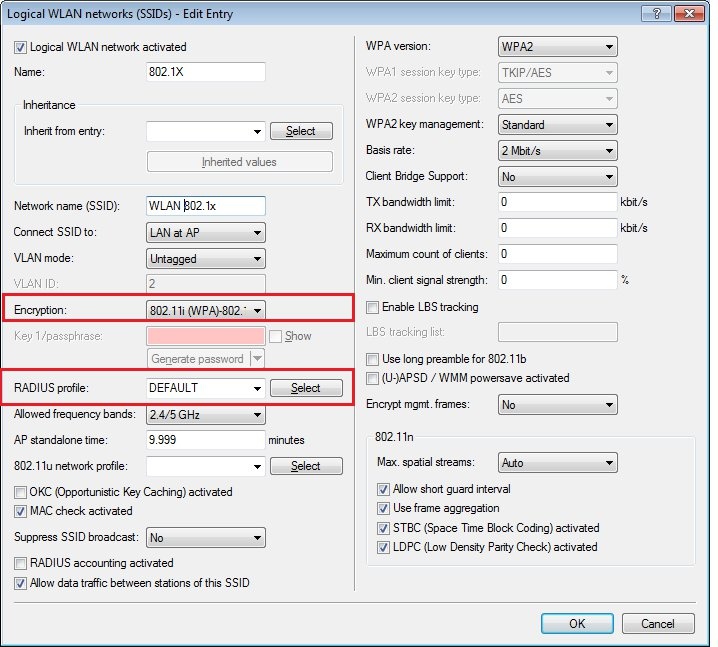
1.2) Create a new logical WLAN, in which authentication is performed by 802.1X.
- Set the Encryption option to 802.11i(WPA)-802.1X.
- In the RADIUS profile field, select the RADIUS profile DEFAULT.
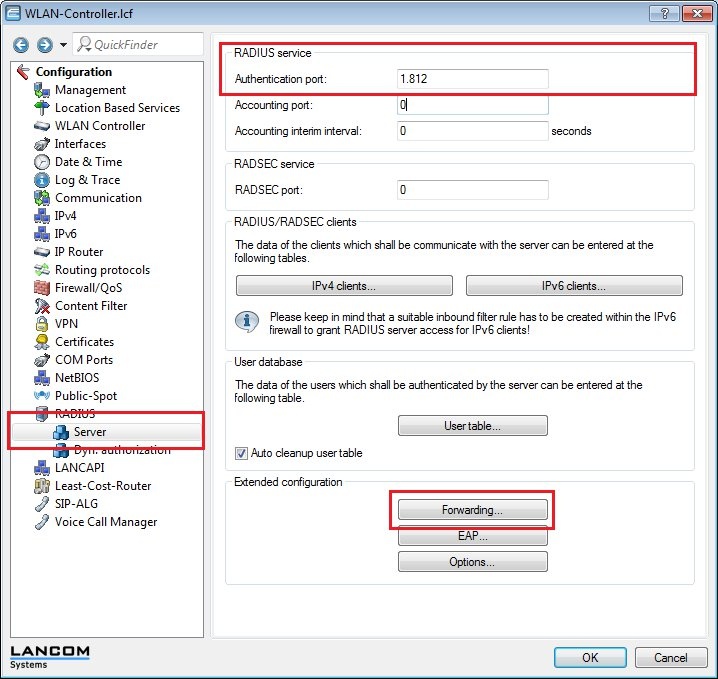
1.3) Navigate to the menu
RADIUS -> Server and activate the RADIUS server by setting the field
Authentication port to the
value 1812.
1.4) Switch to the menu item
RADIUS -> Server -> Forwarding.
1.5) Now insert the
name of the realm (in this case: NPS-SERVER) into the
Empty realm field.
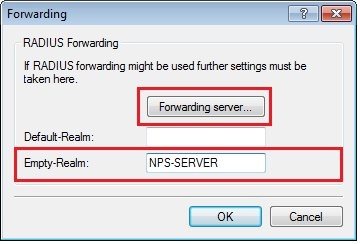
1.6) Now click the
Forwarding server button and create a
new entry, which
describes the connection to the NPS server. 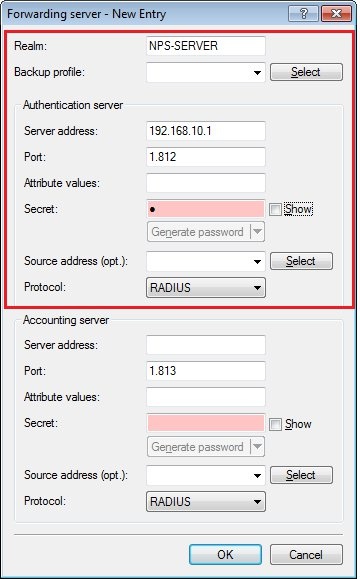
1.7) Close the dialogs with the
OK button and write the configuration back to the device. The configuration of the LANCOM WLAN controller is now complete.
2) Configuration steps on the Windows NPS server and WLAN client: The configuration steps on the Windows NPS server and the WLAN client are described in the following Knowledge Base document:
 INFO: WLAN controller is the Authenticator
- in this scenario, it must be
created as a RADIUS client in the configuration of the NPS server. 