Description:
This document is a general description of how to set up a VPN connection between the "VPN Tracker" version 6 from Equinux and a LANCOM VPN router. The hardware used here was an Apple iMac (Intel-based) and a LANCOM VPN router. The operating system was Mac OS X 10.6 (Snow Leopard). These instructions also apply to the two predecessors OS X 10.4 (Tiger) and OS X 10.5 (Leopard).
Requirements:
- Apple Mac OS X 10.4 (or later)
- Equinux VPN Tracker version 6
- Any browser (for WEBconfig)
Procedure:
The basic setup for the VPN connection on the LANCOM router can be configured in a number of ways. These instructions describe two ways of setting up your router. These are followed by a description of how to set up the VPN Tracker client.
Setting up the VPN connection in the LANCOM router:
The first method requires the use of a Windows PC. The tool LANconfig features a Wizard that guides you through the setup of your connection's parameters.
The second method works with any browser to access the LANCOM router's web interface (WEBconfig). This method of configuration can be conducted with any operating system with a current browser.
Configuration method 1 – Wizard (LANconfig)
On your Windows PC, start LANconfig and then invoke the Wizard (click on it with the right-hand mouse key).
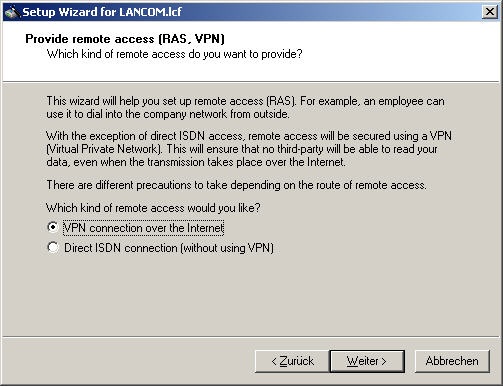
Select Provide remote access (RAS, VPN) and then click on Next.

In the dialog that follows, select the menu item VPN connection over the Internet.
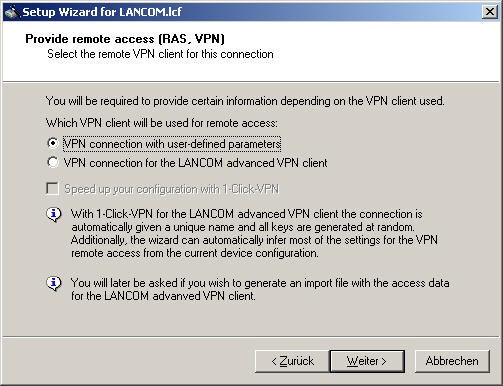
The following dialog lets you specify that it is a VPN connection with user-defined parameters.
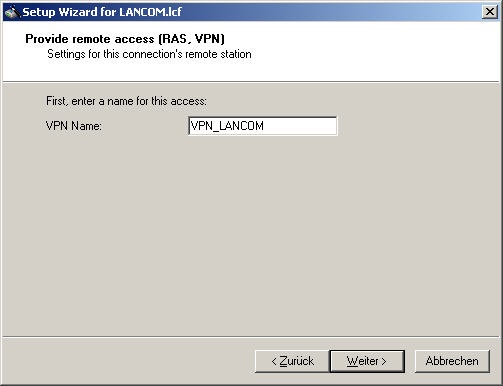
Enter the name of the connection under VPN name. Enter a name of your choice.
Set the type of authentication to be used to Preshared key and aggressive mode. Now set a preshared key and make a note of it for entry into the configuration of the software later.
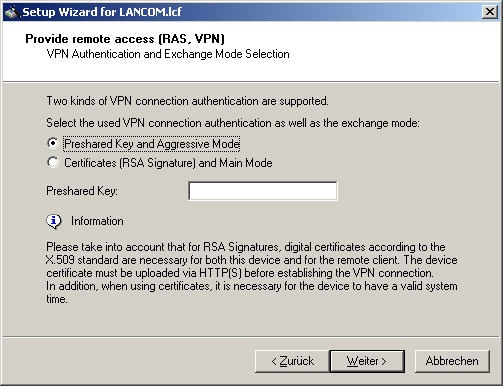
Leave the default settings for the IKE parameters unchanged and click on Next.

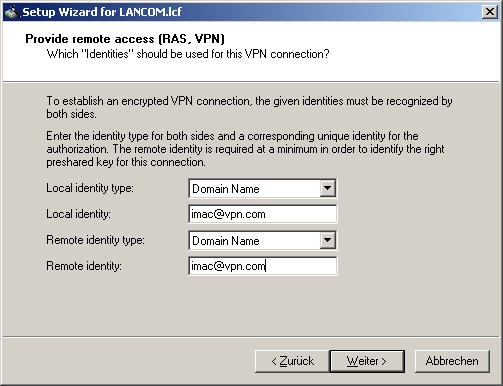
You are required to enter identities to be able to authenticate the client later. For the local identity type and the remote identity type, select authentication by domain name and enter unique names of your choice. Note this name down, as it is required by the client software for identification.
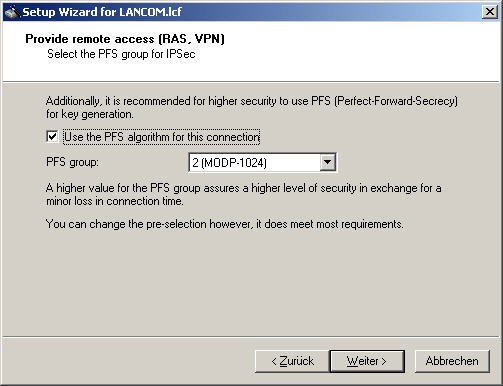
The PFS algorithm (Perfect Forward Secrecy) is set to group 2 by default and can be left unchanged.
You can also leave the encryption algorithms set to their default values and go on to the next dialog.
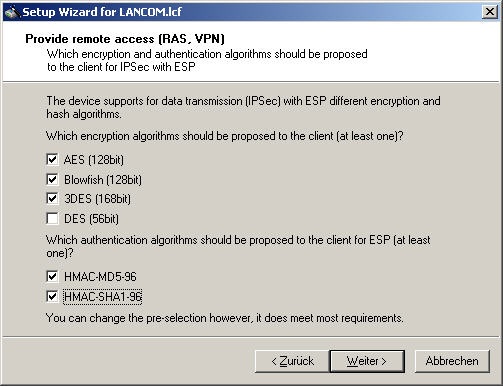
Additional authentication protocols are not used and you can confirm with Next.

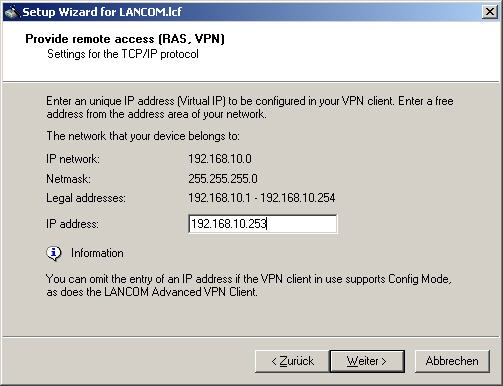
The following dialog gives you the opportunity of setting a fixed IP address from the target network. You should first check if the address is available in order to avoid problems when connecting. Even then, it is still possible to specify an address from a pool of addresses. This is set up manually by using LANconfig or WEBconfig.
You can control access to the addresses behind the VPN tunnel by placing restrictions on access to the target network.
If you do not wish to place any restrictions on the client, activate Allow all IP addresses to be reachable for the VPN client.

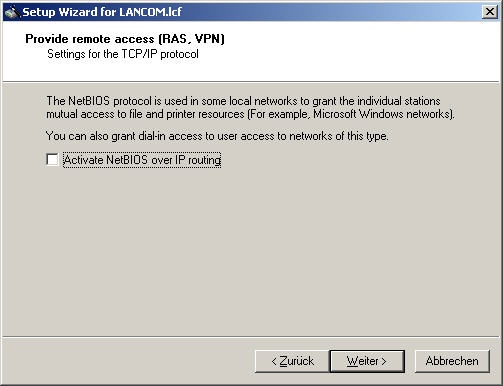
Access to files and printers in Windows networks can be provided by activating the NetBIOS protocol. This is not required for connections from a Mac OS X client. Deselect the checkbox next to Activate NetBIOS over IP routing.
This concludes the setup of the connection. It can now be initialized.
Configuration method 2 – the LANCOM router's web interface (WEBconfig)
The configuration can be conducted with non-Windows PCs by using the alternative configuration method that relies on the LANCOM router's web interface, which is accessed with a browser. The following describes each step involved. Make a note of the various settings as these are required to configure the client later.
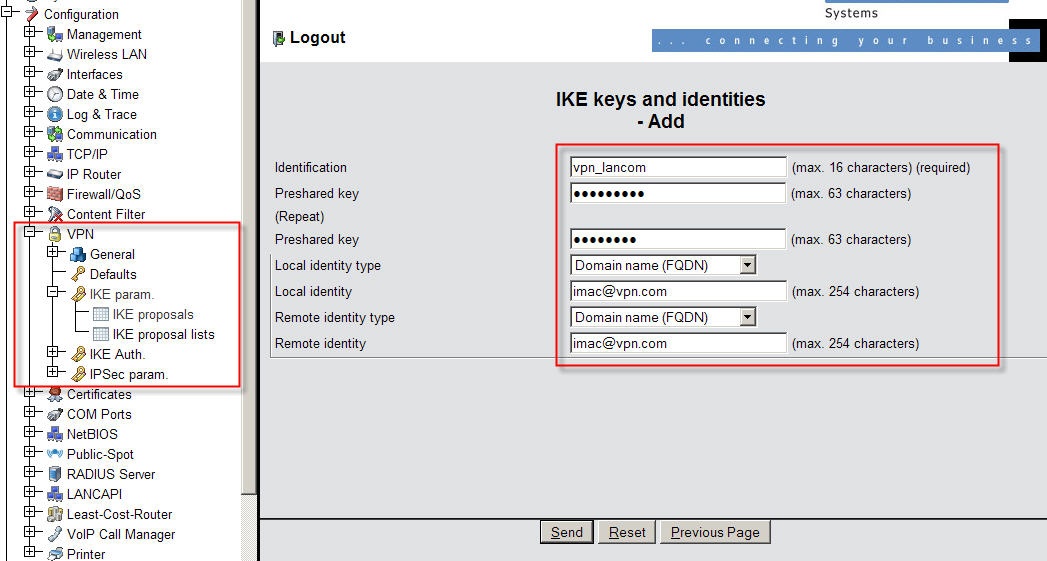
Open a browser window and enter the router's IP address. Once you have logged in with your user name and password, click on Configuration -> VPN -> IKE auth. -> IKE keys and identities -> Add. Enter a unique identifier and a preshared key. These are also required by the client for authentication. Enter the local and remote identity type as Domain name (FQDN). Set the name for the local and remote identity with a name of your choice. Accept your entries with Send.
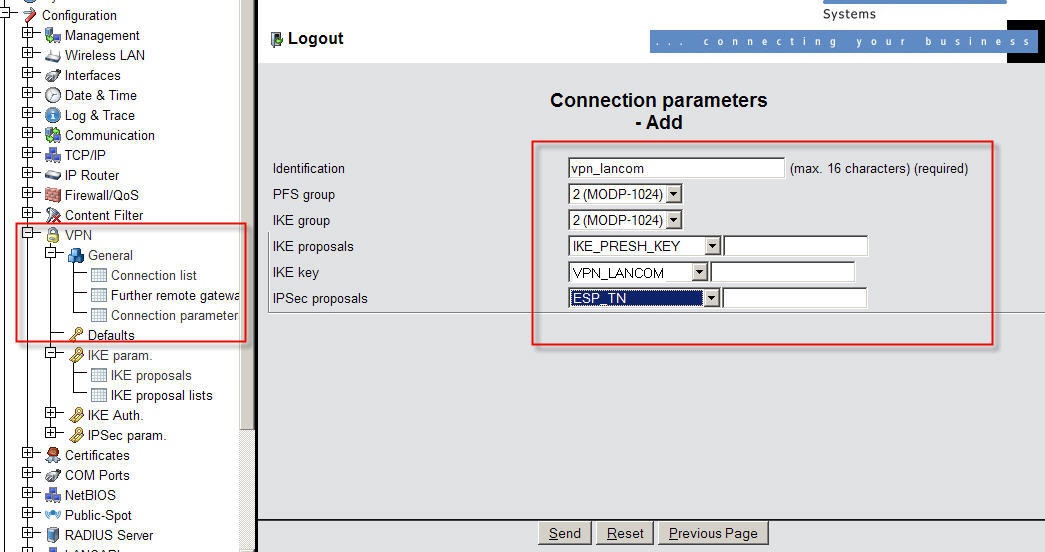
Now change to VPN -> General -> Connection parameters -> Add. Enter a unique identifier and set the values for PFS group and IKE group to 2 (MODP-1024) and set IPsec proposals to ESP_TN. The value for the IKE key is to be set to the identifier for the IKE key and identities specified above. This is selected from a drop-down menu. Accept your entries with Send.
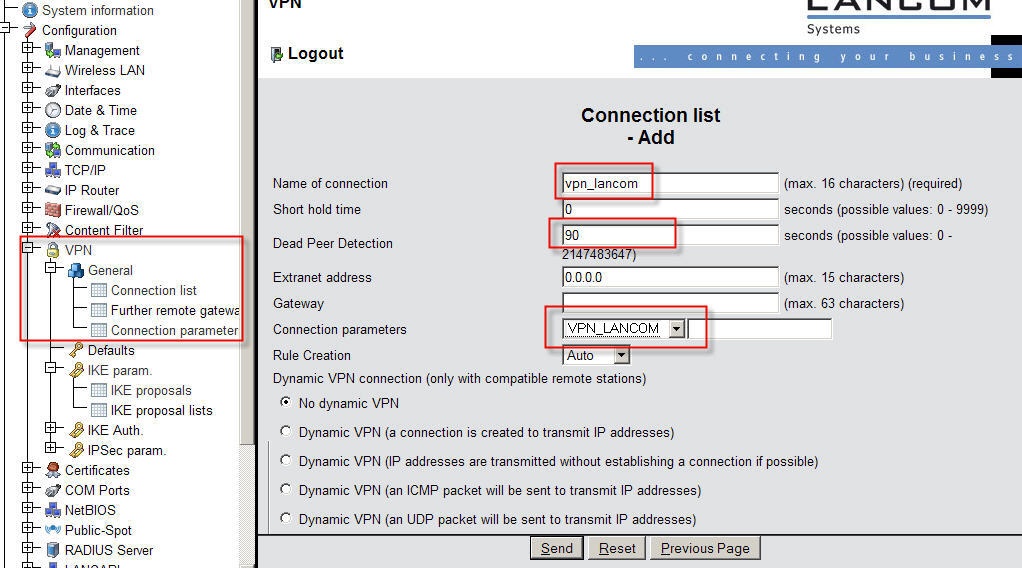
Now change to VPN -> General -> Connection list -> Add. Give the connection a unique name under Name of connection and set the Dead peer detection with a value of 90 seconds. For Connection parameters select the name for the parameters as defined above. Rule creation must be set to automatic. Set the IKE exchange to Aggressive mode. Confirm with Send.
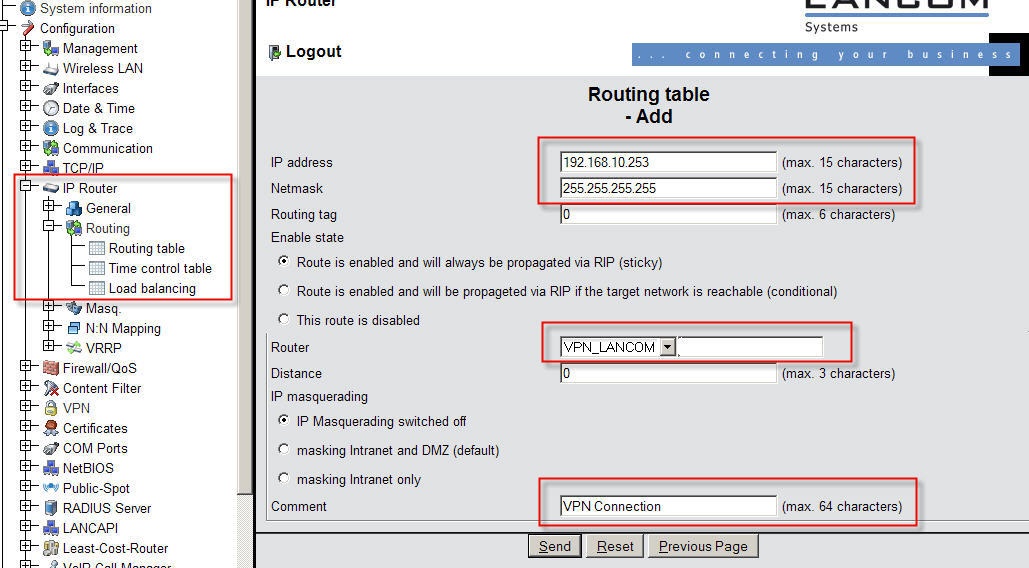
The final stage of configuration is to specify the entries in the routing table. Access this by clicking on IP router -> General -> Routing -> Routing table -> Add. Enter the IP address that is to be allocated to the client. The netmask for this particular host is 255.255.255.255 (class D). The value for Router is to be set to the VPN connection displayed in the drop-down menu. The Comment field serves as an aid to orientation within the routing table. Simply enter a name to help identify the routing entry.
The router is now configured and the VPN tunnel can be initialized.
Setting up the connection in Equinux VPN Tracker Version 6
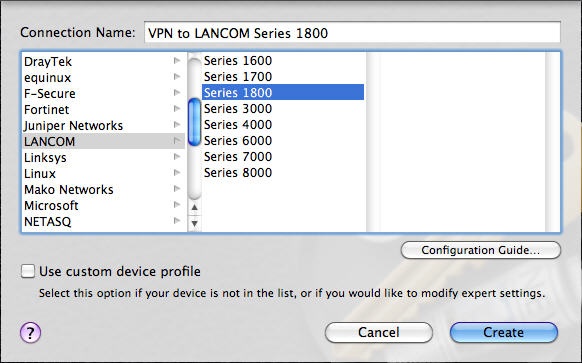
Start the client on your system and create a new profile. You can do this with a Wizard. The Wizard gives you the option to select LANCOM devices, which takes care of various basic settings.
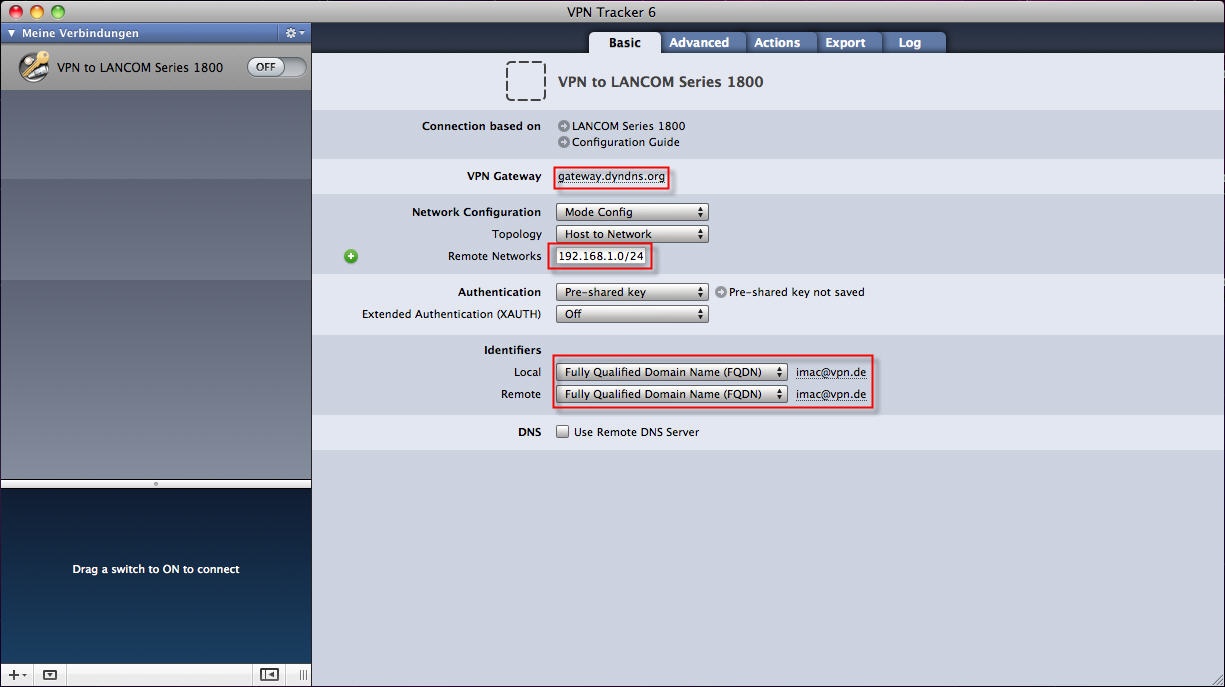
Under VPN gateway enter the public IP address or the DynDNS name of your LANCOM router. If your LANCOM router is not set up to allocated a fixed IP address to the VPN client, the leave the Network configuration set to Mode Config. Under Remote networks enter the network address of the target network (the LANCOM router's local network). Set the two Identifiers to Fully Qualified Domain Name (FQDN). You now enter the values entered into your router for local and remote identity.

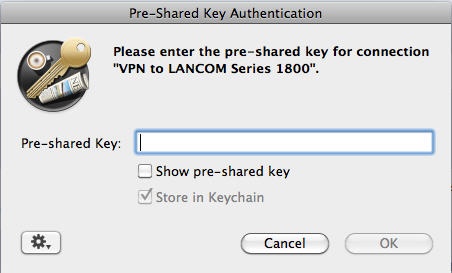
Under Authentication you now enter the Pre-shared key. VPN Tracker also provides an option to store this access data to the Keychain, the password and certificate manager integrated into OS X.
All of the settings necessary for this sample configuration have now been made. Your screen should appear something like this.
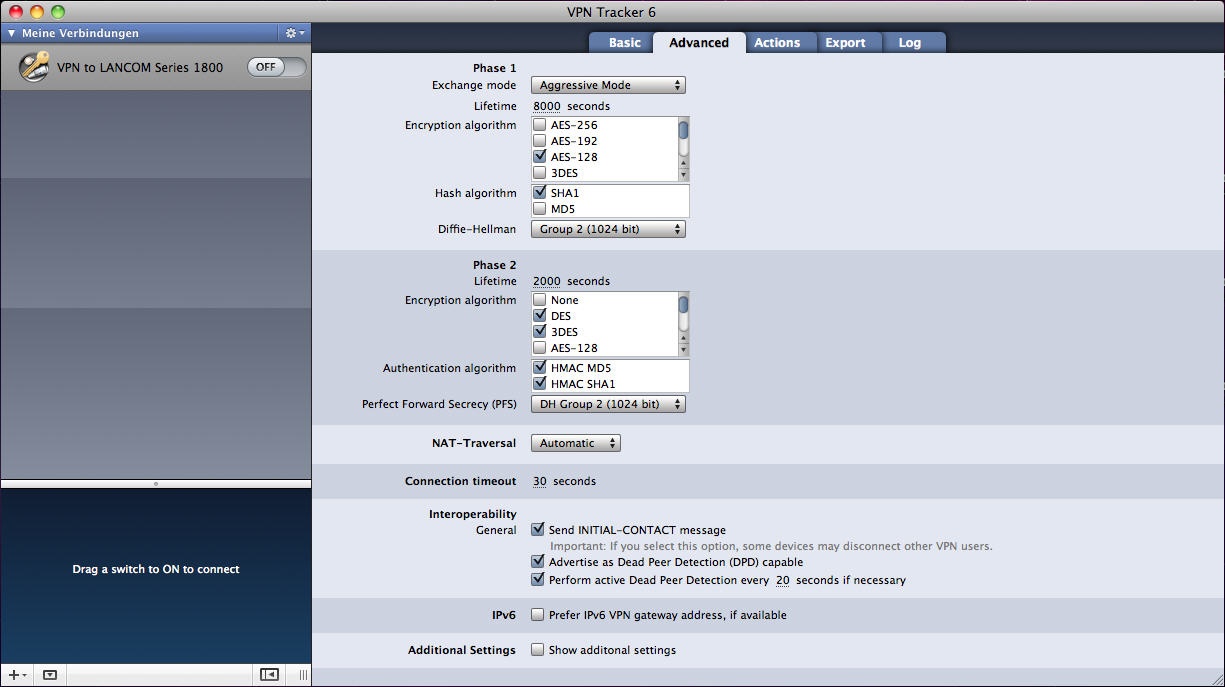
The Advanced tab lets you adjust detail settings for the two phases of authentication. You can manually configure the algorithms, the Diffie-Hellman parameters and the Perfect Forward Secrecy (PFS). For your LANCOM connection, please use the settings shown in the following screenshot.
The tabs for "Actions", "Export" and "Log" contain further program functions such as the automatic retrieval of e-mails after connecting, exporting profiles for distribution in a company network, and a log function for the tunnel connection.
All settings have now been made. You can initiate the connection by from the My connections area by moving the button vpn_lancom to the right. |
|
