Description:
Two sites, each with two fixed public IP addresses, should be linked via VPN connections. These two VPN connections should be bundled together by means of load balancing.
Requirements:
Procedure:
The procedure described here takes the perspective of one of the sites. This scenario also requires the configuration of the LANCOM router at the other site in line with these instructions.
1) Perform a basic configuration of the LANCOM router, which includes the internal network and the name of the device. In this example, the two routers are called Head office and Branch.
2) Using LANconfig, open the configuration for the first LANCOM router. In this case we are configuring the Head office router.
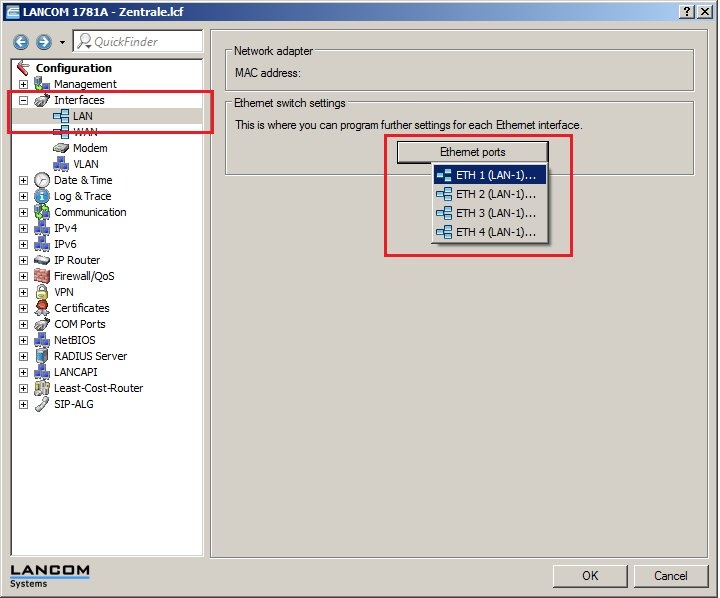
3) Set up the interfaces so that two of the router's interfaces can be used as a single WAN interface. To do this, navigate to the configuration menu Interfaces -> LAN. In the LAN section, select the button Ethernet ports and select the interface which you want to configure as an additional WAN port. In this example we are taking ETH 1.
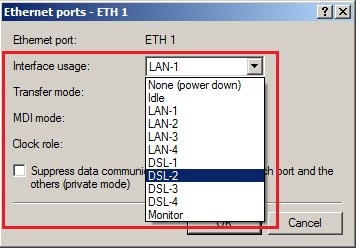
4) Then you select the item DSL-2 as the Interface usage and confirm with OK.
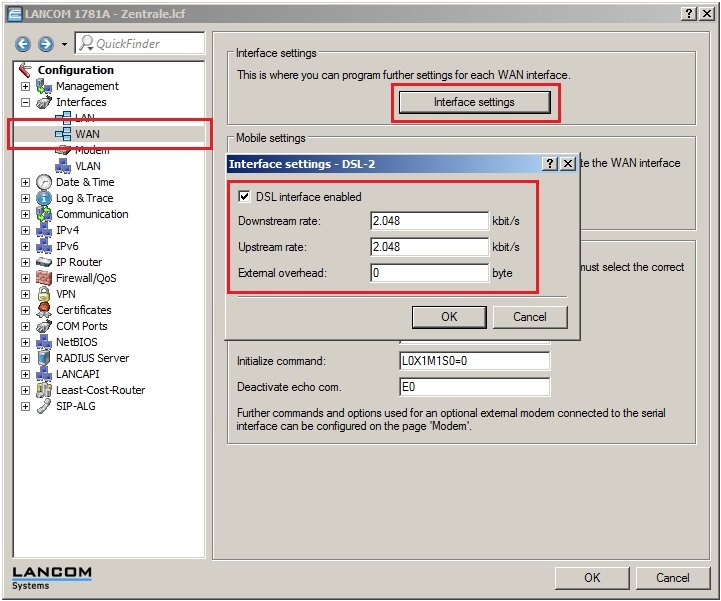
5) From the WAN menu item, click on Interface settings, enable the item DSL-2, and enter the corresponding line properties for the Internet connection. In this case we are using an SDSL line.
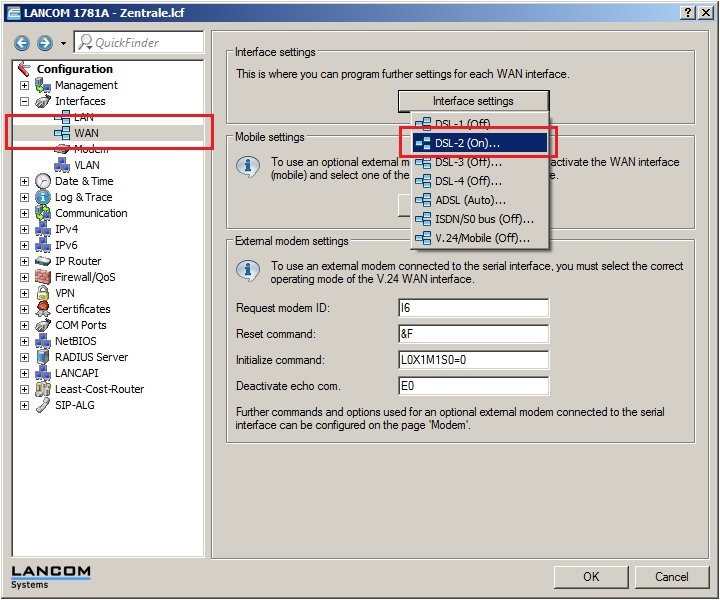
6) The newly enabled additional DSL interface should be visible as follows:
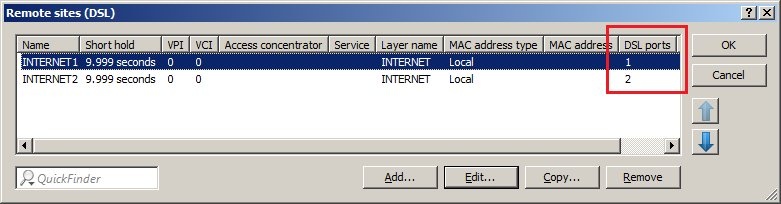
7) Next up for configuration are the two Internet connections. To do this, select the item Communication -> Remote sites -> Remote sites (DSL). In the following window, use the button Add to set up the two Internet connections.
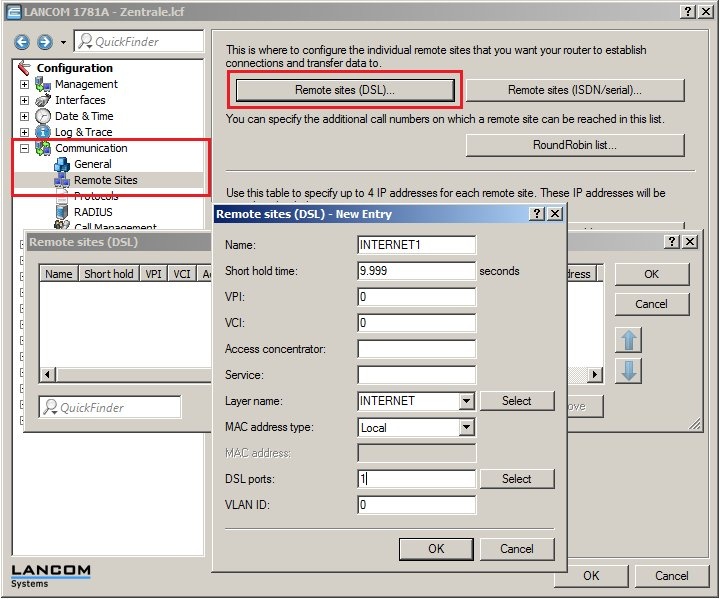
Here, it is important that you enter a DSL port for each connection. In this case, it should appear as follows:
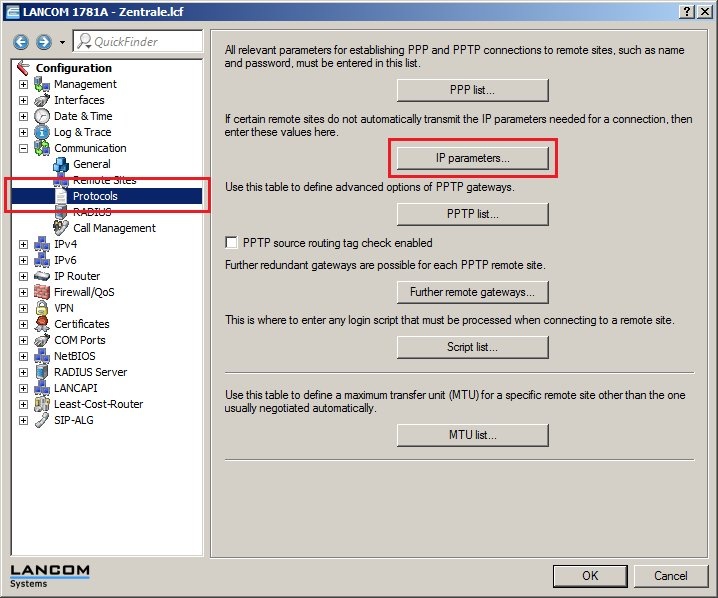
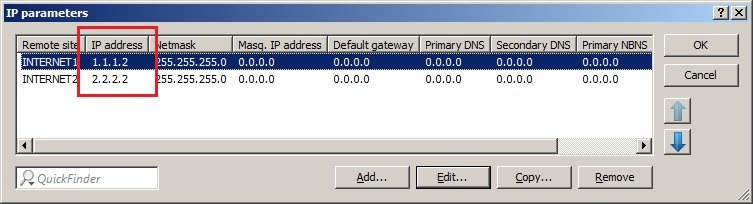
8) Under Communication -> Protocols -> IP parameters you assign the public IP addresses to the two Internet connections.
9) Here we have used the fictitious addresses 1.1.1.2 and 2.2.2.2. Insert your addresses here.
10) After the Internet connection has been set up, the two VPN tunnels have to be configured now.
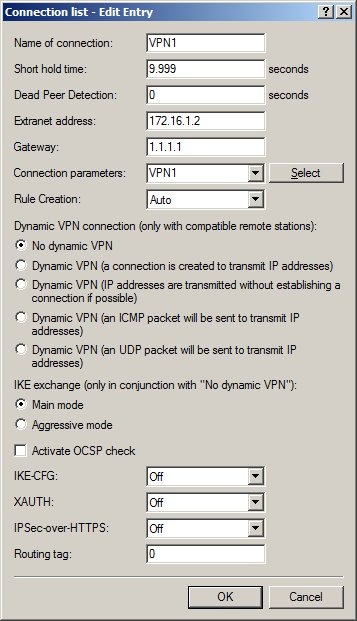
To do this, you first select the item VPN -> General-> Connection list. Use the Add button to enter the two VPN connections. In this context it is important that you define an extranet address that will be contacted through this VPN tunnel.
Otherwise you would be attempting to reach the same private network with two different VPN connections. It follows that no reasonable routes can be set without using the extranet addresses. Our scenario also assumes that fixed public IP addresses are available.
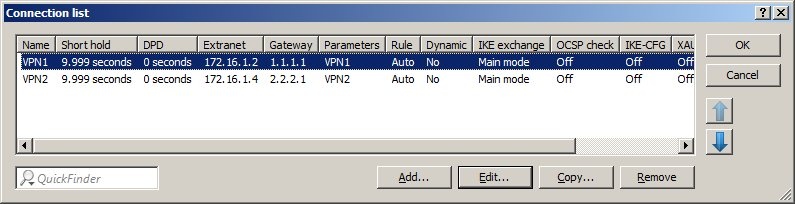
11) After you have configured your connections, the connection list should appear as follows:
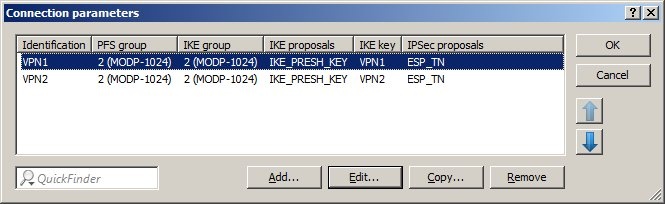
12) Under Connection parameters, you specify the following entries in accordance with the connection list:
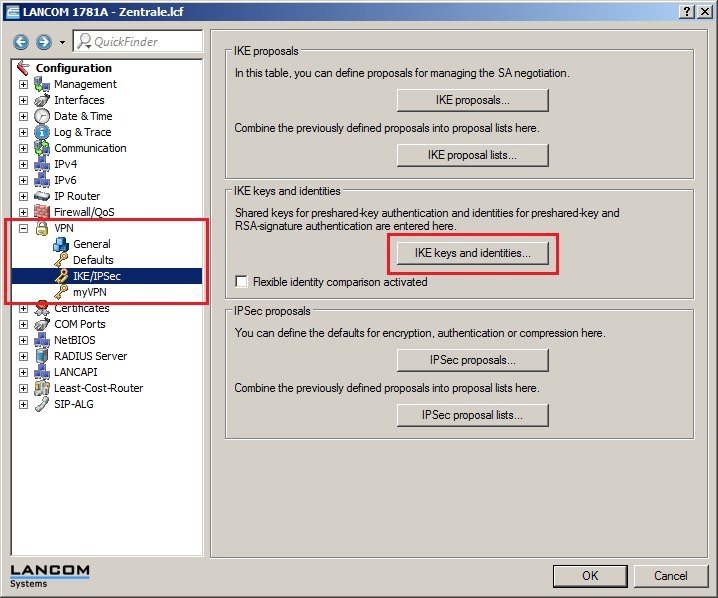
13) This scenario works with the preshared key method, so you enter the preshared keys under VPN -> IKE/IPSec -> IKE keys and identities:
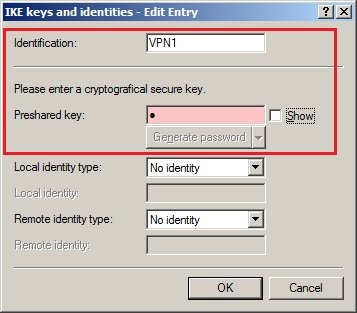
14) Once the configuration is completed, there should be two entries.

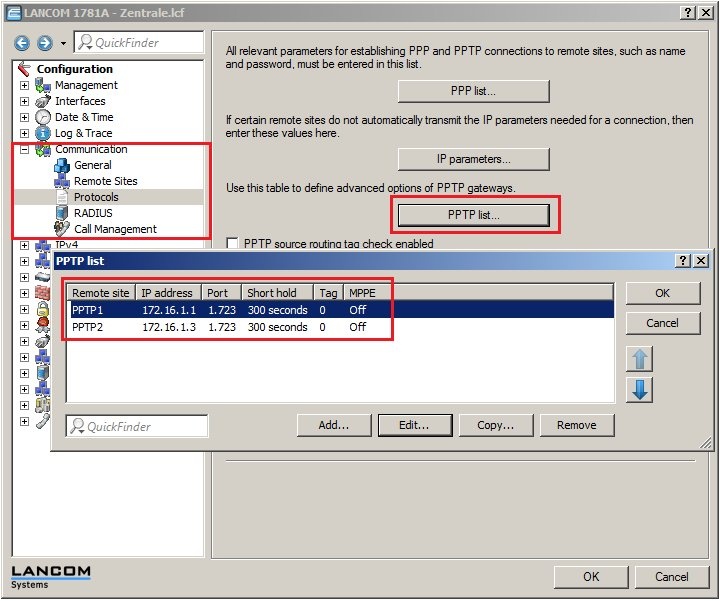
15) The next step in the configuration is to set up the PPTP remote sites. The PPTP list is located under Communication -> Protocols -> PPTP list and includes the PPTP remote sites. Make sure that you set up the remote stations with the extranet addresses of VPN connections specified earlier. New remote sites are created with the Add button.
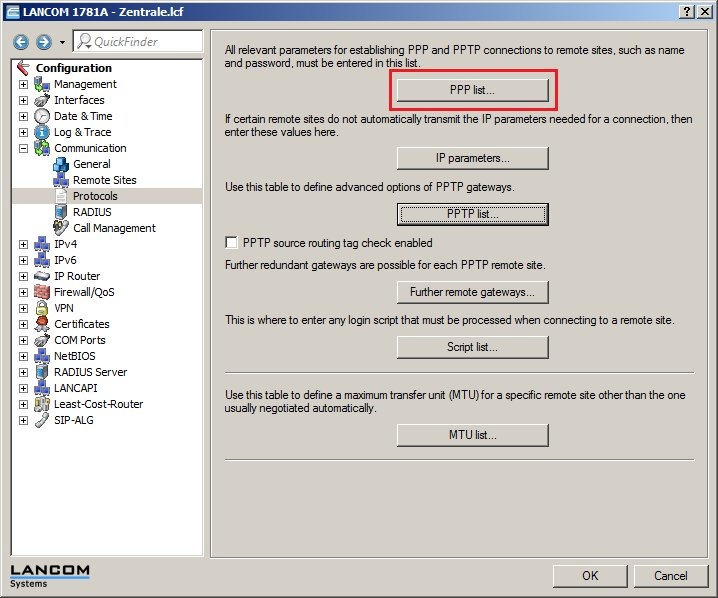
16) The next step is to set up PPTP connections that use the VPN tunnels. See Communication -> Protocols for the PPP list button. Once again you can use the Add option to enter these two connections.
17) In the dialog illustrated, please note that the password must be set IDENTICALLY at both sites to ensure that a PPTP connection can function properly. Also, you should set a checkmark for IP routing and NetBIOS over IP.

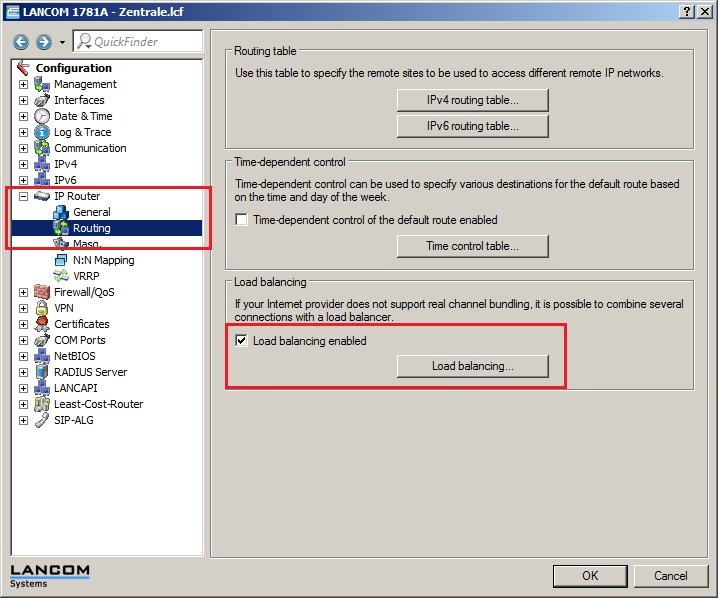
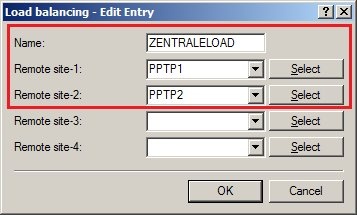
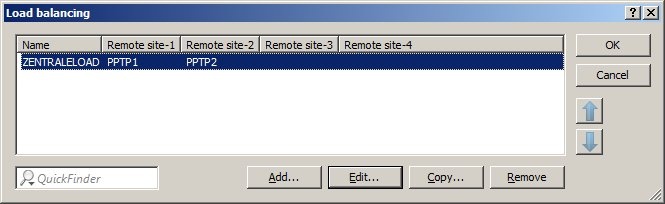
18) The final step in the configuration is to enable load balancing and set the routes so that the connections can be established as required. To do this, please select the option IP router -> Routing. In this section, set a checkmark on Load balancing enabled and then click on the button Load balancing.
19) There, you create the new bundle and select the two PPTP connections.
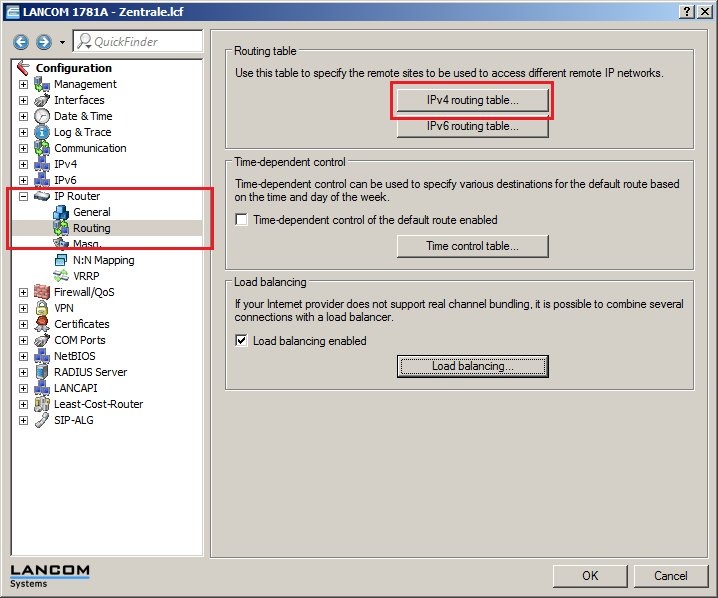
20) The final step is to edit the routing table, which can be found under IP router-> Routing-> IPv4 routing table.
As you can see from the illustration below, the Internet connections are the entries INTERNET1 and INTERNET2. The routing entries VPN1 and VPN2 are the VPN tunnels with the extranet addresses as their respective destinations. We now require three identically-named routes for the target network. Two are used to keep the PPTP connections unmasked.
Enter these into the routing table with the target network (in this case 192.168.100.0) and a routing tag (in this case 1 and 2). These routes are not actually used, but they serve to control the masking. The entry ZENTRALELOAD (head office load) contains the route for the load balancing to the private network at the other site.
Please note that the illustrated IP addresses must be replaced by your own values.
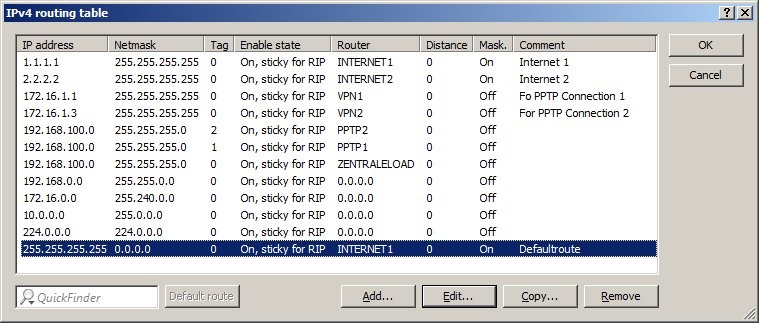
Alternatively, a second tagged default route can be used instead of the routes 1.1.1.1 and 2.2.2.2.
The routing tag used here must then be entered for the 2nd VPN connection according to item (10. |
|
