Description: This article describes how an ADSL or VDSL connection implemented via an upstream DSL modem and using a VLAN ID can be set up on a Unified Firewall (PPPoE) and how this can be assigned to an Internet object on the desktop. Requirements: - LANCOM R&S® Unified Firewall with firmware as of version 10.2
- Internet access via upstream DSL modem
- Web browser for configuring the Unified Firewall.
The following browsers are supported:
- Google Chrome
- Chromium
- Mozilla Firefox
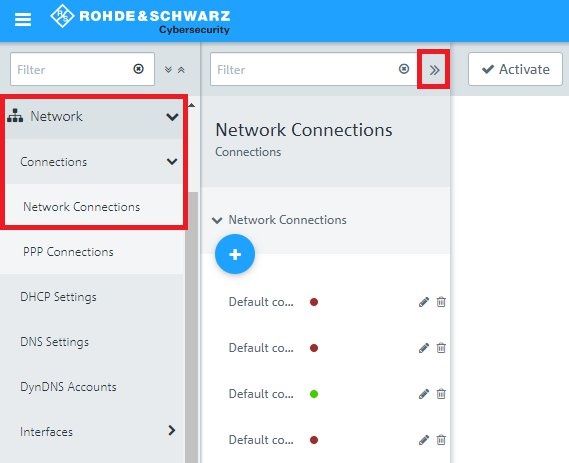
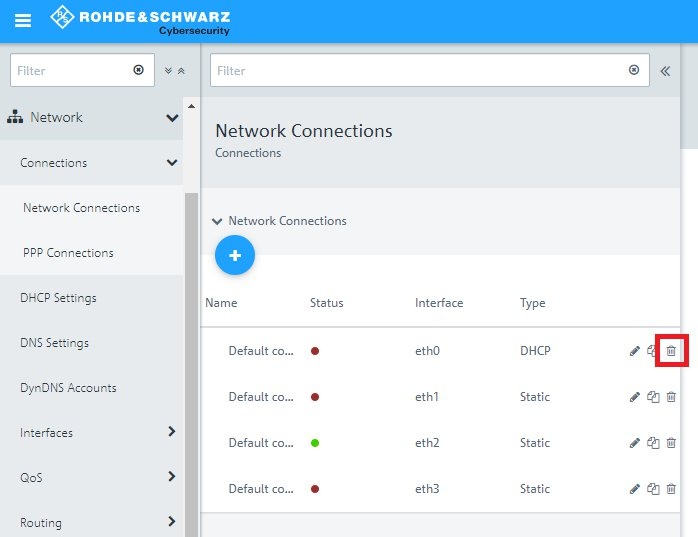
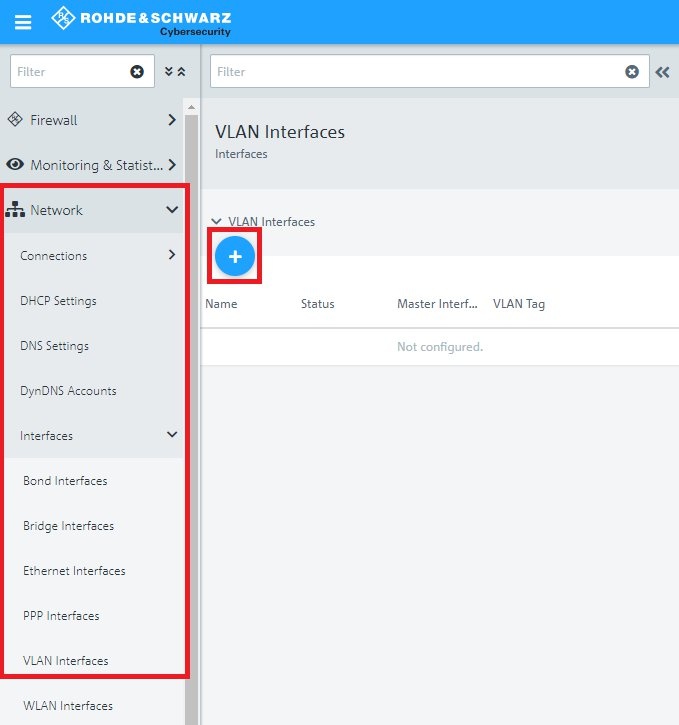
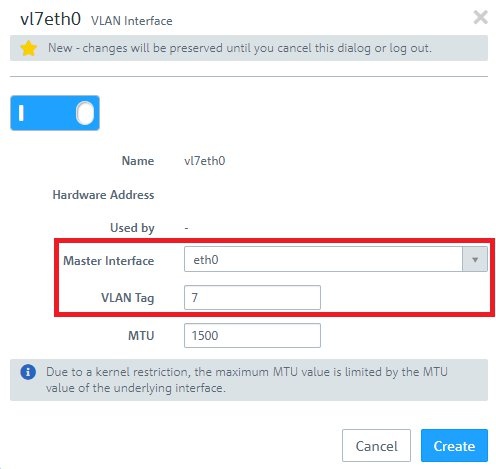
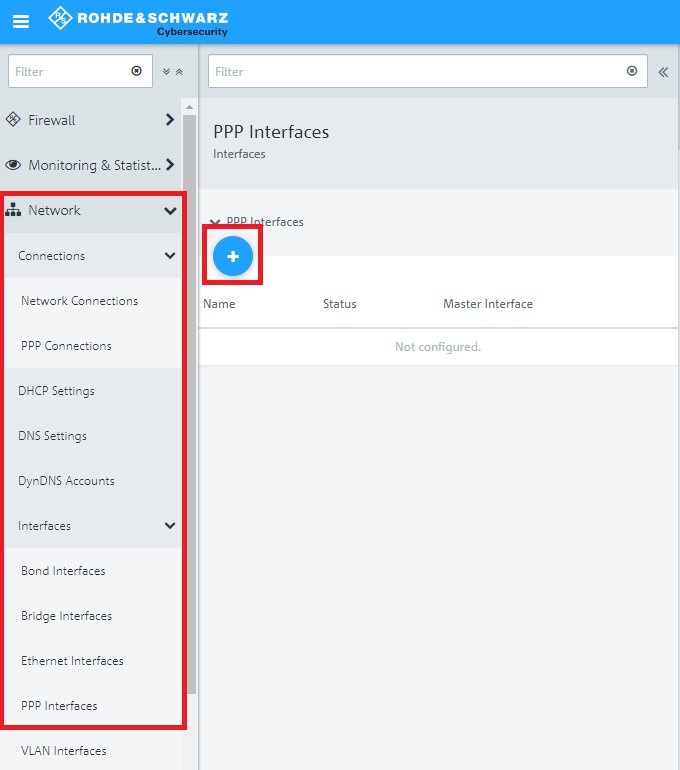
Procedure:1) Setting up the network connection for Internet access: 1.1) Open the configuration interface of the Unified Firewall in your browser, change to the menu Network → Connections → Network Connections and click on the chevron icon to enter the advanced view. 1.2) Delete the entry for the interface eth0. By default the interfaceeth0 is set toDHCP. 1.3) Navigate to the menu Network → Interfaces → VLAN Interfaces and click on the “+” icon to create a new entry. 1.4) Enter the following parameters: - Master Interface: From the drop-down menu, select the interface eth0.
- VLAN Tag: Enter the VLAN ID assigned to you by your provider.
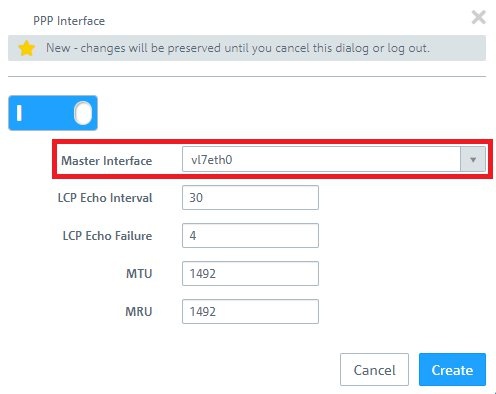
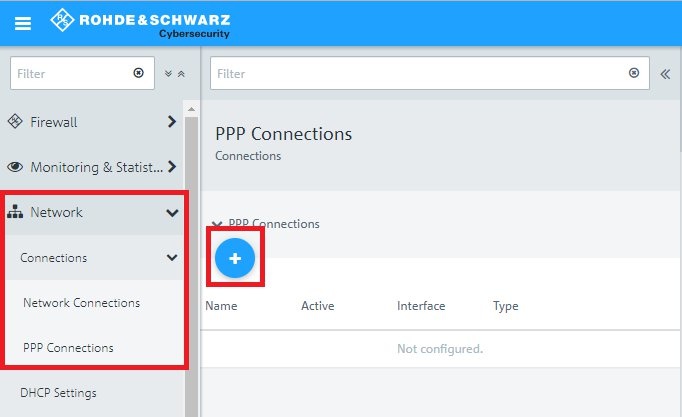
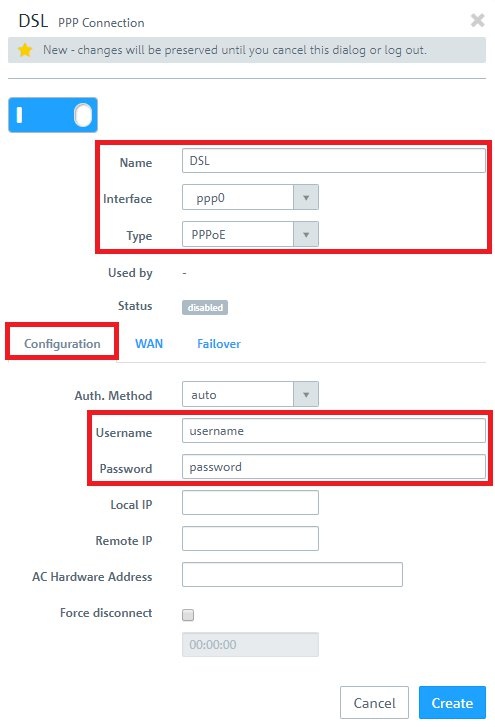
1.5) Navigate to the menu Network → Interfaces → PPP Interfaces and click on the “+” icon to create a new PPP interface. 1.6) For Master Interface, select the VLAN Interface created in step 1.4. 1.7) Change to the menu Network → Connections → PPP Connections and click on the “+” icon under PPP Connections to create a new entry. 1.8) Enter the following parameters: - Name: Enter a descriptive name.
- Interface: Select the PPP interface created in step 1.6.
- Type: Check that the value is set to PPPoE.
- Username: Enter Username for DSL dial-in assigned to you by your provider.
- Password: Enter the password for DSL dial-in assigned to you by your provider.
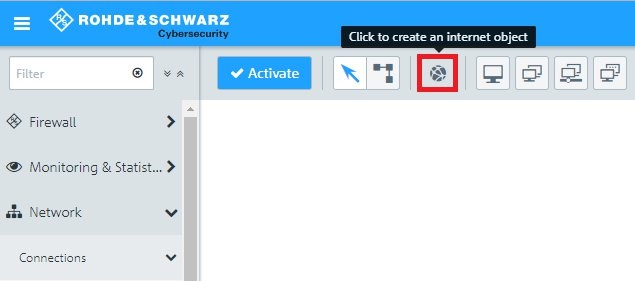
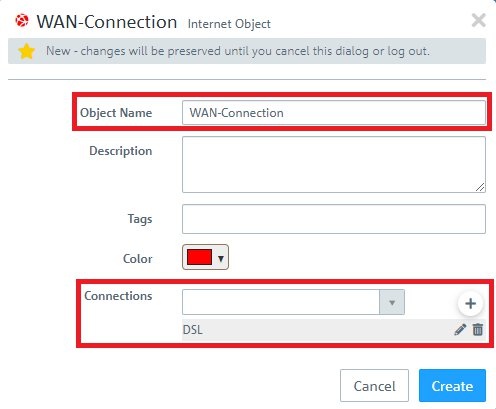
2) Create a desktop object for the Internet connection: 2.1) Click the button to Create an Internet object. 2.2) Enter the following parameters: - Object Name: Enter a descriptive name.
- Connections: From the drop-down menu, select the PPP Connection created in step 1.8 and click on the “+” icon to add the object.
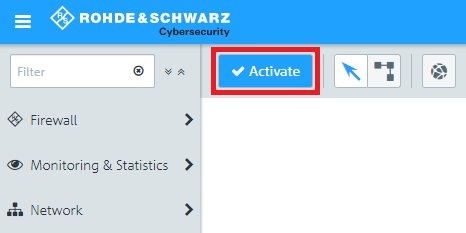
3) Saving and activating the configuration steps: 3.1) Click on the Activate button to accept the changes and enable filtering. |