This document describes how you can create digital certificates with LANCOM Smart Certificate for authenticating certificate-based VPN connections (site-to-site or client-to-site).
LANCOM central-site gateway, WLAN controller, or LANCOM router with an activated VPN 25 Option
Procedure:
Configuring certificates for VPN connections:
By using LANCOM Smart Certificate, the digital certificates required for certificate-based VPN connections can be created directly on the LANCOM router.
The procedure is the same for all VPN scenarios. Each communication partner (router or VPN client) requires its own certificate.
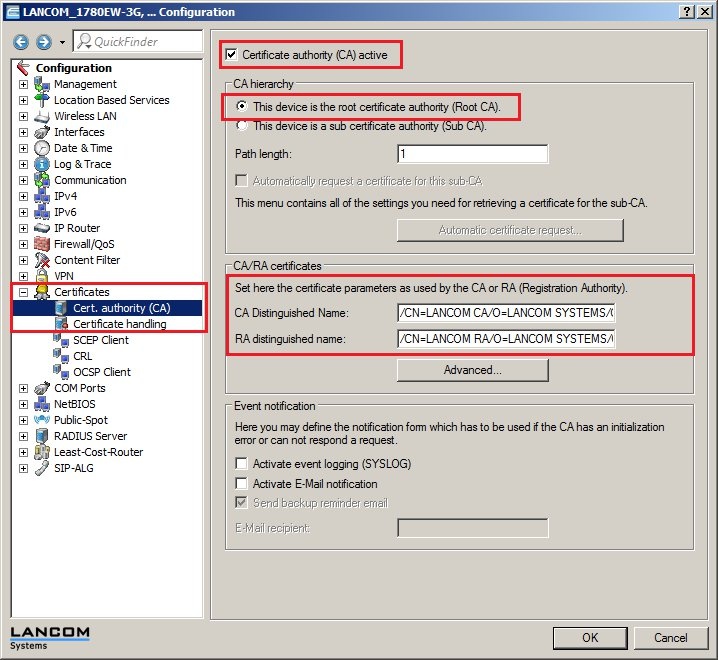
1.1) In LANconfig, open the configuration dialog for the LANCOM router and switch to the menu item Certificates
->
→ Cert. authority (CA).
1.2) Set a check mark for the option Certificate authority (CA) active. The LANCOM router functions as the root certificate authority (root CA).
Note:
Info
For this configuration example we leave all of the other parameters with their preset values.
Image Removed
Image Added
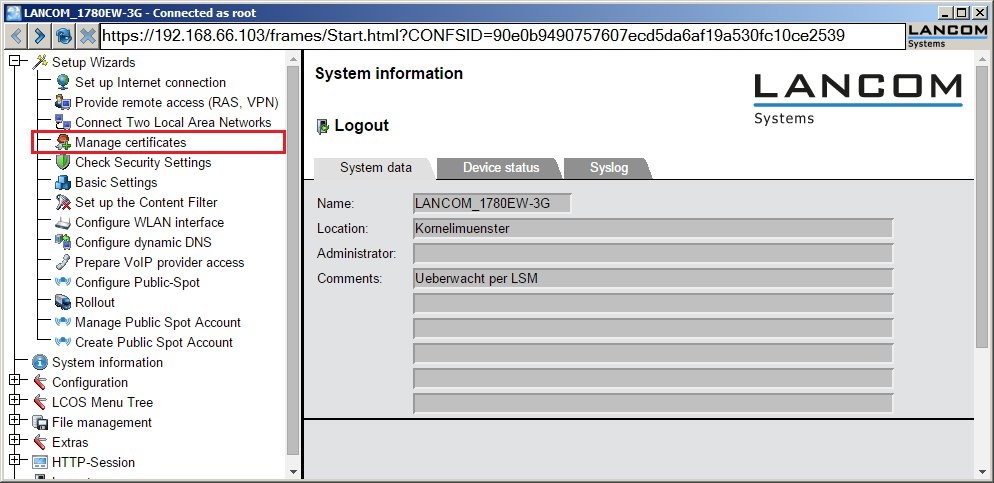
1.3) In WEBconfig, access the configuration for the LANCOM router and switch to the menu item Setup Wizards
->
→ Manage certificates.
Image Removed
Image Added
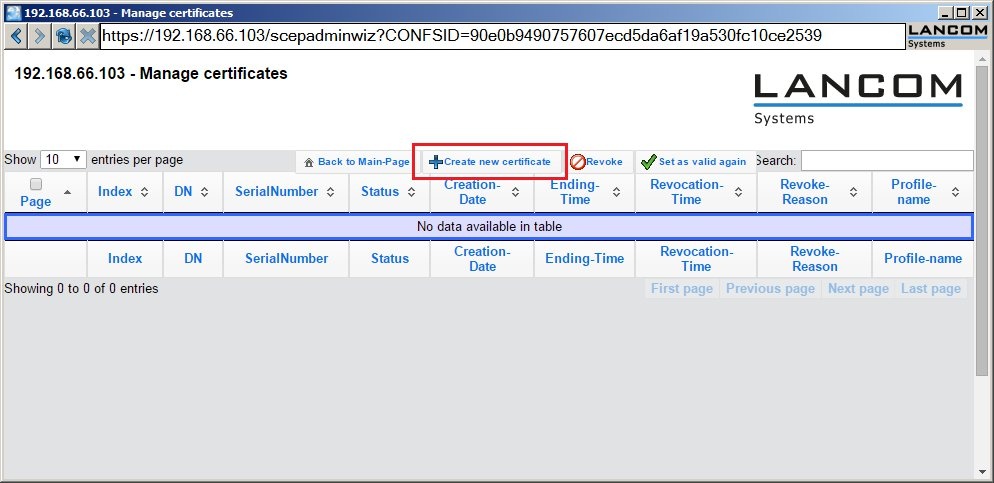
1.4) First, create the certificate for the LANCOM router. Click the button Create new certificateto do this.
Image Removed
Image Added
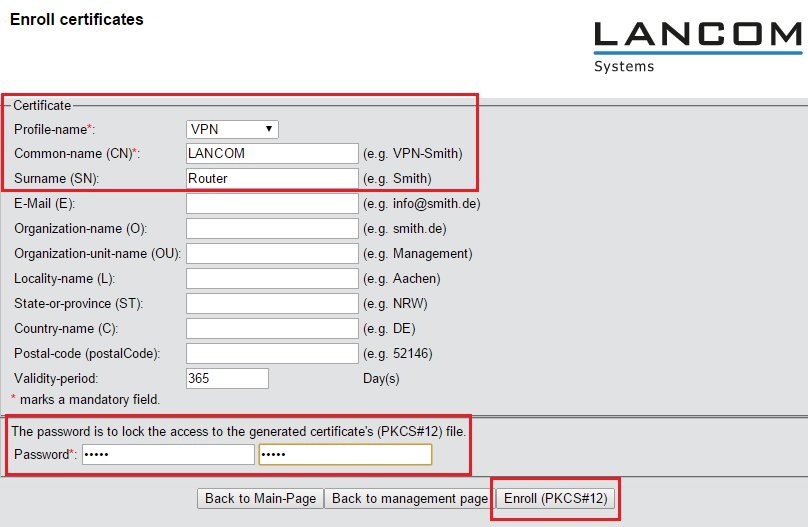
1.5) Set the profile name to VPN.
1.6) In this example, the common name (CN)is set as the company's name. By way of example, the surname (SN)is set to the descriptor Router. The other fields can be filled in as you desire.
Note:
Info
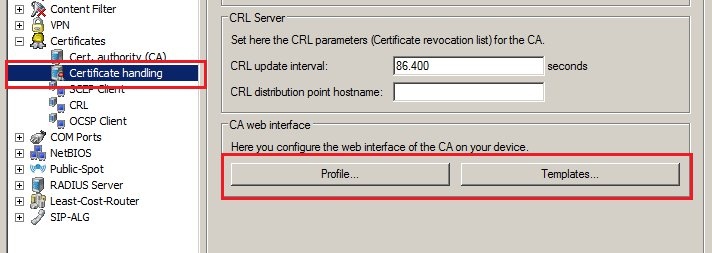
You can specify which profiles and fields should be displayed in this form in the LANCOM router's configuration with the menu items Certificates
->
→ Certificate handling
->
→ Profiles and Templates.
Image Removed
Image Added
1.7) Be sure to password-protectthe certificate container.
Image Removed
Image Added
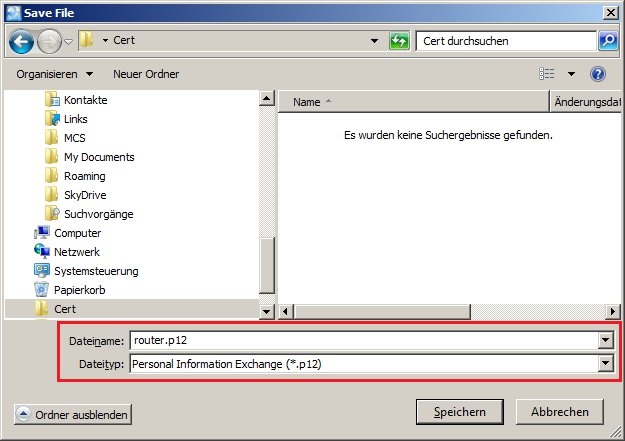
1.8) Click the button Enroll (PKCS#12)and give the certificate file a unique file name, if necessary.
Image Removed
Image Added
1.9) The successful download of the certificate file is confirmed by a message.
Image Removed
Image Added
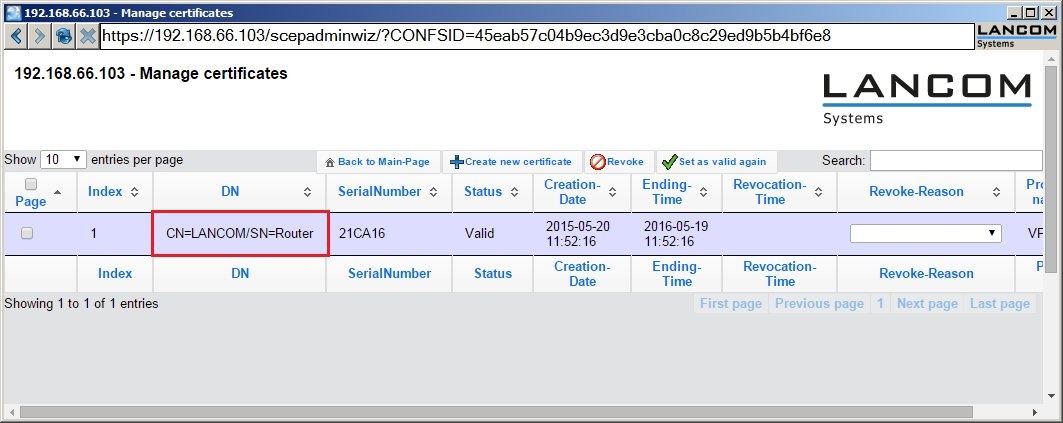
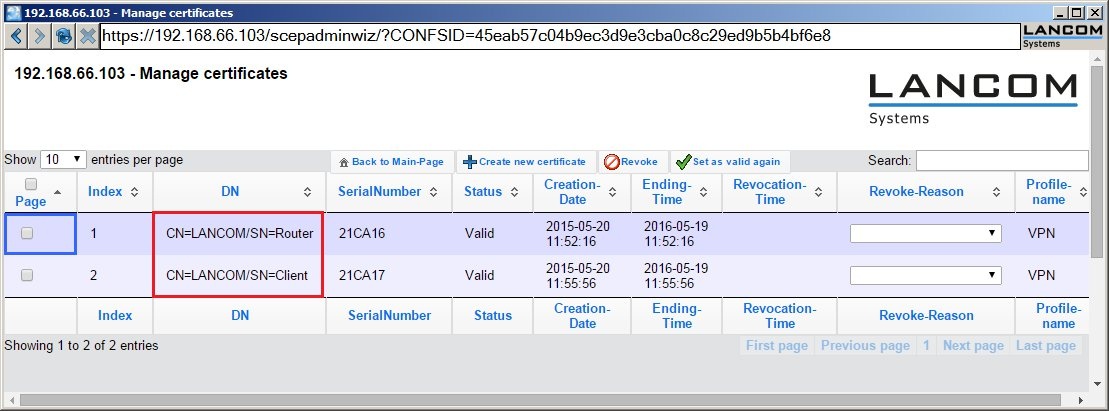
1.10) If you switch back to Manage certificates, you should see the created certificate in the list.
1.11) Create an additional certificate for the VPN Clientby clicking on the button Create new certificateonce again.
Image Removed
Image Added
1.12) Set the profile name to VPN.
1.13) In this example, the common name (CN)is set as the company's name. By way of example, the surname (SN)is set to the description Client. The other fields can be filled in as you desire.
1.14) You need to password-protectthe certificate container.
Image Removed
Image Added
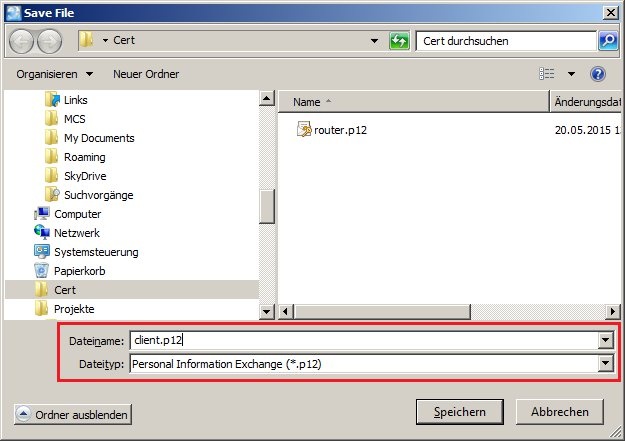
1.15) Click the button Enroll (PKCS#12)and give the certificate file a unique file name, if necessary.
Image Removed
Image Added
1.16) The successful download of the certificate file is confirmed by a message.
Image Removed
Image Added
1.17) If you switch back to the Manage certificates, you should see the created certificate in the list.
Image Removed
Image Added
1.18) The certificates should have been created successfully and can now be used for the authentication of certificate-based VPN connections.
For instructions on how to configure a certificate-based VPN connection with the LANCOM Advanced VPN Client, see