The use of the LANCOM router as default gateway for the devices in the DMZ is mandatory!
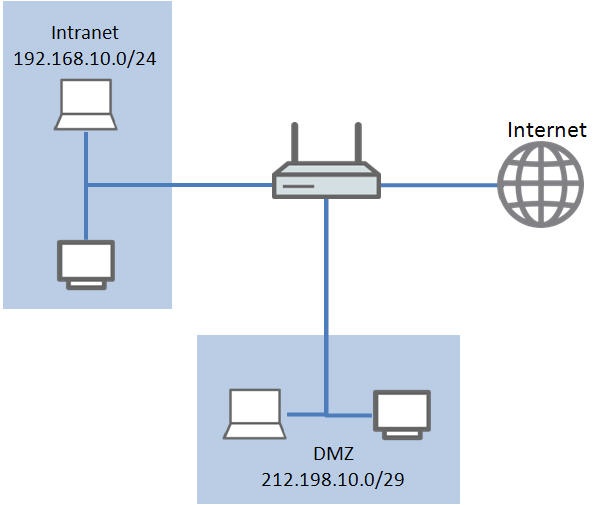
Scenario:
The example used here shows a CompanyConnect connection from Deutsche Telekom with a gateway router and 4 public IP addresses.
The LANCOM router is already integrated into the local intranet network.
An Internet connection will be set up in the initial configuration step.
After this, the DMZ will then be set up with public IP addresses.
Image Removed
Image Added
Procedure:
1. Setting up Internet access:
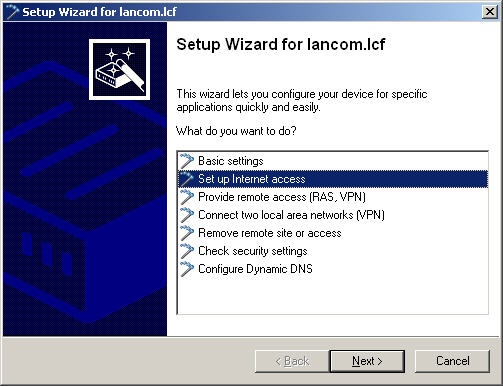
1.1) Internet access is set up using the Setup Wizard in LANconfig. Right-click on the device you wish to configure and select the option Setup Wizard.
1.2) Select the option Set up Internet access.
Image Removed
Image Added
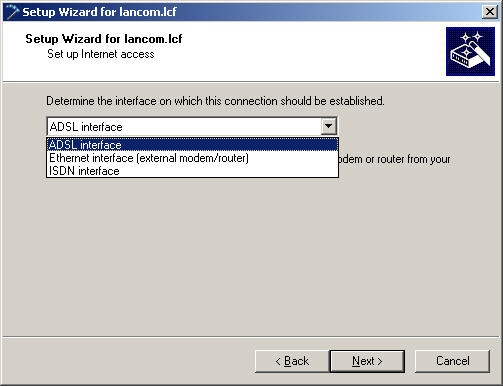
1.3) Select the
ADSL
Ethernet interface
setting in order
to use
the integrated
an external modem or router.
Image Removed
Image Added
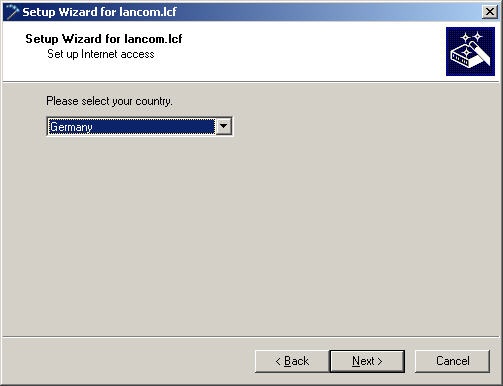
1.4) Select your country.
Image Removed
Image Added
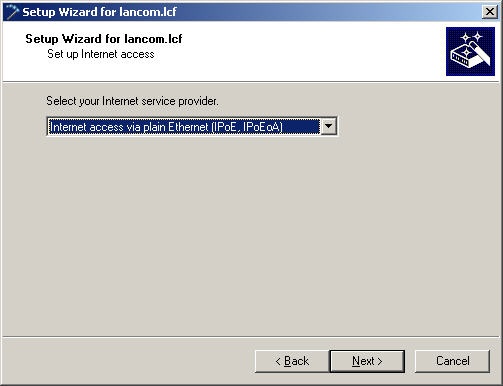
1.5) In the subsequent dialog, select option Internet via plain Ethernet (IPoE, IPoEoA).
Image Removed
Image Added
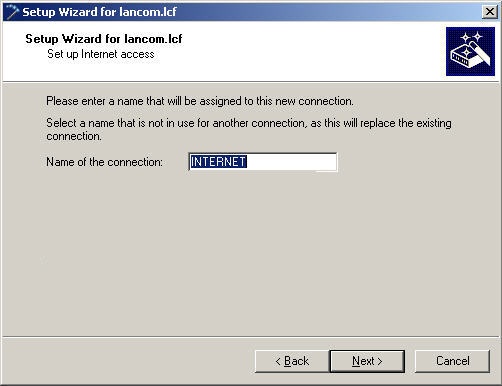
1.6) In the next screen, specify a Name for the Internet connection.
Image Removed
Image Added
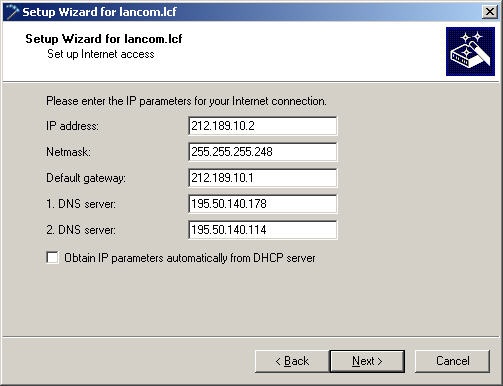
1.7) Uncheck the box Obtain IP parameters automatically from DHCP server and enter the IP parameters supplied by your provider.
Image Removed
Image Added
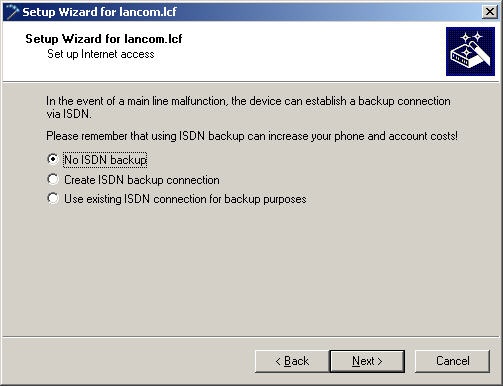
1.8) No backup connection is used in this example, so we can leave the default settings unchanged.
Image Removed
Image Added
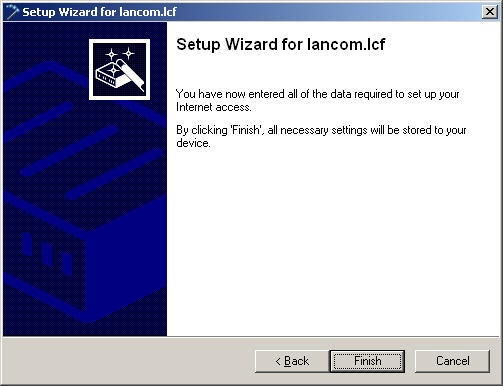
1.9. Exit the setup Internet connection wizard with the Finish button. The configured values are then written to the LANCOM router.
Image Removed
Image Added
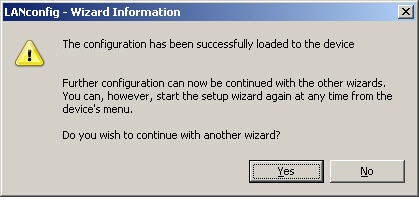
1.10) Once the configuration has been written back to the device the Setup Wizard will ask whether you wish to continue with other wizards.
Click on No in this screen since the configuration steps for setting up the Internet connection are now complete.
Image Removed
Image Added
2. Setting up the DMZ:
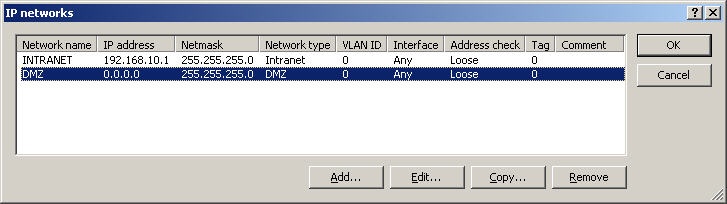
2.1) Open the configuration dialog for the LANCOM router in LANconfig and switch to the menu Configuration → IPv4 → General → IP networks.
Image Removed
Image Added
2.2) Highlight the DMZ entry and click on Edit.
..
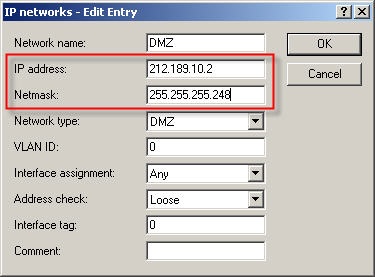
2.3) You must enter the public IP address of the LANCOM router as IP address (here: 212.189.10.2). The Netmask defines the size of the DMZ network. In this example 4 public IP addresses may be used. For this reason 255.255.255.248 must be entered as Netmask.
Image Removed
Image Added
2.4) Close the dialog by clicking on the OK button and switch to the menu Configuration → IP Router → Routing → IPv4 Routing table
..
.
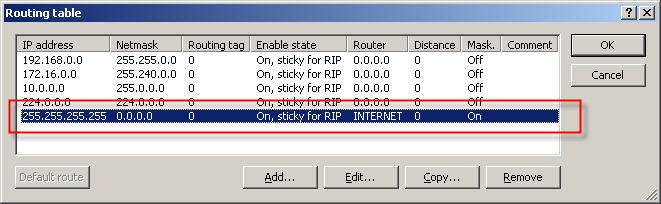
2.5) Since it is a public IP address range that needs to be reached, masking for this must be deactivated for the default route in the routing table.
2.6) Highlight the default route and click on Edit.
..
Image Removed
Image Added
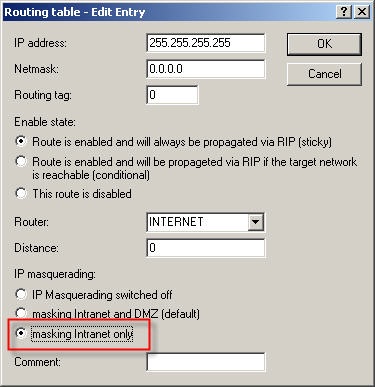
2.7) Select the option masking intranet only in the configuration dialog. Then close the dialog with OK.
Image Removed
Image Added
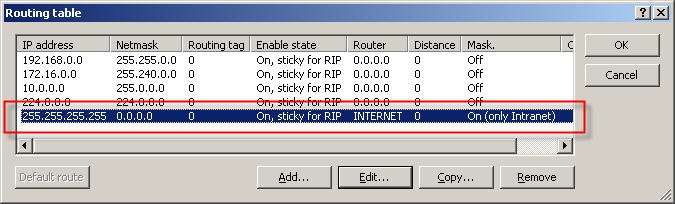
2.8) The default route should then look as follows in the routing table.
Image Removed
Image Added
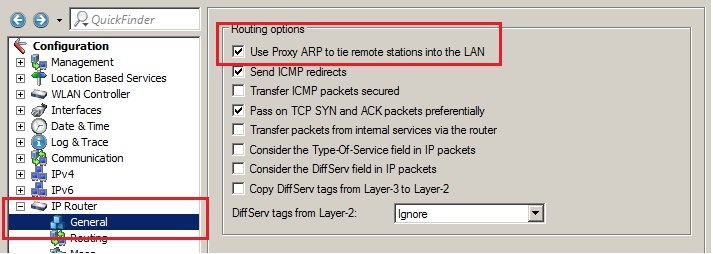
2.9) Open the menu IP-Router → General and make sure that the
Option
option Use Proxy ARP to tie remote stations into the LAN is
aktivated
activated.
Image Removed
Image Added
2.10) Close the routing table with OK and then write the configuration back to the LANCOM router.
2.11) Disconnect the existing Internet connection to allow the changes to become effective.
2.12) This concludes the configuration process required to set up a DMZ with public IP addresses.
Information:
Hinweis
Please note that the public IP addresses range can now be reached completely transparently from the Internet and are thus also open to attack from outside.