→ URL/Content Filter and click on the “pen” icon to edit the respective profile. 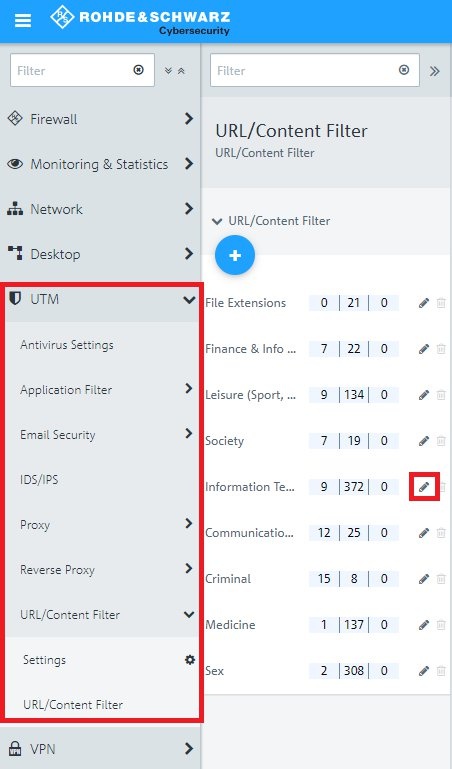 Image Modified Image Modified2.1.2) The profile gives you a view of the categories stored in the Content Filter as well as the keywords in the Content Filter black list and white list. The user overwrite function is deactivated by default. Activate this function if you want to allow (certain) users to be able to view pages blocked by the content filter. | Info |
|---|
You cannot adjust the default Content Filter profiles. You can, however, add entries to the black list and white list. As of LCOS FX 10.5.0, the management of the content filter has been expanded to include codes with which users can view blocked pages within certain times by entering the respective code despite the filter. For more information, see the following Knowledge Base article. |
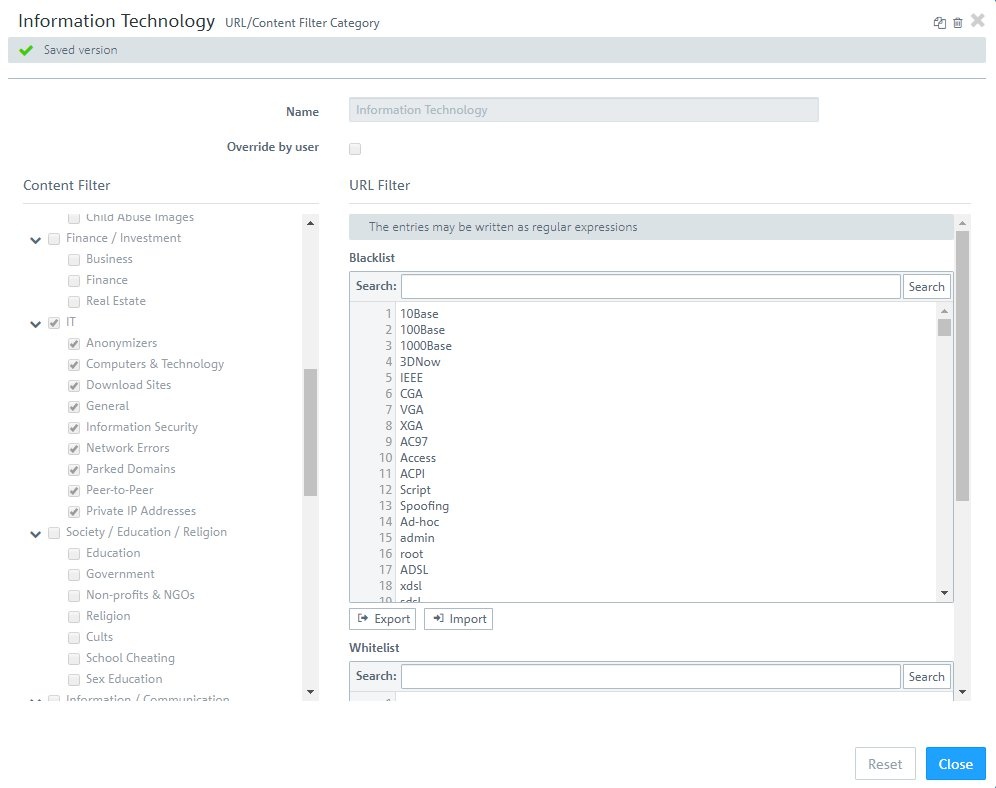 Image Modified Image Modified
2.1.3) You can add your own entries to the black list and white list. Use a separate line for each entry.
| Hinweis |
|---|
If the blacklist and the whitelist are used in parallel, the whitelist is treated with higher priority. |
With the function Export the blacklist or whitelist can be exported as a text file and with the function Import it can be imported.
| Info |
|---|
The maximum size of the text file is 1 MB. |
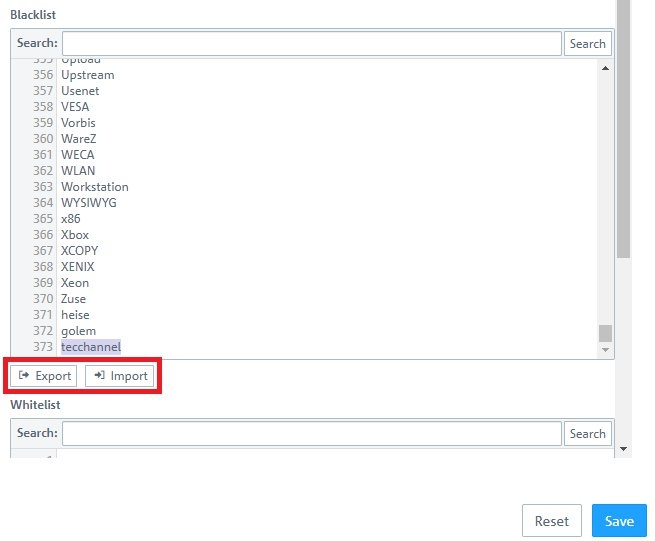 Image Modified Image Modified
2.2) Creating your own URL/Content Filter profile: 2.2.1) Click on the “plus” icon to create your own URL/Content Filter profile. 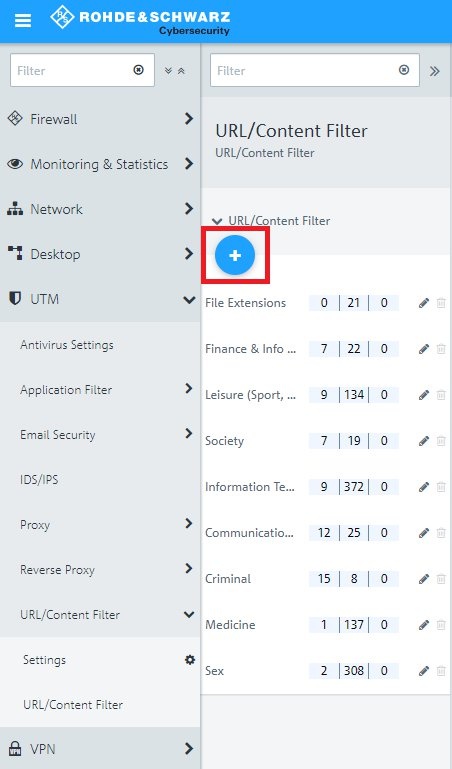 Image Modified Image Modified2.2.2) Modify the following parameters:- Name: Enter a descriptive name for the profile.
- Override by user: With this option enabled, users can temporarily unblock the category if a website is blocked (also see step 1.2).
- Content Filter: Select the categories to block.
- URL Filter - Blacklist: Enter terms that are contained in undesirable URLs.
- URL Filter - Whitelist: Enter terms that are contained in desired URLs.
 Image Modified Image Modified
3) Assigning the URL/Content Filter profiles to the connection from the internal network to the Internet: 3.1) On the desktop, click the network object and select the Connection Tool. Link the network object to the Internet object. 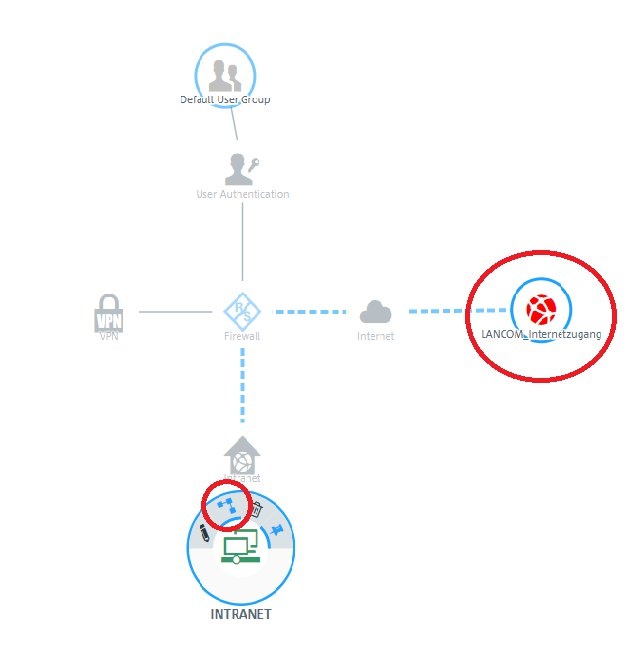 Image Modified Image Modified3.2) Go to the tab URL/Content Filter and select the desired profiles for the URL Filter and the Content Filter.
| Info |
|---|
If the function Block all by default is activated, all URL and content filter profiles created in the system are activated. Exceptions can then only be permitted via the whitelist. |
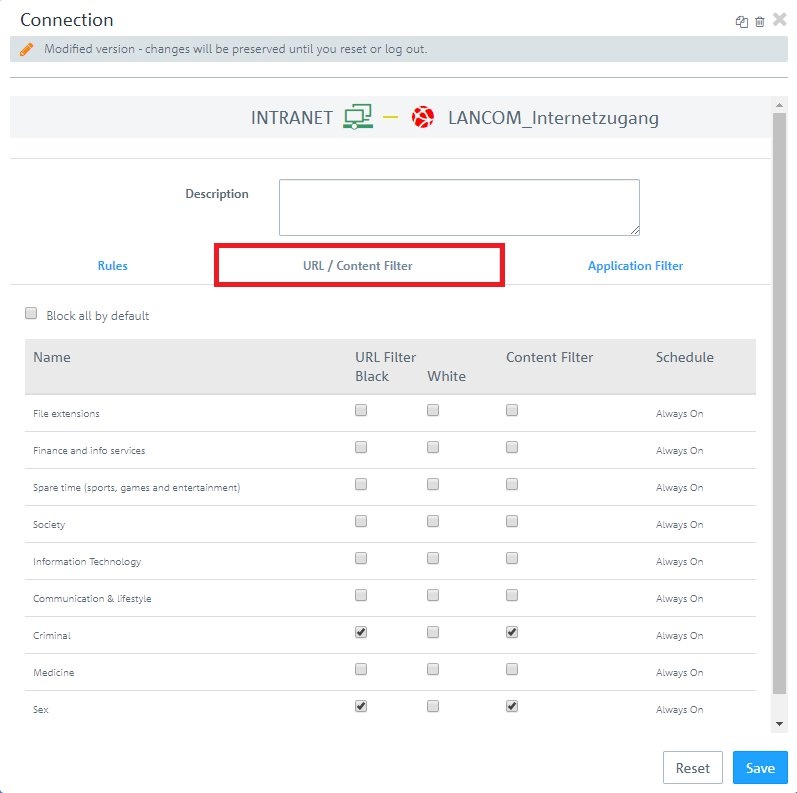 Image Modified Image Modified
3.3) Click on the Activate button to accept the changes and enable filtering. 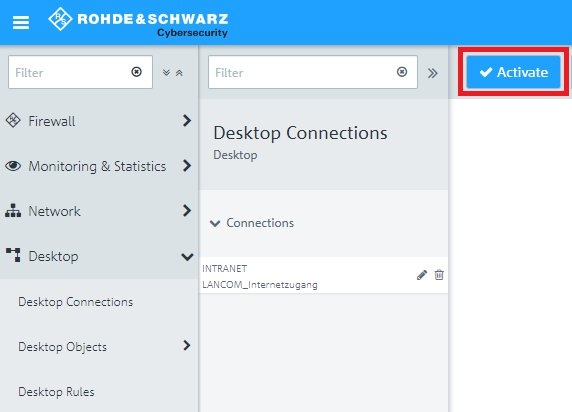 Image Modified Image Modified
4) Additiional steps when a desired URL is blocked by the Blacklist: If a desired URL is blocked by the URL / Content Filter of the Unified Firewall, it must be checked why it is blocked.
| Info |
|---|
Bei der Verwendung der Default-Blacklists wird den Benutzern in der Blockmeldung die Blacklist "Unknown" angezeigt. Nur bei Verwendung einer eigenen Blacklist wird der Name in der Blockmeldung korrekt angezeigt. |
4.1 Öffnen Sie auf der Unified Firewall das Menü Monitoring & Statistiken → Einstellungen und setzen die Parameter Web-Zugriff zugelassen und Web-Zugriff verhindert auf Rohdaten lokal speichern, damit die Meldungen zum URL- / Content Filter im Alarmprotokoll festgehalten werden. Klicken Sie anschließend auf Speichern.
4.2 Wechseln Sie in das Menü Monitoring & Statistiken → Protokolle → Alarmprotokoll und prüfen, ob dort zu der erwünschten URL eine entsprechende Meldung in dem folgenden Format vorhanden ist: Web Filter: blocked domain '<URL>' from IP address <IP-Adresse> as category 'Blacklist' from profile '<Blacklist>' Ist dies der Fall, wurde die URL aufgrund eines Eintrags in der entsprechenden Blacklist blockiert. 4.3 Wechseln Sie in das Menü UTM → URL/Content Filter → URL/Content Filter (siehe auch Schritt 2.1) und klicken auf das "Stift-Zeichen" bei dem jeweiligen Profil, um dieses zu öffnen. Durchsuchen Sie anschließend die Blacklist nach der erwünschten URL bzw. Teilen der URL und löschen die entsprechenden Einträge, damit die URL nicht mehr blockiert wird. Alternativ können Sie die URL auch in der Whitelist hinterlegen. Diese ist höher priorisiert als die Blacklist und greift daher vor dieser.
| 

