Description:
This document explains how to set up a VPN connection between the Watchguard Mobile User VPN Client and a LANCOM VPN router.
Authentication uses the preshared key method in aggressive mode.
Requirements:
You require a VPN-capable LANCOM device: See our homepage for an overview of VPN-capable components from LANCOM.
The client uses the software Watchguard Mobile User VPN. Please note this must be licensed.
This document describes the current LANCOM LCOS operating system and the Watchguard Mobile User VPN Client version 7.3
Procedure:
Configuration of the VPN should be carried out with the LANconfig Setup Wizard.
Start the program LANconfig and double-click on the router for VPN configuration:
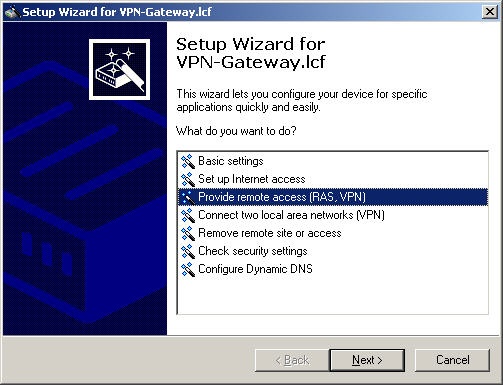
Select the item "Provide remote access (RAS, VPN)"
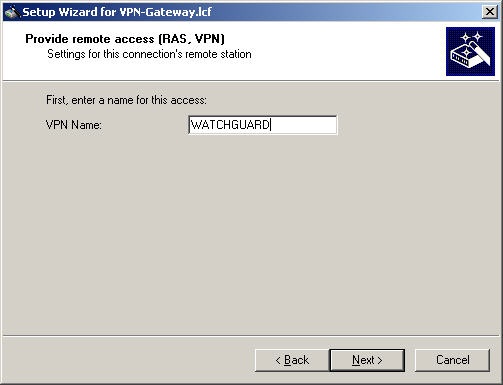
Enter the name for the VPN connection here (e.g. WATCHGUARD)
Select the option "Preshared key and aggressive mode" and enter the key (the Watchguard Mobile User VPN Client requires at least 8 characters!)

Leave the standard IKE parameters unchanged:

In addition to the shared secret, the Watchguard Mobile User VPN Client requires another identity. This identity can be specified as an IP address or domain, as a local and a remote identity. We recommend that these are identical.
For improved usability of the Watchguard Mobile User VPN Client, you should use the option Domain Name. The following example uses lancom.de for both identities:
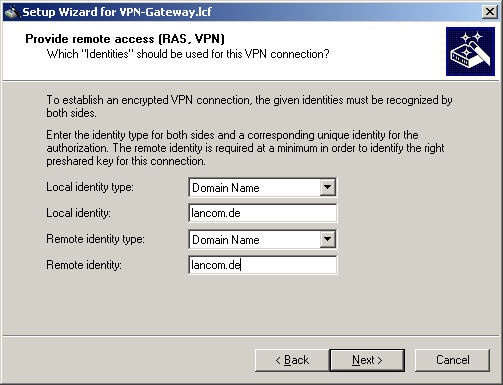
In case of multiple VPN connections, you should use different identities for each connection.
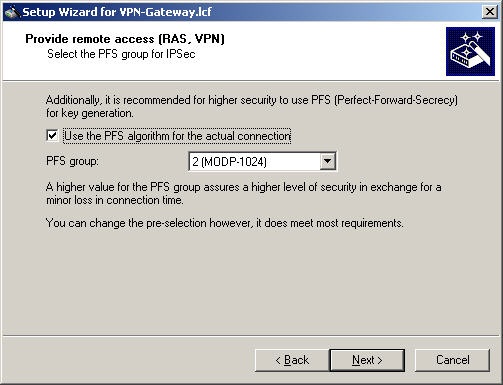
Additional security is gained by activating the PFS algorithm. The Watchguard Mobile User VPN here supports the PFS groups 1, 2, 5 and 14.
For reasons of compatibility, select group 2:
The encryption options (proposals) can be selected manually here.
Blowfish is not supported by the Watchguard Mobile User VPN. Ensure that AES(128) and 3DES are selected.
Authentication can be conducted with MD5 or SHA. For reasons of compatibility, you should select both:

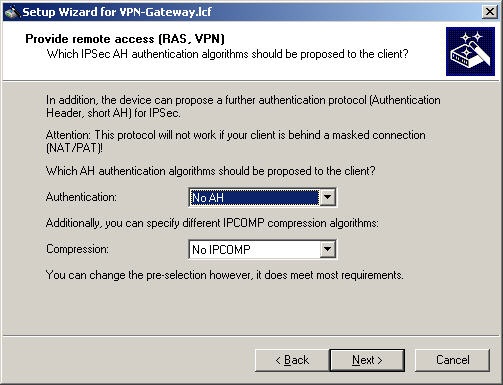
For this configuration, you should only use the ESP method of encryption.
For this reason, select no AH authentication.
Also select no compression.
Here you define the virtual IP address for the Watchguard Mobile User VPN Client:
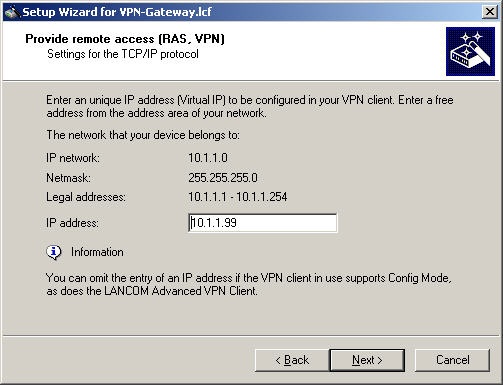
In our example this is 10.1.1.99, which will be configured in the client later.
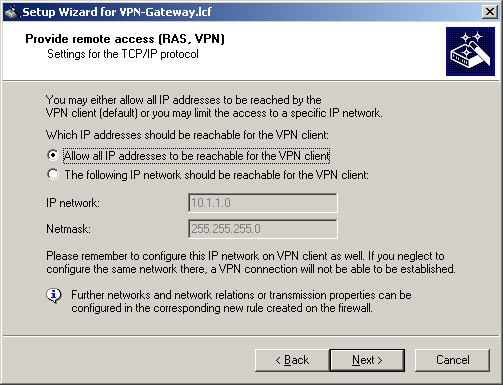
Now you configure the networks which should be available.
For reasons of compatibility select "Allow all IP addresses to be available to the VPN client".
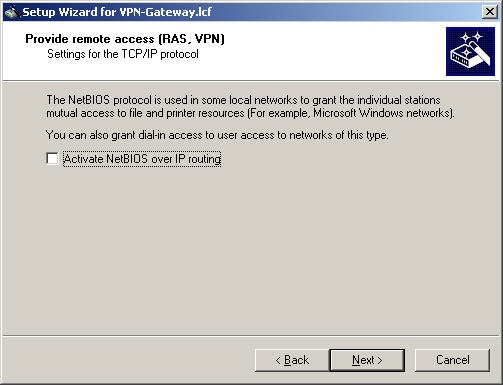
The "Activate NetBIOS over IP routing" option is not supported by Watchguard Mobile User VPN.
Configuring the Watchguard Mobile User VPN Client:
After installing the Watchguard Mobile User VPN Client, proceed as follows:
From the Windows Start menu select the item "Mobile User VPN"->"Security Policy Editor".
Under "My Connections" create a new connection and give it a suitable name (here: LANCOM):
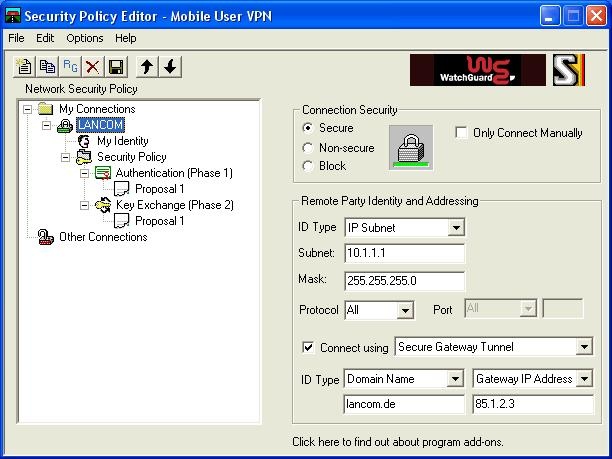
- In the right-hand menu, define this connection as "Secure".
- Under "Remote Party Identity and Addressing" select the option "Connect using Secure Gateway Tunnel" from the lower part of the menu.
- Select the ID Type as "Domain Name" and enter the same domain as defined on the LANCOM as "local identity". In our example, this is "lancom.de"
- In the lower part of the menu, enter a gateway. This may be a DNS name or an IP address. Enter here how the LANCOM is to be accessed (the public IP address or a dynamic DNS name)
- Now in the upper part of the menu select the ID Type "IP Subnet". As "Subnet" enter the target network and enter the associated subnet mask under "Mask".
- Leave the "Protocol" switch set to "All"
Now select the submenu "My Identity":
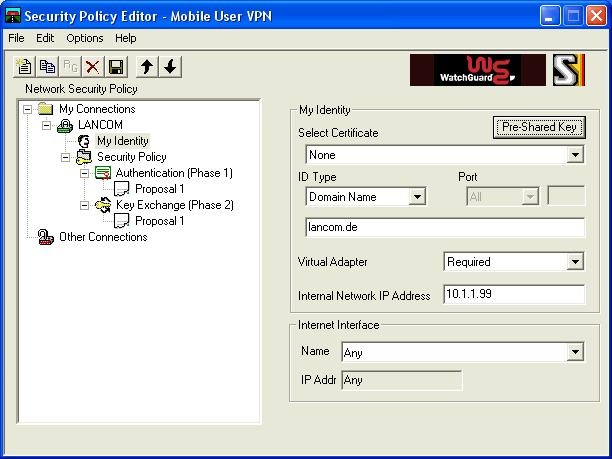
Under "My Identity -> Select Certificate" select the option "None".
Use the "Preshared key" button to enter the preshared key.
As the ID Type, enter "Domain Name" and enter the domain name which you defined on the LANCOM router as the "remote identity".
In our example, this is "lancom.de"
Set the option "Virtual Adapter" to "Required"
As "Internal Network Address" enter the IP address which you have configured on the LANCOM for this client.
- The setting "Internet Interface" can be left unchanged as "Any".
Now select the submenu "Security Policy":
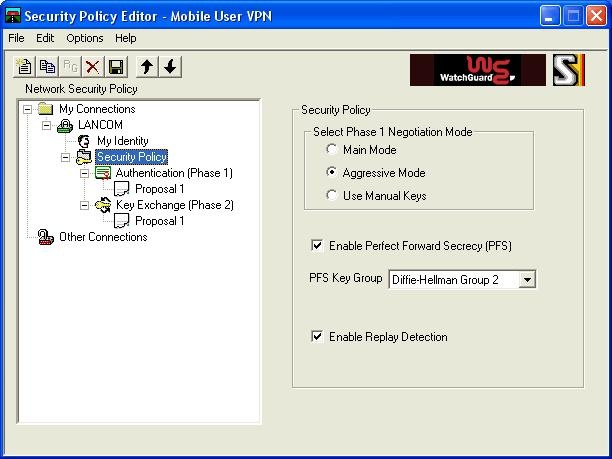
As "Phase 1 Negotiation Mode" select the option "Aggressive Mode".
Activate the item "Enable Perfect Forward Secrecy". Keep the default setting "Diffie-Hellman-Group 2"
Select the submenu "Authentication (Phase 1)" and then the submenu "Proposal 1":

One option would be to retain the default settings (Encr.: TripleDES, Hash: SHA-1).
However, for security reasons we suggest you use the settings configured above:
Encrypt Alg.: AES-128
Hash Alg.: MD5
"SA Life" and "Key Group" can remain unchanged.
Both settings function with the LANCOM.
Select the submenu "Key Exchange (Phase 2)" and then the submenu "Proposal 1":
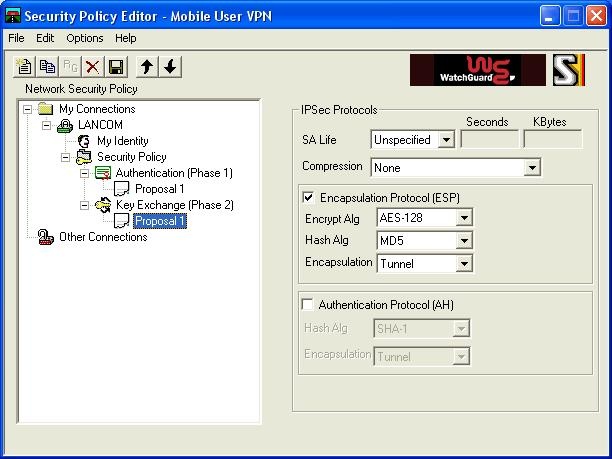
Here too, an option would be to retain the default settings (Encr.: TripleDES, Hash: SHA-1).
However, for security reasons we suggest you use the settings configured above:
Encrypt Alg.: AES-128
Hash Alg.: MD5
"Encapsulation" remains unchanged as "Tunnel", "AH" remains deactivated.
Both settings function with the LANCOM.
The configuration of your Watchguard Mobile User VPN Client is now complete.
The connection is initiated automatically when there are data packets for the target network. |
|
