Description:
This document describes the management of user-related rights when operating the PPPoE server on the LANCOM router, and how to set up the PPPoE client in Windows 7.
The PPPoE server integrated into the LANCOM router allows multiple PPPoE users to be created and managed within an existing LAN. With the widespread availability of DSL, most operating systems are now equipped with PPPoE clients. These can be used to "log on to the network" as well as to manage access rights to services such as the Internet, e-mail or remote sites.
In most scenarios DHCP is used to assign addresses to LAN users, which makes the configuration of individual firewall rules complicated and laborious. This process can be simplified by creating PPPoE users and then using the remote sites as the basis for granting access rights. This approach greatly simplifies the configuration and management of individual employees and groups.
In the example described here, the firewall is used to restrict the group named Purchasing to using the following services: HTTP, HTTPS, POP3, SNMP, and NNTP. All other services are prohibited for this group. This range of services can be enlarged or restricted to meet your individual needs.
Requirements:
- The router must have been given a name under Management-> General -> Device name.
- An address pool for dial-in access must be specified in the router under Configuration -> TCP/IP-> Addresses.
Procedure:
1. Configuring the LANCOM router:
1.1) Enable the PPPoE server in the configuration of the LANCOM router (Configuration -> Communication -> General).
1.2) Assign a name to the service, e.g. User_Auth).
Information:
Entering a name for the service is optional. This enables a PPPoE client to select a certain PPPoE server as specified in the client software.
The
Session limit specifies how often a client can be logged on simultaneously with the same MAC address. Once the limit has been reached, the server no longer responds to the client queries that are received. The default is
1 , the maximum value is
99 . A Session limit of
0 stands for an unlimited number of sessions.
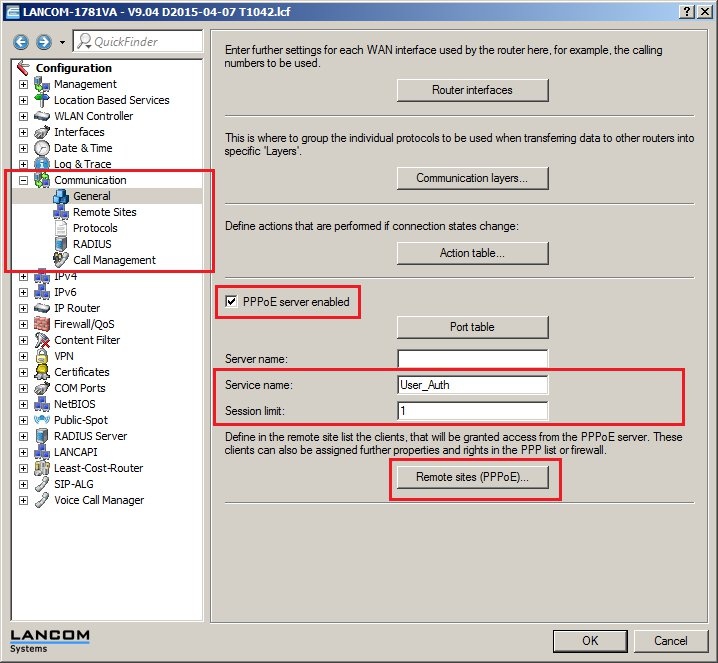
1.3) Click on the button 'Remote sites (PPPoE)' and create a new entry in the PPPoE server's name list (LANconfig> Communication> Name list).

The settings for the remote site DEFAULT are applied to all client dial-ins.
To make settings for each individual client, you can define remote-site names for each client here. The name of the remote site must be set in the client as the PPP user name.
Information:
If a MAC address is entered, then only connections from this MAC address will be established. The MAC address of '000000000000' means that the client may log on with any MAC address.
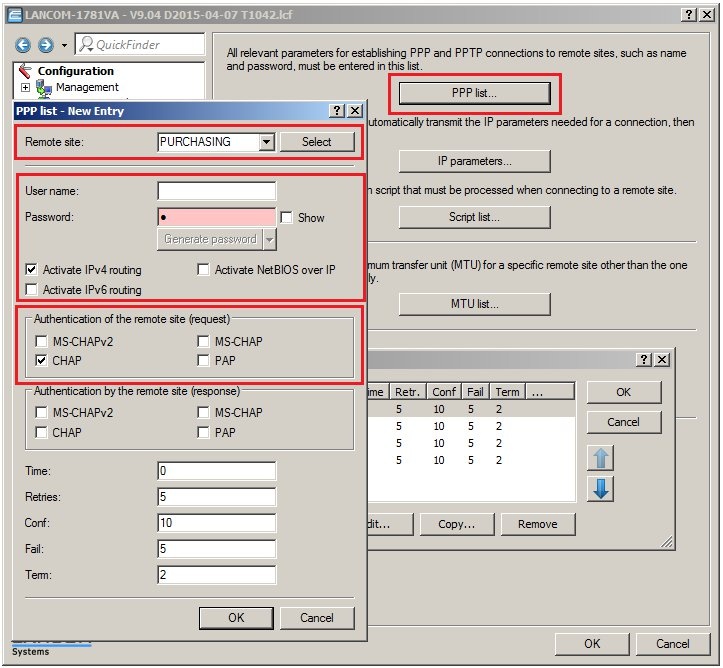
1.4) Go to the menu Configuration -> Communications -> Protocols -> PPP list and Add a new entry.
Enter the user Purchasing as remote site into the PPP list without a user name but with a shared password, which is to be used by all employees in the department. Set authentication (encrypted) as CHAP. IPv4 routing is activated for this PPP user.
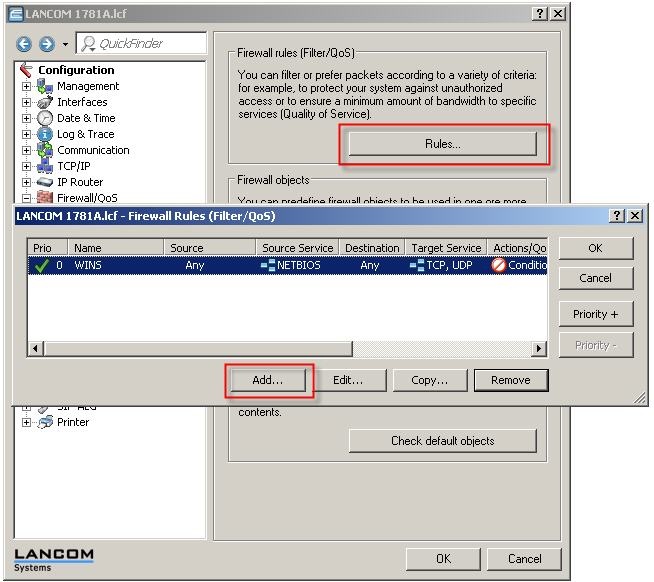
1.5) The firewall can be used to control which services are available for the employees in the Purchasing department. In this example the services WEB and MAIL are to be released.
Go to the menu Configuration -> Firewall/QoS -> Rules and Add a new rule.
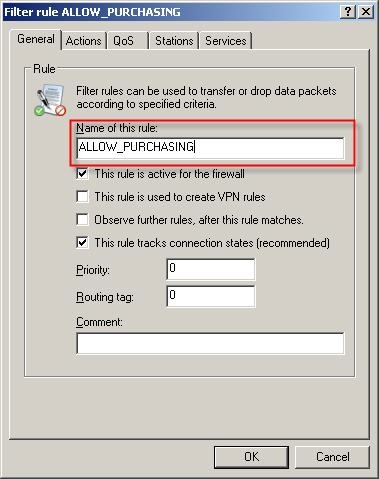
1.6) Enter a name for the new rule.
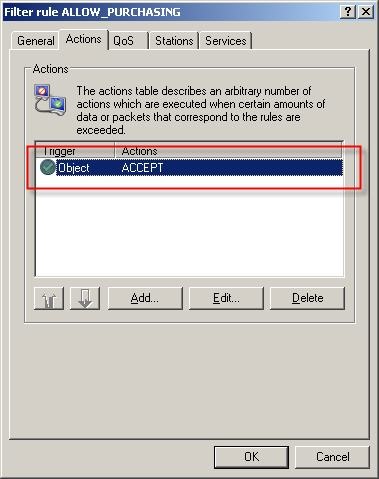
1.7) Go to the Actions tab and select the object ACCEPT.
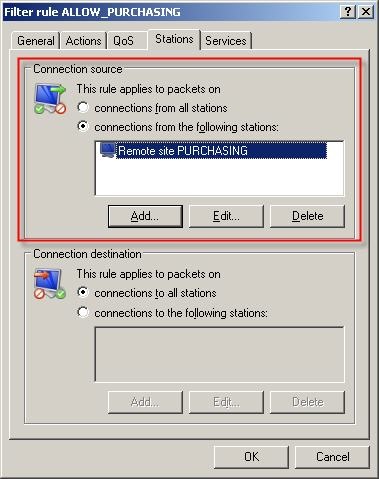
1.8) As the Connection source select the remote site PURCHASING.
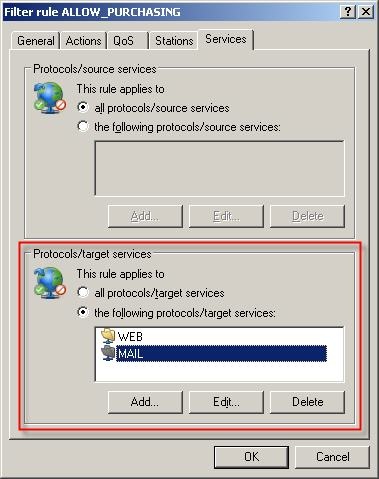
1.9) On the Services tab, go to the Target services section and add the objects WEB and MAIL.
1.10) Close the dialog with OK and write the configuration back to the LANCOM router.
2. Configuring the PPPoE client in Windows 7:
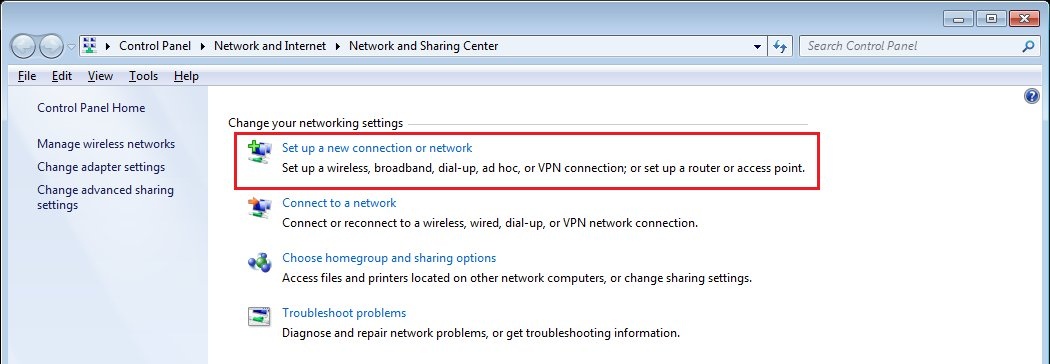
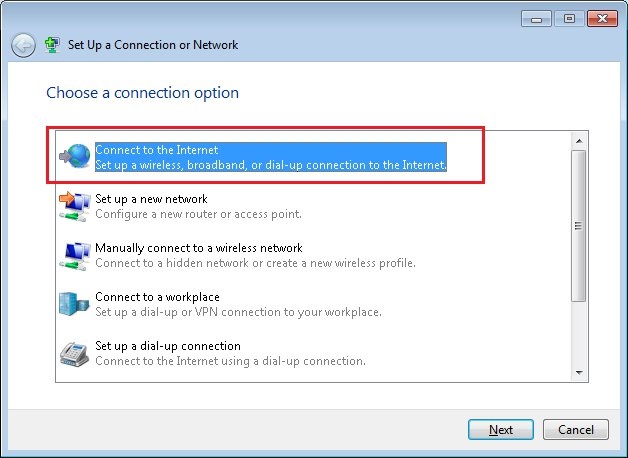
2.1) Click on Start -> Control Panel -> Network and Sharing Center and select the option Set up a new connection or network.
2.2) As a network connection type, select Connect to the Internet.
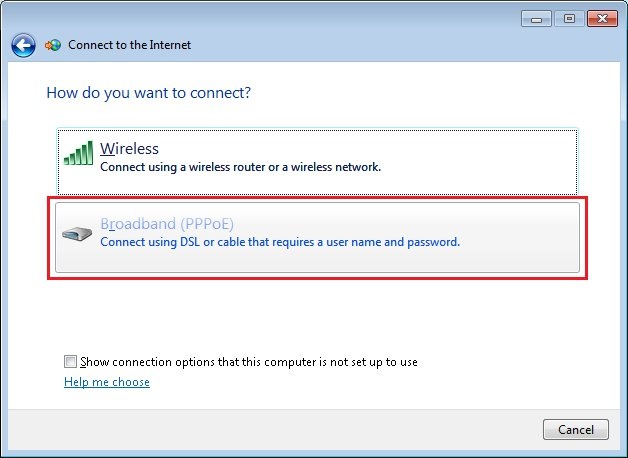
2.3) In the next dialog, select Broadband (PPPoE).
2.4) Here you enter the PPP remote site and the associated password.
2.5) Give the PPPoE connection a Connection ame.
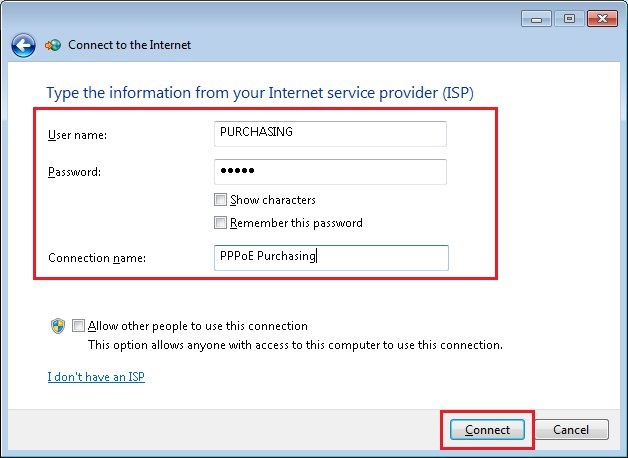
2.6) Click on Connect to close the wizard.
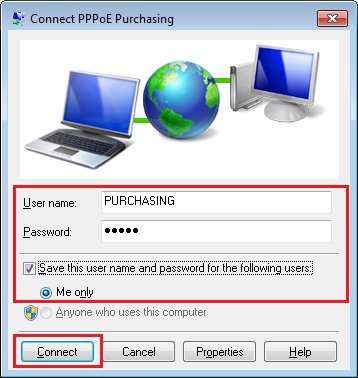
2.7) Enter the Password and click on Connect. This establishes the connection to the LANCOM router.
|
|
