Description: Due to the scarcity of free IPv4 addresses, providers are mainly offering Dual-Stack Lite connections. This provides an IPv6 address and a private IPv4 address. Providers implement this with the help of carrier-grade NAT.
External access is therefore only possible by means of the IPv6 address.
Setting up a VPN connection from a pure IPv4 connection is not possible without some additional tools. This requires the use of a translator from IPv4 to IPv6, which is known as a
tunnel broker (6in4) and makes use of IPv4 and IPv6 addresses.
Please note that this service transmits the data via the servers of the service provider. If the data is not encrypted, the provider is theoretically able to read it! However, this example configuration transmits the data over an encrypted VPN connection. This document describes how to set up a VPN connection from an IPv4 to an IPv6 connection using the tunnel broker
Hurricane Electric.
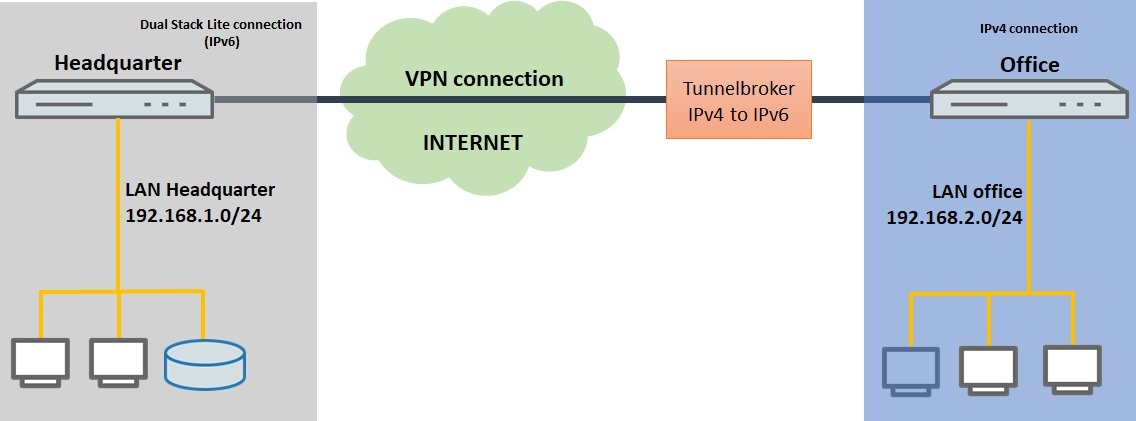
Scenario: - The headquarters has an IPv6 Internet connection with Dual-Stack Lite
- A branch office has a pure IPv4 Internet connection.
- A VPN connection is required between the branch office and the headquarters.
 Requirements:
 - Configured and functional Internet connections at the headquarters and the branch office
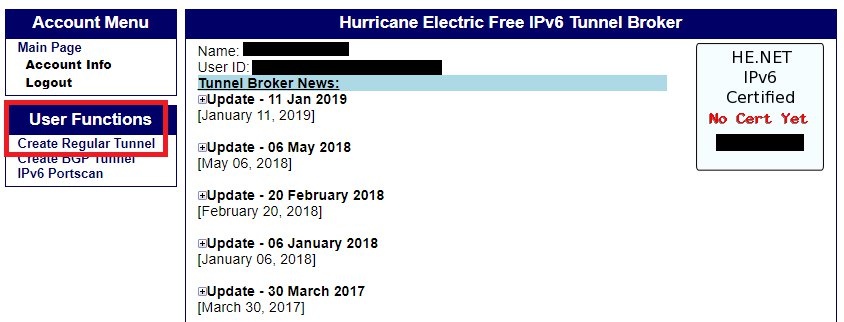
Procedure: 1) Creating a tunnel at the tunnel broker Hurricane Electric: 1.1) Login to your account at
tunnelbroker.net.
1.2) Under the item
User Functions, click on
Create regular tunnel.
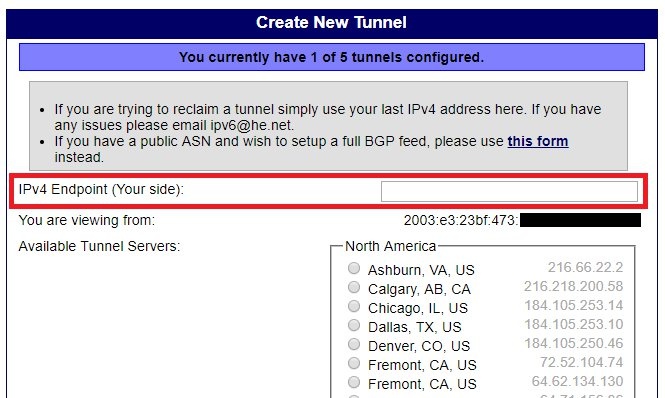
1.3) Under
IPv4 Endpoint (your side), enter the
IPv4 address of the branch office.
Info: - The closest available tunnel server is selected automatically when accessing via IPv4. You can also select this manually (for example, if you are in another location).
1.4) Finally, click on
Create tunnel to create the tunnel.

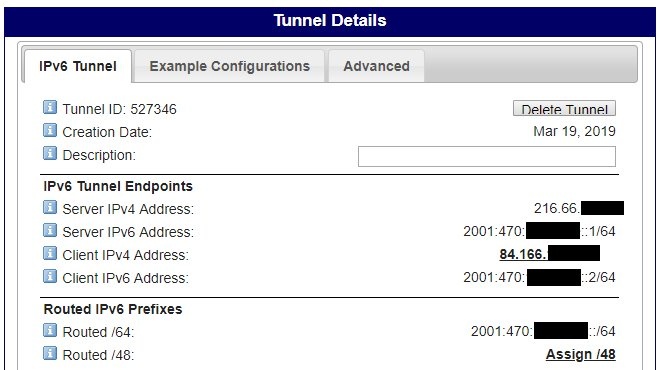
1.5) An overview page then displays the parameters used for tunnel establishment.
 2) Setting up the 6in4 tunnel on the LANCOM router at the branch office:
 2.1) Open the configuration for the router at the headquarters and switch to the menu item
IPv6 -> Tunnel -> 6in4 tunnel.
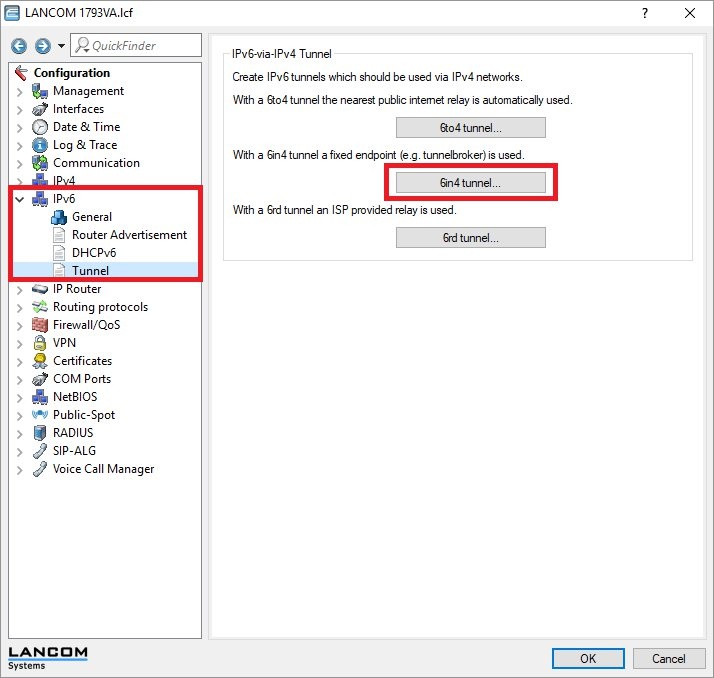
2.2) Create a
new entry and enter the following information:
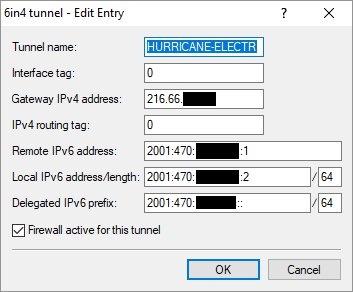
- Tunnel name: Enter a descriptive name.
- Gateway IPv4 address: Enter the Server IPv4 address that was displayed in step 1.5.
- Remote IPv6 address: Enter the Server IPv6 address that was displayed in step 1.5.
- Local IPv6 address / length: Enter the Client IPv6 address and the prefix length that were displayed in step 1.5.
- Delegated IPv6 prefix: Enter the prefix from Routed /64 and the prefix length that were displayed in step 1.5.
2.4) Navigate to the menu
IP router -> Routing -> IPv6 routing table.
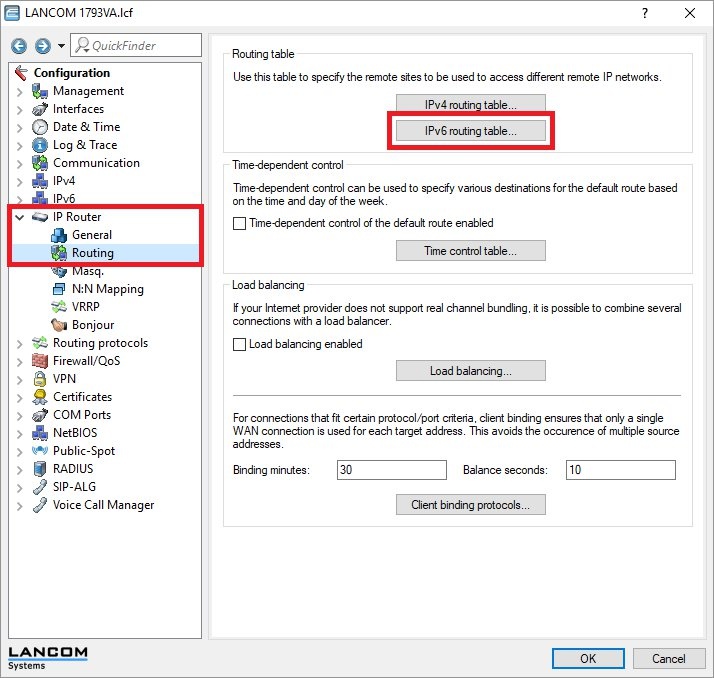
2.5) Click on the button
Default route to open a template.
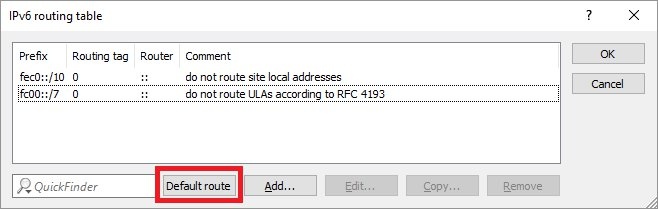
2.6) For the drop-down menu
Router, select the name specified in
step 2.2.

2.7) Under
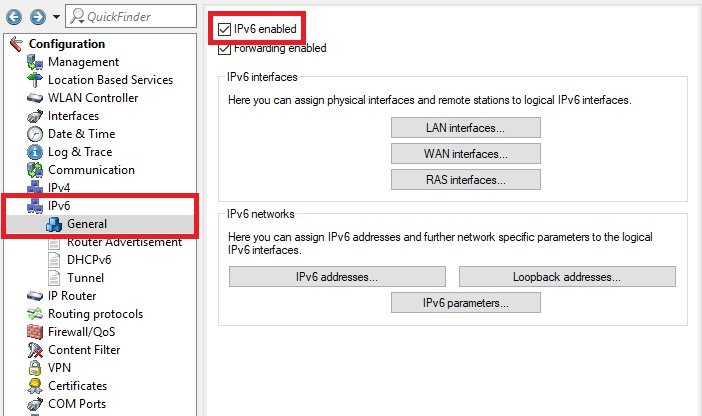
IPv6 -> General, make sure that the option
IPv6 enabled contains a checkmark.
2.8) Write the configuration back to the router.
3) Setting up the VPN connection at the headquarters and the branch office: 3.1) On both routers, start the Setup Wizard
Connect two local area networks (VPN) and set up the connection as described in the following article:
 Info:
Info: - Whether the headquarters or the branch office establishes the VPN connection is immaterial.
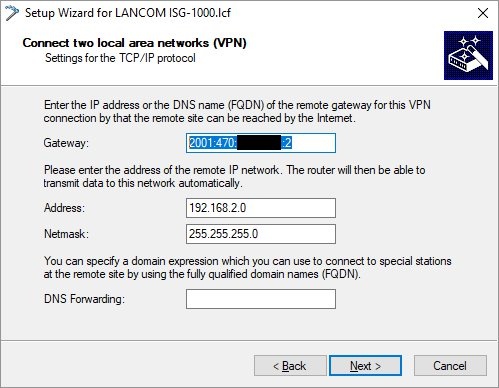
3.2) When setting up the VPN connection at the
headquarters, set the
gateway not as the IPv4 address but as the
Client IPv6 address as displayed in
step 1.5.
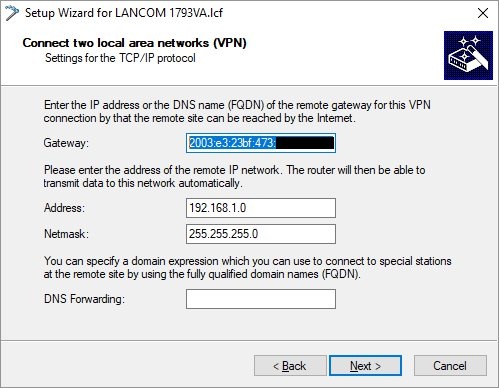
3.3) When setting up the VPN connection at the
branch office, set the
gateway not as the IPv4 address but as the
IPv6 address of the headquarters.
Info: - A DynDNS entry can also be used to point to the IPv6 address.
3.4)
The VPN connections are established and the configuration steps are completed.
4) Optional setup of IPv4 address updates at the branch office: If the branch office has a
dynamic IPv4 address, it is necessary to
set up IP address updates there.
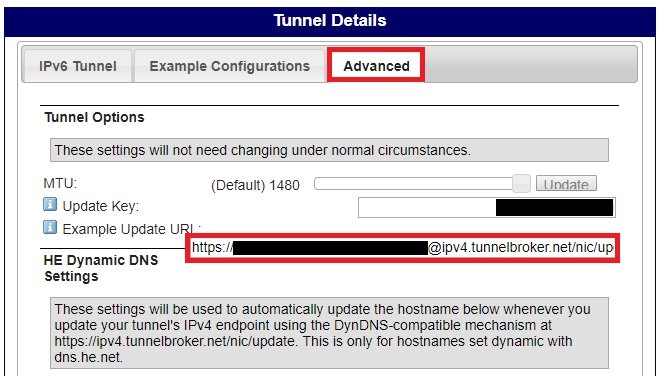
4.1) In the details for the
created 6in4 tunnel, navigate to the
Advanced tab and copy the update command
Example update URL.
4.2) Open the configuration for the router at the branch office and switch to the menu item
Communication -> General -> Action table.
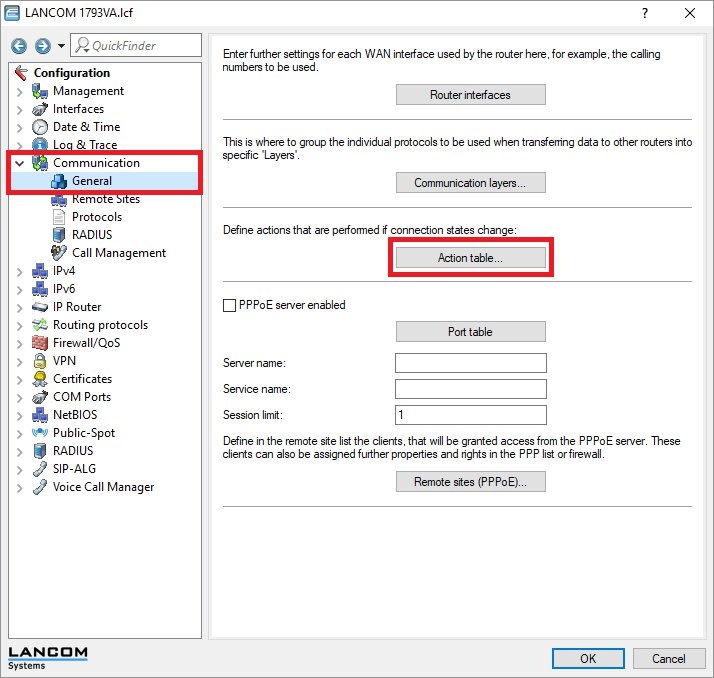
4.3) Create a
new entry and enter the following information:
- Name: Enter a descriptive name.
- Remote site: Select the Internet connection from the drop-down menu.
- Action: Paste the update command copied in step 4.1.
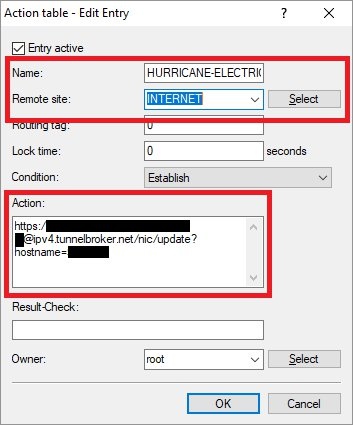 Important: ConditionEstablish
4.4) You can now write the configuration back to the device.
