Description: This document uses a given scenario to describe how to set up policy-based routing on a LANCOM router.
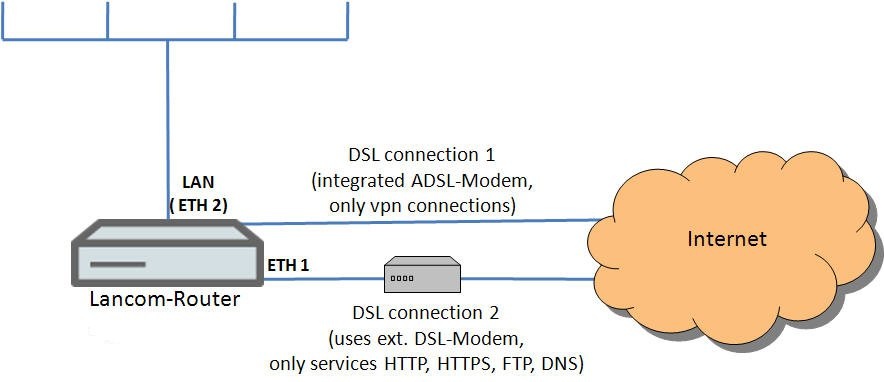
Requirements: You need the current version of LCOS and the current LANtools. Scenario: The configuration is carried out for the following example scenario. - Two DSL connections are to be set up.
- The first DSL connection is to be implemented with the integrated ADSL2+ modem in the LANCOM router.
- The second DSL connection is to be implemented with an external DSL modem, which is connected to the Ethernet port ETH 1 on the LANCOM router.
- The LANCOM router handles the dial-in and logging on at the provider for both of the DSL connections.
- All configured VPN connections are to be routed via the first DSL connection.
- The services HTTP, HTTPS, FTP, and DNS are to be routed over the second DSL connection.
- The LANCOM router is already connected to the local network via Ethernet interface ETH 2.
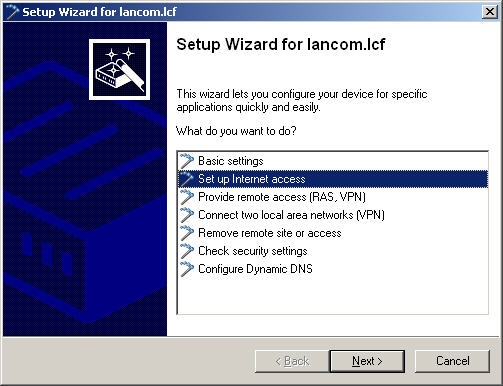
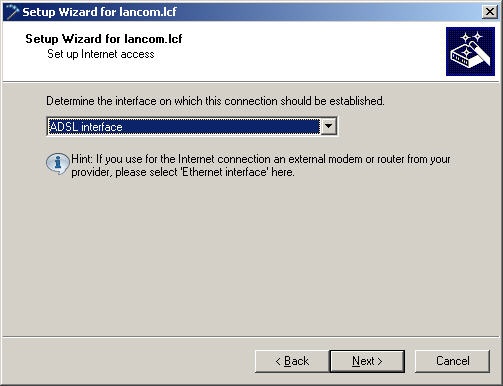
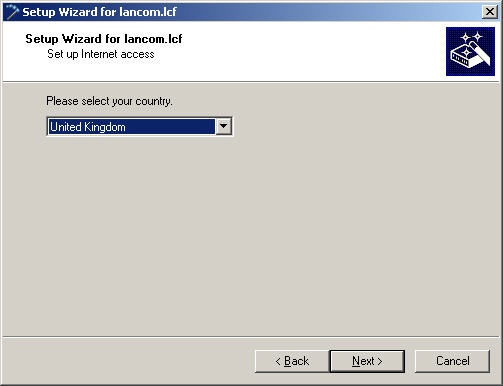
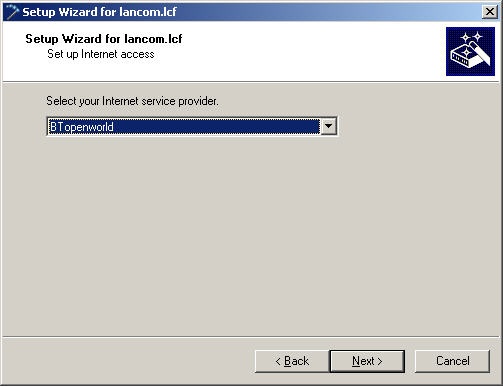
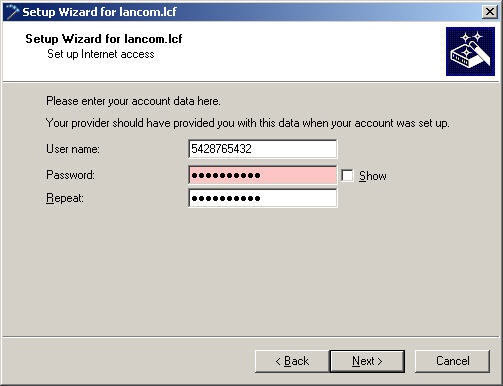
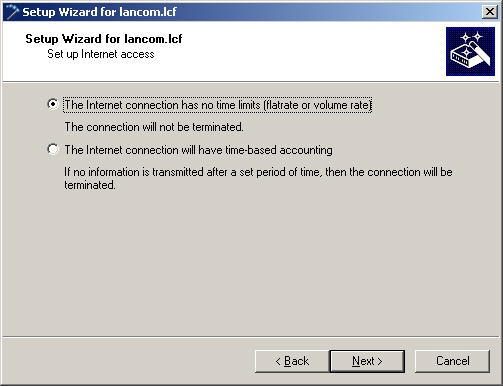
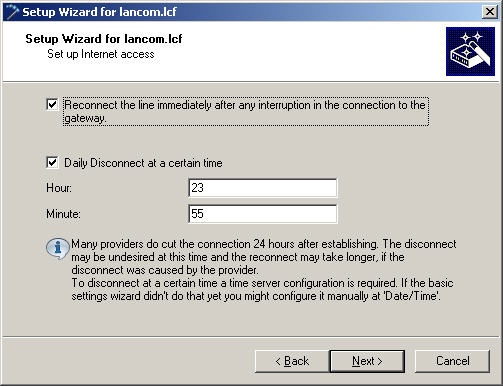
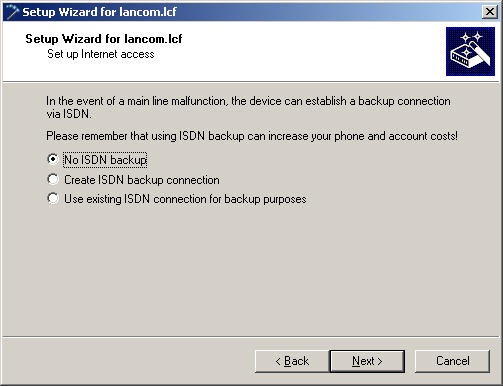
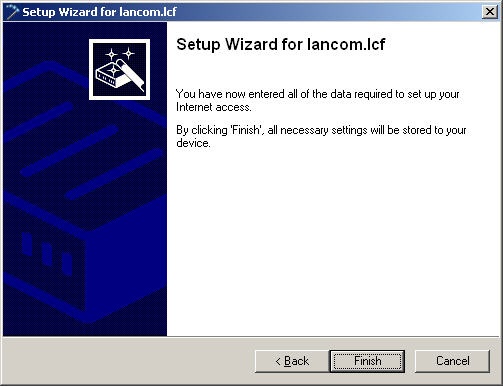
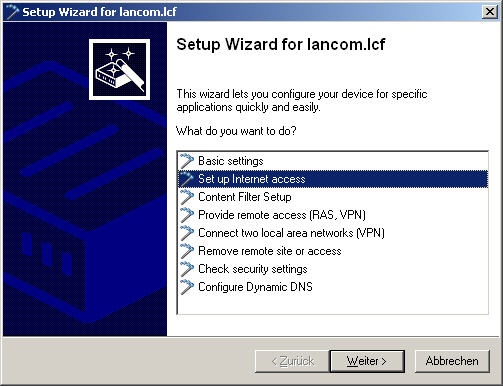
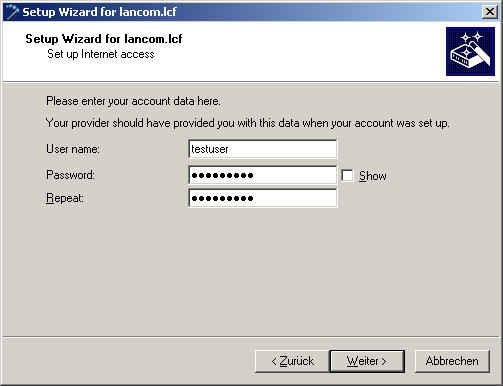
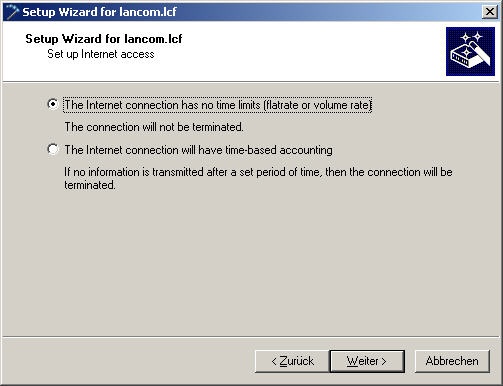
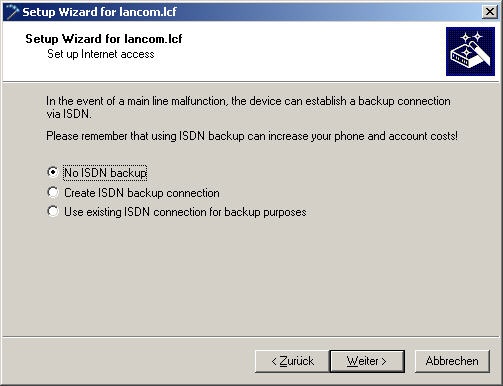
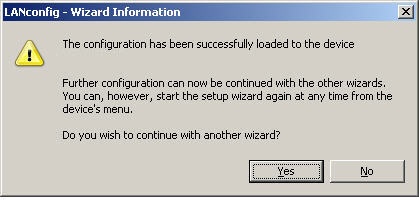
 1. Setting up the first Internet connection: 1. Setting up the first Internet connection: 1. Launch the Setup Wizard for the LANCOM router and select the option Set up Internet access. 2. Specify that the connection is to be established via the ADSL interface. 3. Select your country. 4. Select your Internet provider. 5. Enter a name for your Internet connection. In the interests of clarity we use the name INTERNET1 for this example. 6. Enter your login data in the following dialog. 7. You can apply the following default settings without modification. If you wish to use a different time for the daily forced disconnection, change the values in the appropriate fields. 8. In this example, no ISDN backup is used, so we will retain the default settings. 9. Exit the setup Internet connection wizard with the Finish button. The configured values are then written to the LANCOM router. 10. After the configuration is written to the device, the setup wizard asks whether you want to continue one with another wizard. At this point confirm this with Yes, because another DSL connection has to be set up.
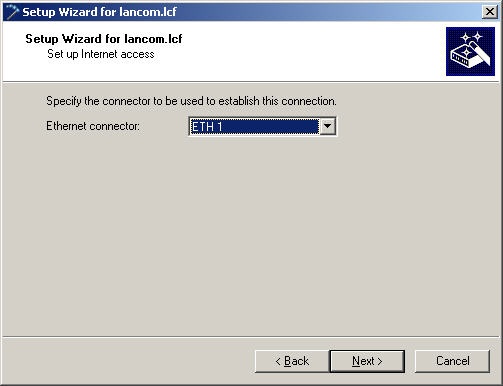
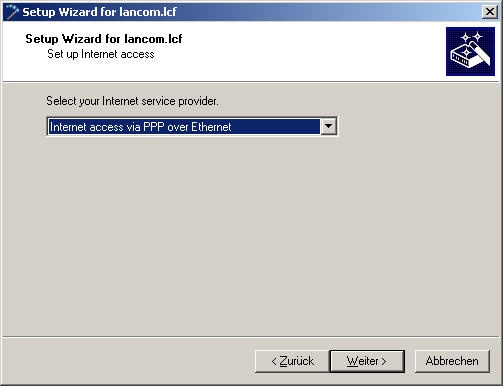
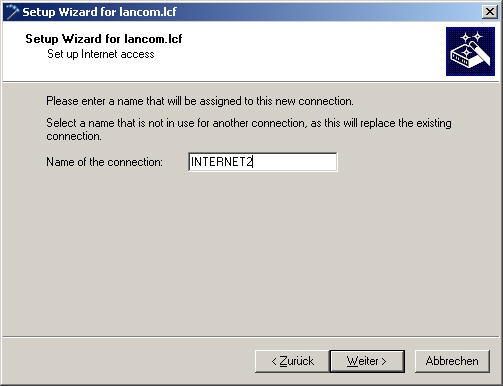
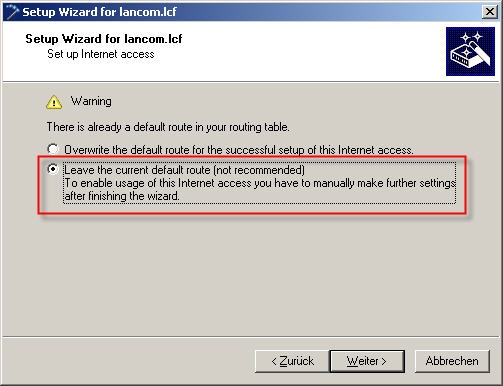
2. Setting up the second Internet connection: 1. Select the option Set up Internet access again. 2. Specify that the connection is to be established via the Ethernet interface. 3. As the second external DSL modem is connected to the Ethernet port of the LANCOM router, the ETH 1 port must be selected in the following dialog. 4. Select your country. 5. Select the option Internet access via PPP over Ethernet. 6. Enter a name for your Internet connection. At this point it is important to give this Internet connection a different name than the first one (INTERNET1). In the interests of clarity we use the name INTERNET2 for this example. 7. Enter your login data in the following dialog. 8. Select the corresponding time model. 9. You can apply the following default settings without modification. If you wish to use a different time for the daily forced disconnection, change the values in the appropriate fields. 10. In this example, no ISDN backup is used, so we will retain the default settings. 11. A warning appears at this point because the previously established Internet connection INTERNET1 is configured as the default route. For now, select the option leave the current default route. Later in the configuration, we will add another default route for the second internet connection. 12. Exit the setup Internet connection wizard with the Finish button. The configured values are then written to the LANCOM router. 13. After the configuration is written to the device, the setup wizard asks whether you want to continue one with another wizard. Select No at this point, because the setup wizard is not required for the remaining steps in the configuration.
3. Manual configuration steps: For the remainder of the configuration we have to continue in the configuration dialog for the LANCOM router.
3.1 Adding the data transfer rate :
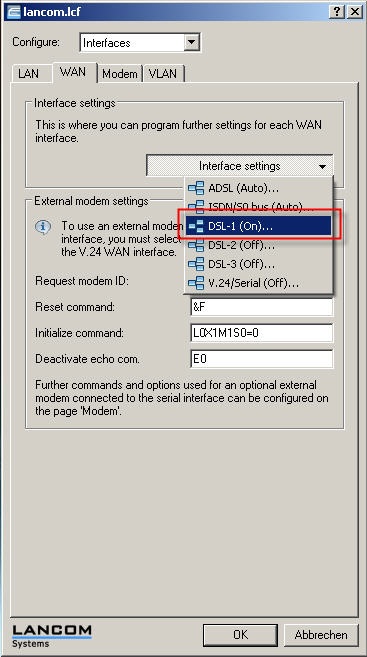
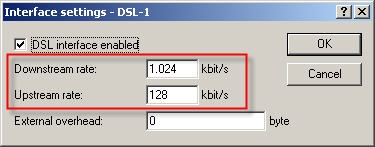
The data transfer rate of the internal ADSL modem in the LANCOM router is already known, since it was negotiated with the provider during DSL synchronization. However, the LANCOM router does not know the data transfer rate of the external DSL modem, so this must now be entered manually into the connection settings for the DSL interface: 1. Go to the menu item Interfaces → WAN. 2. Select the DSL-1 interface from the interface settings: 3. In the fields downstream and upstream rate, enter the data transfer rates for the DSL line. 4. Accept your entries with OK.
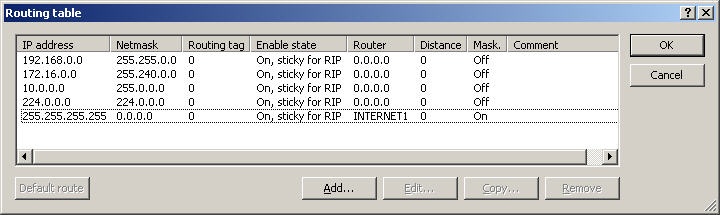
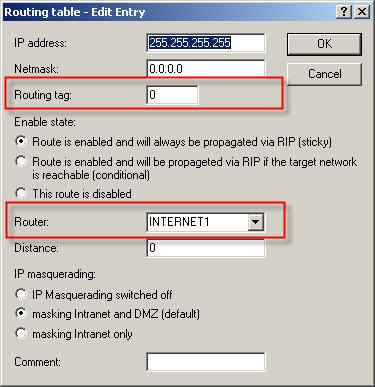
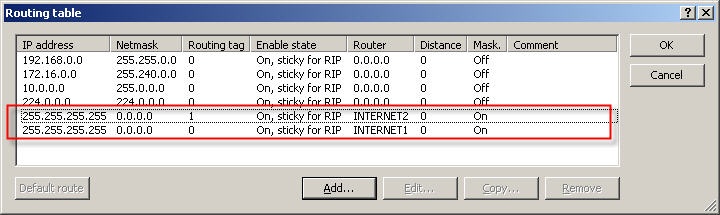
3.2 Configuring the Internet routes: You can now configure both Internet routes in the routing table. To do this, navigate to the menu item IP router → Routing → Routing table. In this example scenario, all VPN connections are to be routed via the first DSL remote INTERNET1, so you can leave the default route as it is. 1) Use the Add... button to configure a second default route. In the field IP address enter the address 255.255.255.255. 2) In the routing tag field, you must enter the value 1. The remote site to be used for the second default route should be the DSL remote station INTERNET2. 3) For IP masquerading activate the option Masking intranet and DMZ (default). Now close the dialog window with the OK button. 4) The routing table should now contain the following Internet routes: 5) Now close the routing table window with the OK button.
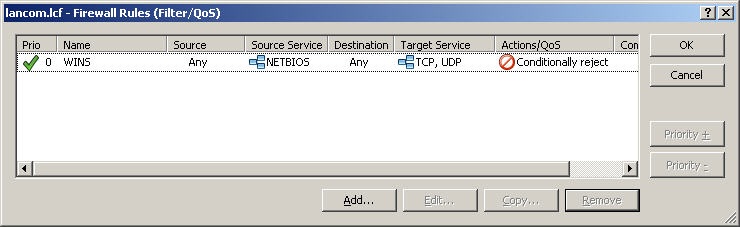
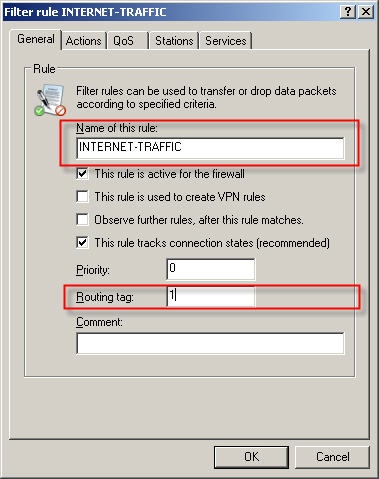
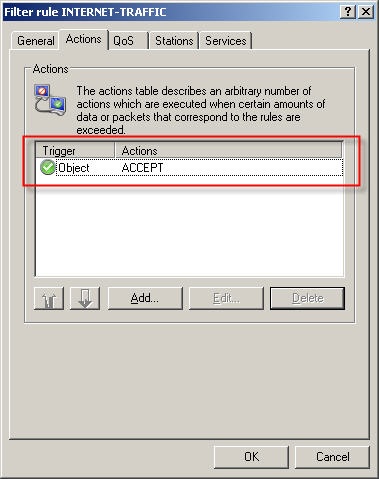
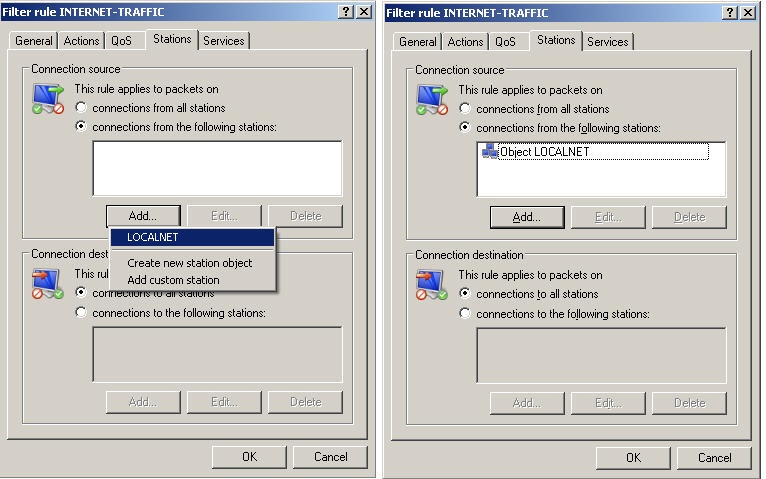
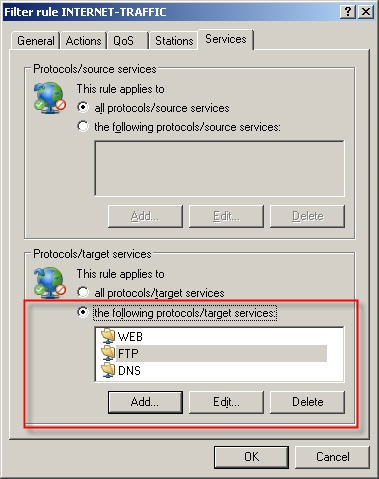
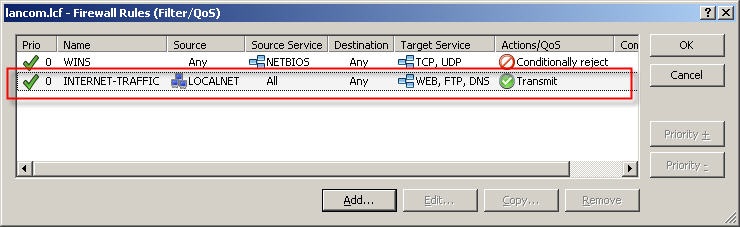
3.3 Configuring the policy for Internet traffic routing: In this example scenario, the services HTTP, HTTPS, FTP, and DNS should only be routed over the second DSL connection INTERNET2 (and given routing tag 1). To achieve this you must add a new rule to the firewall configuration for the LANCOM router: 1) To do this, please switch to menu item Configuration → Firewall/QoS → Rules and open the rules list. 2) Use the Add... button to configure a new firewall rule. Enter a descriptive name for the new firewall rule and, in the routing tag field, enter the value 1. 3) Go to the Actions tab and set up the action object ACCEPT. 4) This rule should only apply to packets that originate in the local network. For this reason, go to the Stations tab and, as a Connection source, add the station object LOCALNET. 5) This rule is to operate according to the various services used, and so these services must be defined. Change to the Services tab. Under Protocols/target services use the Add... button to select the service objects WEB (includes HTTP and HTTPS), FTP, and DNS. 6) Close the configuration dialog with OK. The table of firewall rules should then contain the following rule: 7) Close the Firewall rules dialog with OK and then write the configuration back to the LANCOM router with the OK button. This concludes the configuration steps necessary to set up the policy-based routing. |