Description:
This document describes how you set up a network connection using an IKEv2 site-to-site VPN connection between two LANCOM routers. The LANCOM RADIUS server is used for authentication.
Requirements:
- Functional Internet connection at both ends.
Scenario:
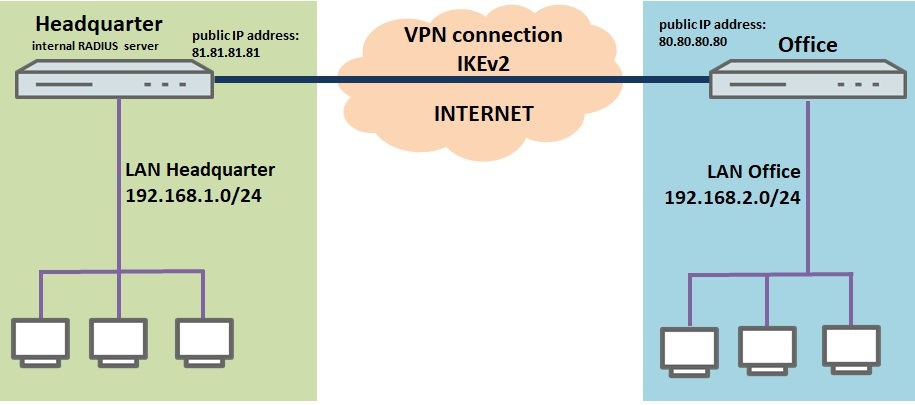
- A company wishes to interconnect the local networks at their headquarters and at a branch office by means of an IKEv2 site-to-site VPN connection.
- The LANCOM RADIUS server is used for authentication.
- Both sites have a LANCOM router as their gateway and an Internet connection with a fixed public IP address. The public IP address of the Headquarters is 81.81.81.81, and the branch office is 80.80.80.80.
- The VPN connection is established from the branch office to the headquarters.
- The local network at the headquarters has the IP address range 192.168.1.0/24, and the branch office uses the local IP address range 192.168.2.0/24.
Procedure:
1) Manual configuration of the LANCOM router at the headquarters:
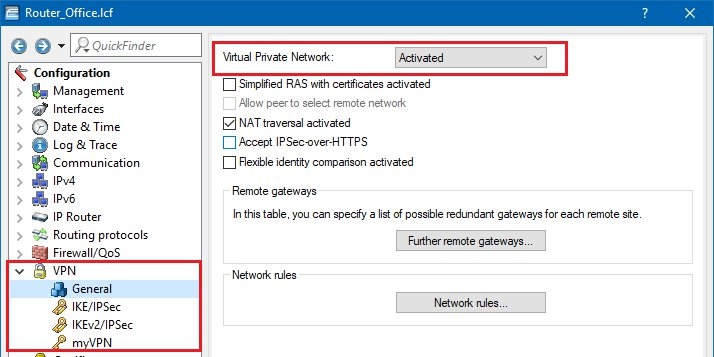
1.1) Open the configuration for the LANCOM router at the headquarters and switch to the menu item VPN -> General.
1.2) Enable the function Virtual Private Network.

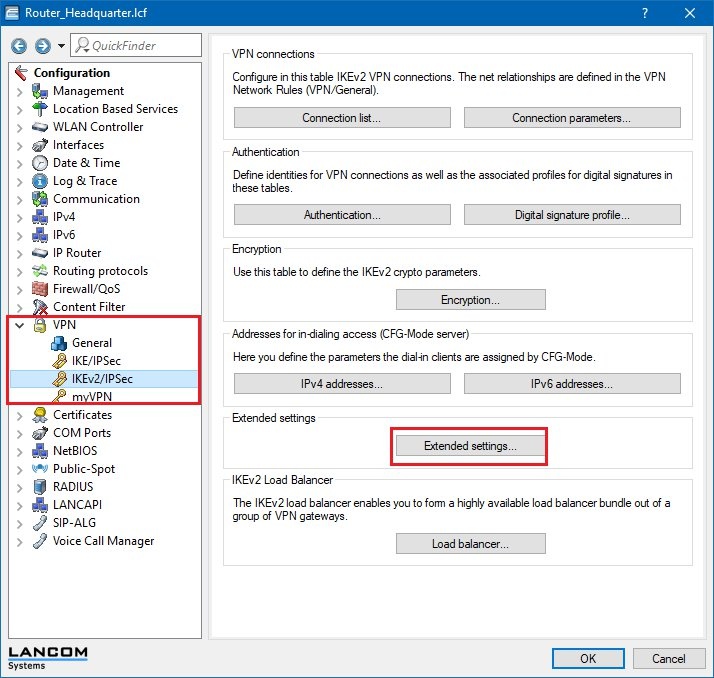
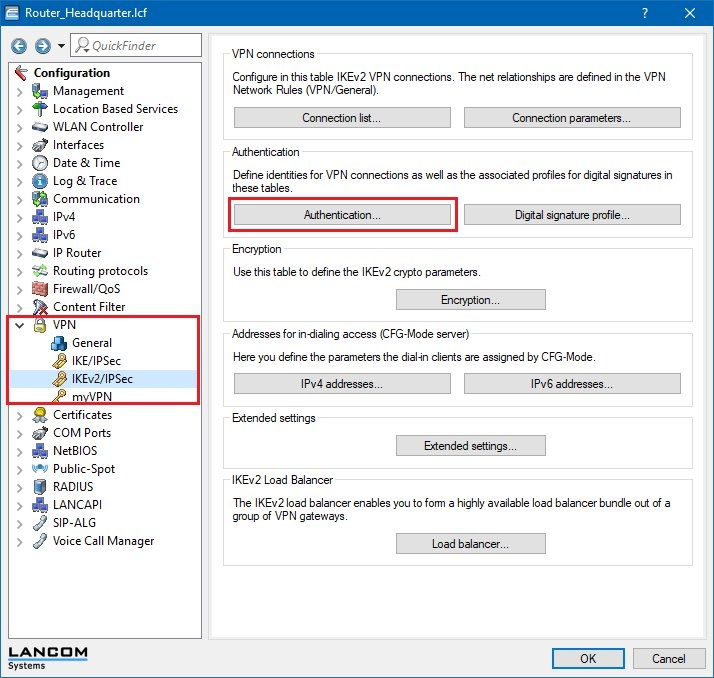
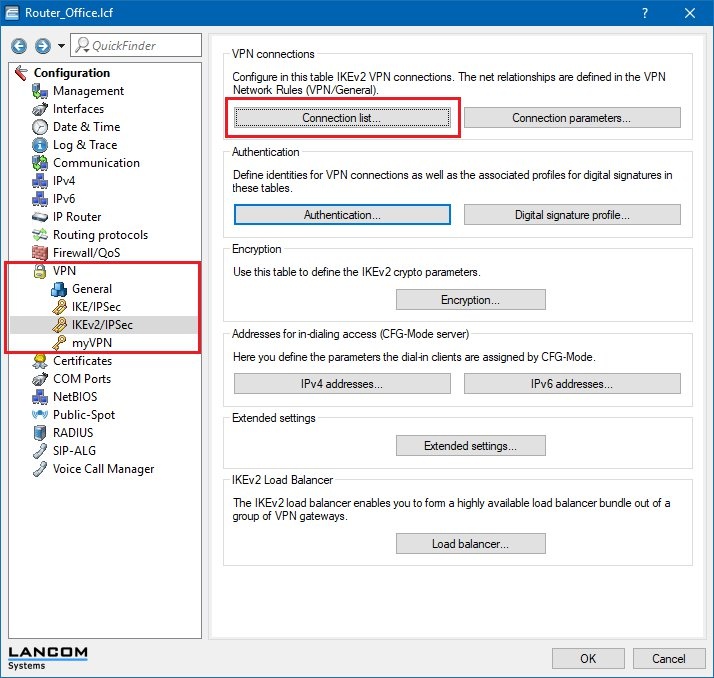
1.3) Open the menu item VPN -> IKEv2/IPSec and click the button Extended settings.
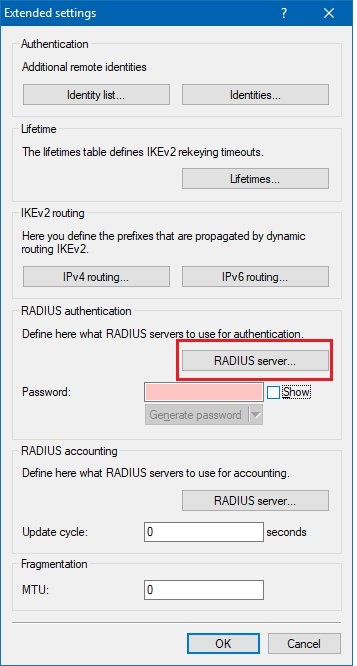
1.4) On the RADIUS authentication pane, click the RADIUS server button and add a new entry.
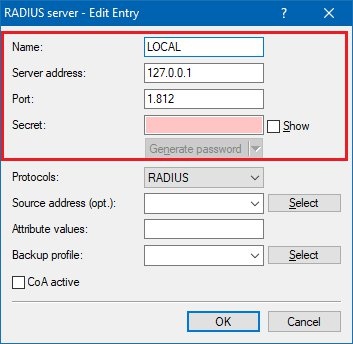
1.5) Set a Name of your choice for this entry.
- In the field Server address, enter the IP address of the internal RADIUS server (127.0.0.1).
- The default port is 1812.
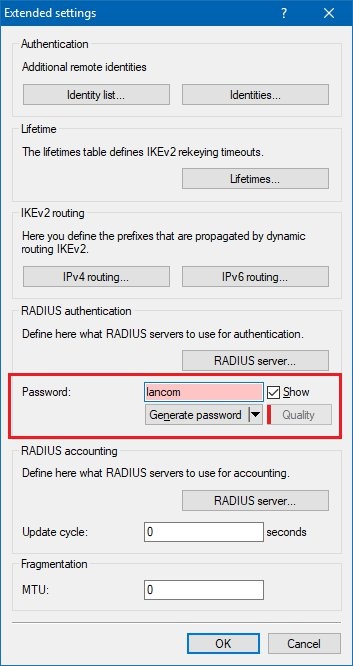
1.6) Close the dialog with OK and in the Password field, specify a challenge password that the RADIUS server receives in the access-request attribute as the user password.
The RADIUS server usually associates this password directly with a VPN peer for network access authorization. With IKEv2 however, the requesting VPN peer is authorized not by the RADIUS server, but instead by the LANCOM gateway after this receives the corresponding authorization in the access-accept message from
the RADIUS server.
Accordingly, you enter a challenge password at this point. The challenge password in this example is lancom (also see step 1.12).
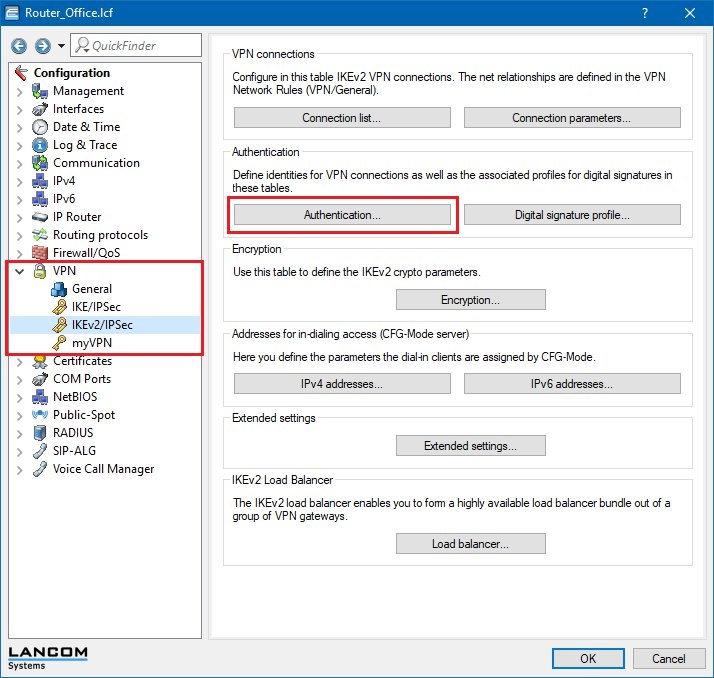
1.7) Open the menu item VPN -> IKEv2/IPSec and click the button Authentication.
1.8) Click on the Add... button to create a new entry.
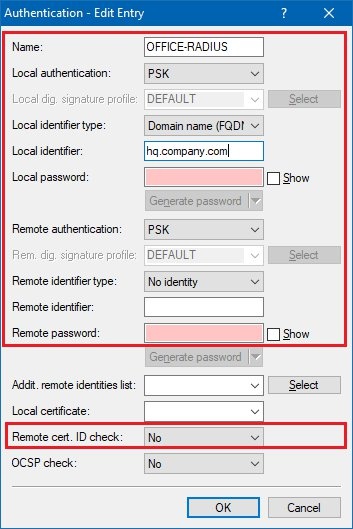
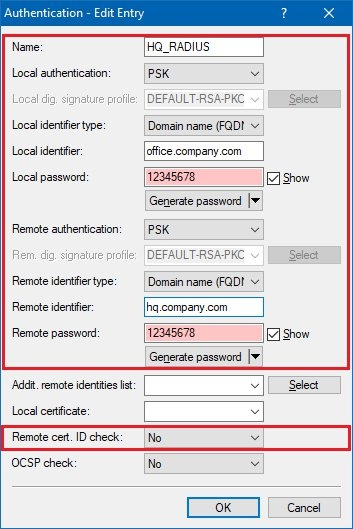
1.9) Enter the information for the authentication of the VPN connection into the configuration window.
Name:
Enter the
name for the authentication here. This entry is used later in the VPN connection list (see step 2.11).
Local authentication:
Select the
authentication type used on the router at the headquarters . This example uses authentication by
pre-shared key (PSK) .
Local identifier type:
Select the
identifier type used on the router at the headquarters. In this example, the identity type was set to
Domain name (FQDN) .
Local identifier:
Set the local identifier. In this example, the
LANCOM router at the headquarters uses the
local identity hq.company.com .
Remote authentication:
Select the
identifier type used on the router at the branch office. This example uses authentication by
pre-shared key (PSK) .
Remote identifier type:
The remote identifier type is set to
No identity .
Remote cert. ID check:
As this function is not required, set this to
no .
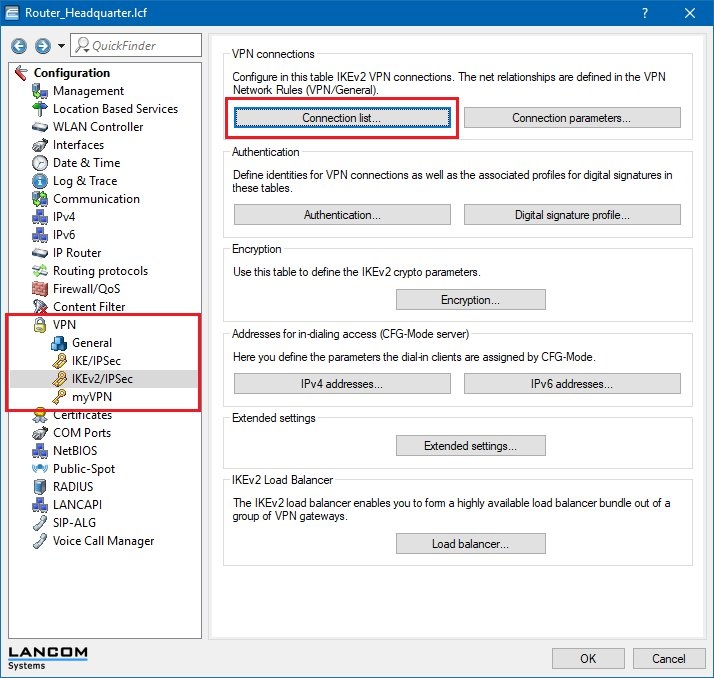
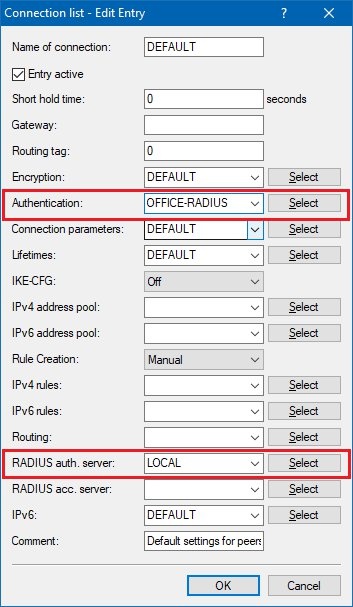
1.10) Open the menu item VPN -> IKEv2/IPSec and click the button Connection list.
1.11) Open the existing DEFAULT entry and modify the following parameters.
Authentication:
Select the authentication. The entry here corresponds to the name of the authentication that you set in step 1.9.
RADIUS auth. server:
Specify the RADIUS server entry created as of step 1.4.
1.12) Navigate to the menu RADIUS -> Server -> User table and use the Add button to add a new user entry.
- The name you set here is used later as the local identity in the VPN configuration of the branch office (see step 2.5).
-
- In the Password field you have to enter the challenge password that you set in step 1.6.
-
- The Service type must be set to the value Any.
-
- For the additional Attribute value you enter the network relations (SA) for this VPN connection:
LCS-VPN-IPv4-Rule=192.168.1.0/24 * 192.168.2.0/24
-
- The tunnel password you set here is used later as the local password in the VPN configuration of the branch office (see step 2.5).
-
- Set the Expiry type of the user account to Never.

1.13) Write the configuration back to the LANCOM router at the headquarters.
Note:
When the connection is established, the IP route is automatically created on the LANCOM router at the headquarters. There is no need to make a manual routing entry.
2) Manual configuration of the LANCOM router at the branch office:
2.1) Open the configuration for the LANCOM router at the branch office and switch to the menu item VPN -> General.
2.2) Enable the function Virtual Private Network.
2.3) Open the menu item VPN -> IKEv2/IPSec and click the button Authentication.
2.4) Click on the Add... button to create a new entry.
2.5) Enter the information for the authentication of the VPN connection into the configuration window.
Name:
Enter the name for the authentication here. This entry is used later in the VPN connection list (see step 2.8).
Local authentication:
Select the
authentication type used on the router at the branch office . This example uses authentication by
pre-shared key (PSK) .
Local identifier type:
Select the
identifier type used on the router at the branch office. In this example, the identity type was set to
Domain name (FQDN) .
Local identifier:
Set the local identifier. In this example, the
LANCOM router at the branch office uses the
local identity office.company.com (also see step 1.4).
Local password:
Set the
pre-shared key to be used to authenticate at the router at the branch office.
Remote authentication:
Select the
authentication type used by the LANCOM router at the headquarters . This example uses authentication by
pre-shared key (PSK) .
Remote identifier type:
Select the
identifier type used on the router at the headquarters. In this example, the identity type was set to
Domain name (FQDN) .
Remote identifier:
Set the remote identifier. In this example, the
LANCOM router at the headquarters uses the
remote identity hq.company.com .
Remote password:
Set the
pre-shared key to be used to authenticate at the router at the headquarters.
Remote cert. ID check:
As this function is not required, set this to
no .
2.6) Open the menu item VPN -> IKEv2/IPSec and click the button Connection list.
2.7) Click on the Add... button to create a new entry.
2.8) Enter the following information into the configuration dialog:
Name of connection:
Enter a name for the VPN connection. This name is used later in the routing table (see step 2.10).
Short hold time:
Specify the
short-hold time in seconds for the VPN connection. In this example, a value of
9999 seconds is entered into the LANCOM router at the branch office. This means that this router actively establishes the VPN connection.
Gateway:
Specify the
public IP address of the
LANCOM router at the headquarters . In this example, this is the IP address
81.81.81.81 .
Authentication:
Select the authentication. The entry here corresponds to the name of the authentication that you set in step 2.5.
IKE-CFG:
The
IKE config mode is not required, and therefore must be switched
off .
Rule creation:
The
rule creation is performed automatically .

2.9) Navigate to the menu IP router -> Routing -> IPv4 routing table.
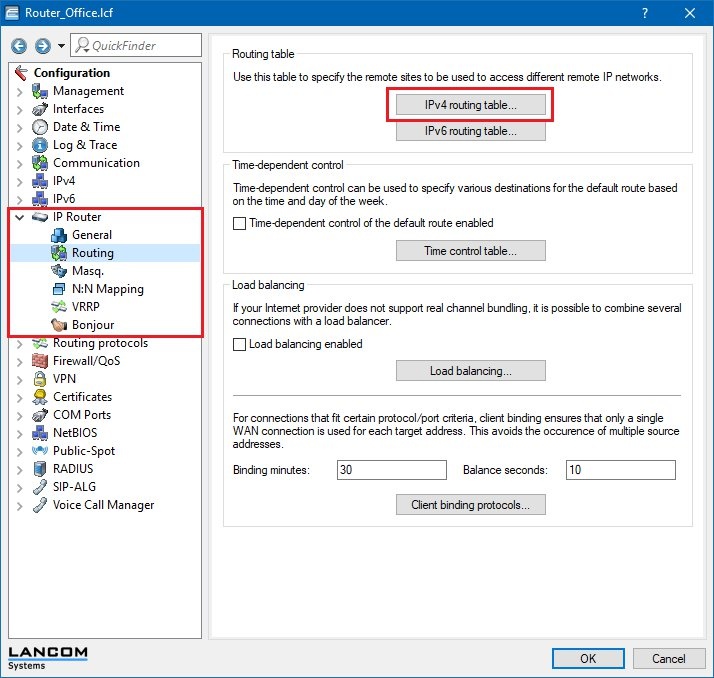
2.10) Add a new routing entry.
- As the IP address, enter the address of the local network at the headquarters. In this example it is 192.168.1.0.
- The netmask needs to be set to the value 255.255.255.0 as the local network at the headquarters is a class C network.
- For the Router field, select the identification of the VPN remote station (in this case: HQ).
- IP masquerading is switched off for this entry.
2.11) Write the configuration back to the LANCOM router at the branch office.
After the configuration has been written back to the LANCOM router at the branch office, the VPN connection can be established between the two LANCOM routers. You can check this for example by loading the two LANCOM routers into the LANmonitor.
Note:
If problems occur during connection establishment, or if the established VPN connection does not work properly, a
VPN Status Trace or a RADIUS Server Trace conducted at the headquarters
could help with the diagnosis .
|
|

