Description: This document describes how to incorporate the terms and conditions of use into the web site of the Public Spot option. Users must accept these terms and conditions of use before they can login to the Public Spot. To use your own content (layout, text, graphics, etc.) in the web site of the Public Spot option, you must replace the existing default web pages in the device with files that contain your modifications and additions. To this end LANCOM provides you with web-page templates, which you can modify according to your requirements and then upload to the LANCOM router. The terms and conditions of use for the Public Spot have to be accepted by the user before the login. For this application, the web page template has to be edited to be a Welcome page. The procedure for creating your own web sites for the Public Spot option is described in detail in the KnowledgeBase document Implementing own Web sites for the LANCOM Public Spot Option.
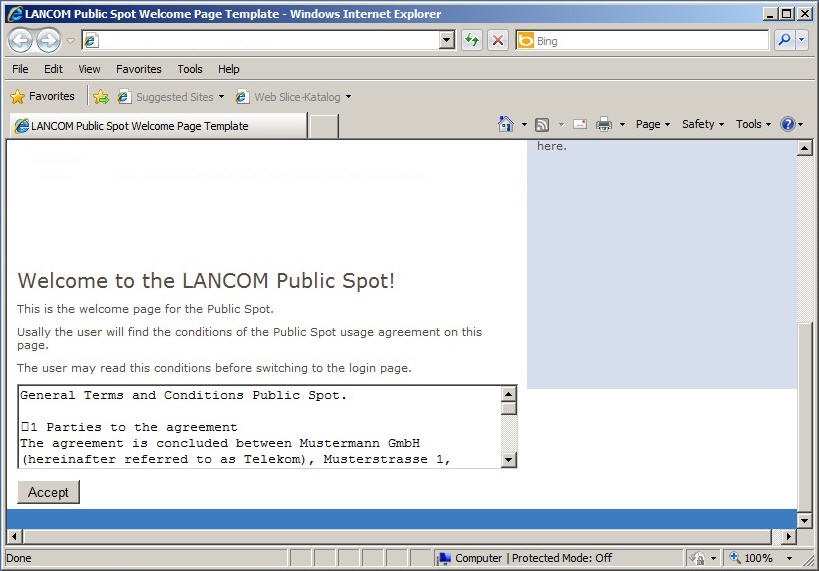
1) Use the LANCOM web-site template Welcome to construct your own Welcome web site, which will contain the terms and condition for using your Public Spot. Once the file is completed name it "welcome.html", for example.
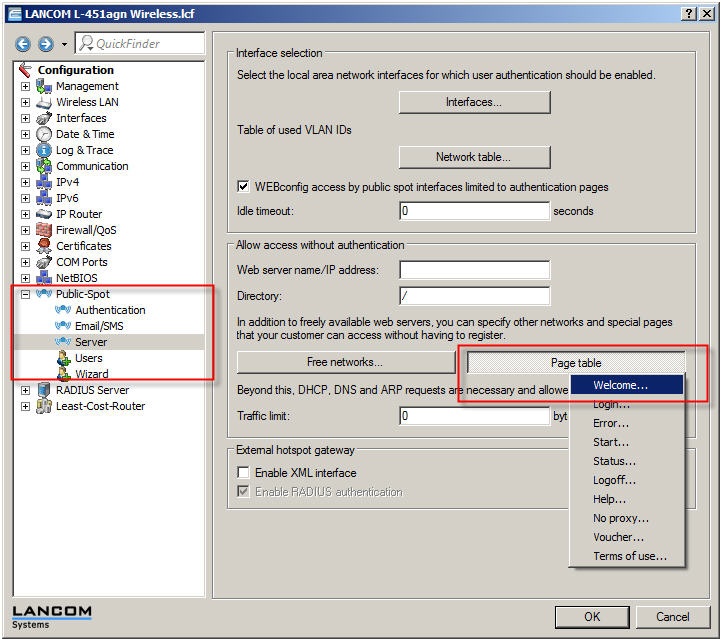
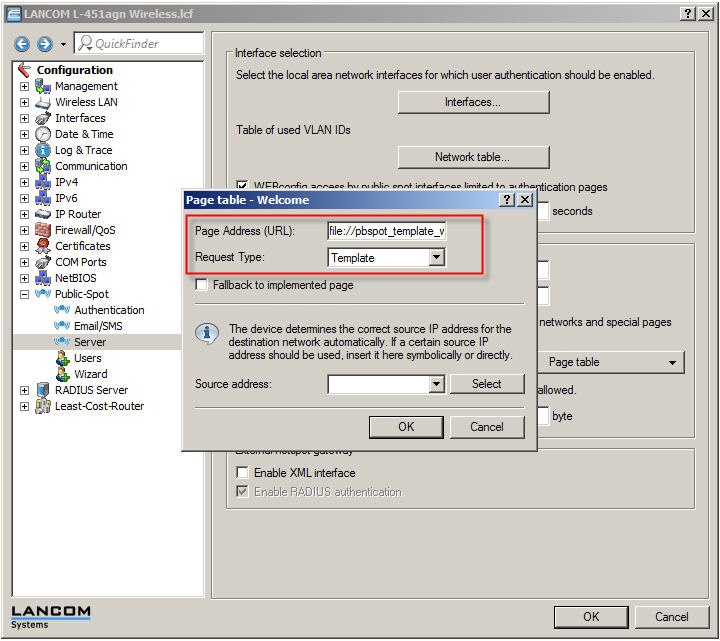
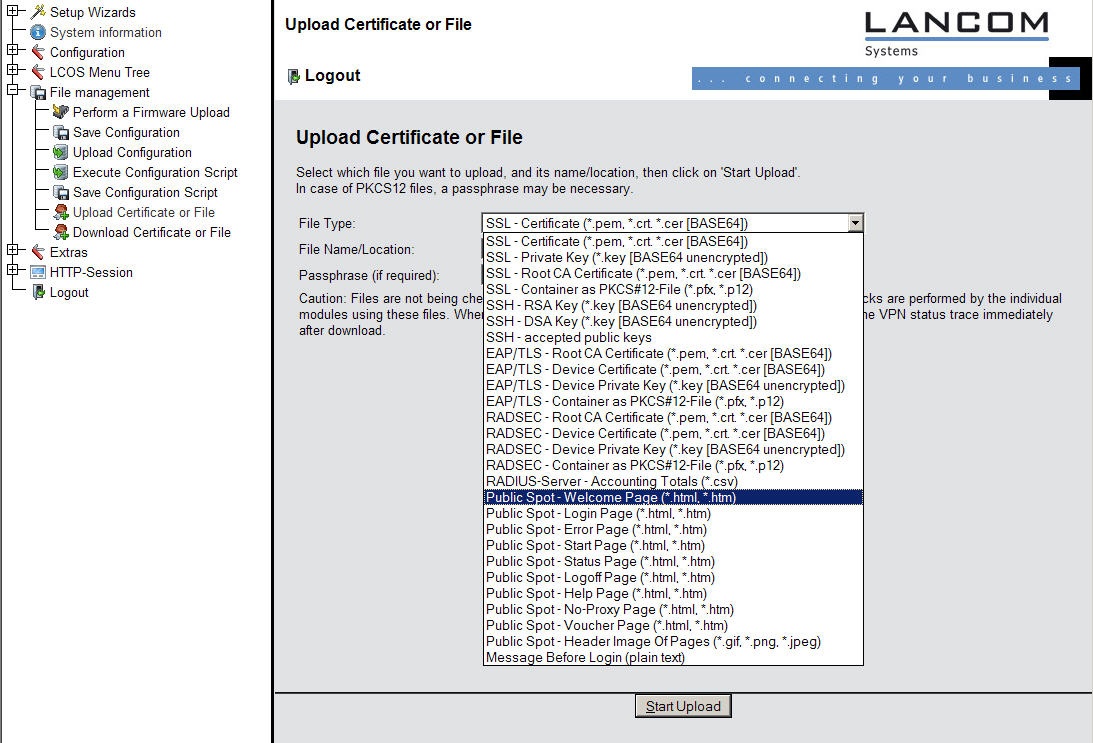
The new Welcome web page must include the Accept button contained in the template, as this is the link to the login page of the Public Spot. 2) In LANconfig, open the configuration dialog of the LANCOM router and switch to Public Spot dialog. 3) Go to the Public Spot tab and click on the drop-down menu Page table. 4) Select the item Welcome.... 5) In the following dialog, enter the Page address (URL) as file://pbspot_template_welcome . 6) Save your entries with OK. Now close the configuration dialog of the LANCOM router to write the changes back to the device. 7) The following steps upload your customized Welcome site into the LANCOM router. To do this, open the LANCOM's configuration in WEBconfig. 8) Switch to the menu item File management → Upload certificate or file. 9) From the drop-down menu, set the file type to Public Spot - Welcome page (*. html, *. htm). 10) Next to the File name field click on the Browse ... button and select the file you created for the welcome page (e.g. welcome.html). 11) Then click on Start upload. A message is displayed after a successful upload. 12) The upload completes the exercise. Log out of WEBconfig and close the web browser.
Function check: The next time the Public Spot is contacted, the Welcome screen appears along with the terms and conditions of use. Click on the Accept button to load the login page, where you can enter the password and your user ID. |