Description: This article describes how to assign a WLAN profile and certificate to new access points to enroll them for management by a WLAN controller.
Requirements: - Any browser for access using WEBconfig
Procedure: To enroll an access point for management and have it broadcast a wireless LAN, it needs to have a certificate and a WLAN configuration.
1) Automatically accept new access points: 1.1) Automatic certificate assignment: The certificate is issued if a configuration is available for the new access point (see
step 1.2 or
step 2).
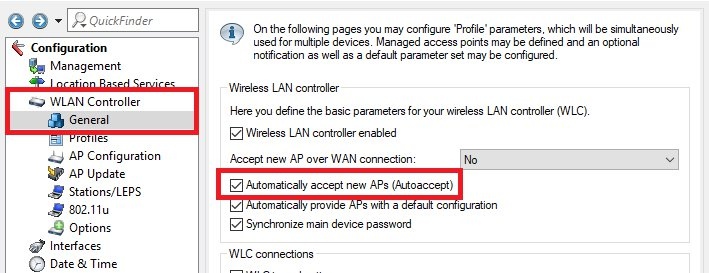
1.1.1) In the menu
WLAN Controller -> General, enable the option
Automatically accept new APs (Autoaccept).
 1.2) Automatic configuration assignment:
 The certificate can be issued either automatically (see
step 1.1) or manually (see
step 4).
A default profile is specified, and this specifies a WLAN profile. This will be automatically assigned to a new access point.
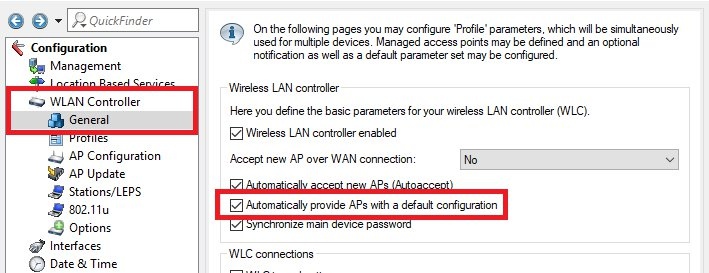
1.2.1) In the menu
WLAN Controller -> General, enable the option
Automatically provide APs with a default configuration.
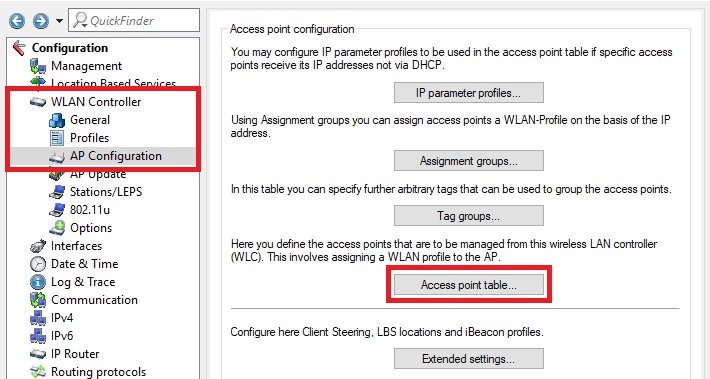
1.2.2) Navigate to the menu item
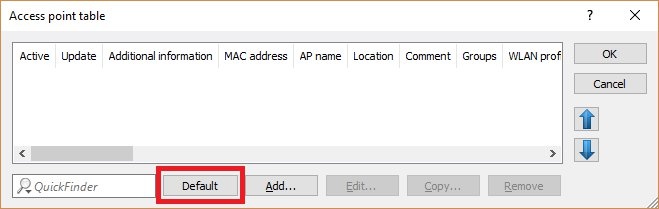
WLAN controller -> AP configuration -> Access point table.
1.2.3) Click the button
Default to create an entry with the MAC address
ff:ff:ff:ff:ff:ff.
Info: - An entry with the MAC address
ff:ff:ff:ff:ff:ff- is used as the default configuration for all unconfigured access points.
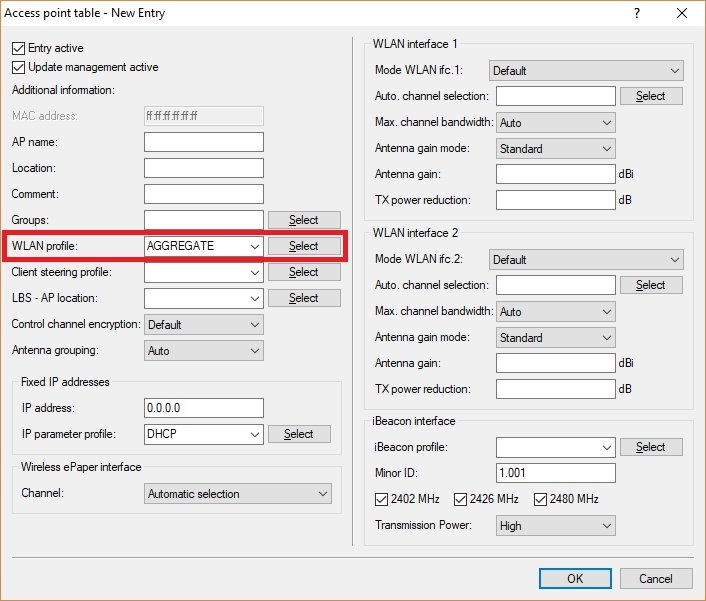
1.2.4) Store the
WLAN profile. If required, you can specify further parameters (such as
Client steering profile).
 2) Manually assign a WLAN configuration to an access point by means of an entry in the access point table (configuration only):
 The certificate can be issued either automatically (see
step 1.1) or manually (see
step 4).
2) Navigate to the menu item
WLAN controller -> AP configuration -> Access point table.

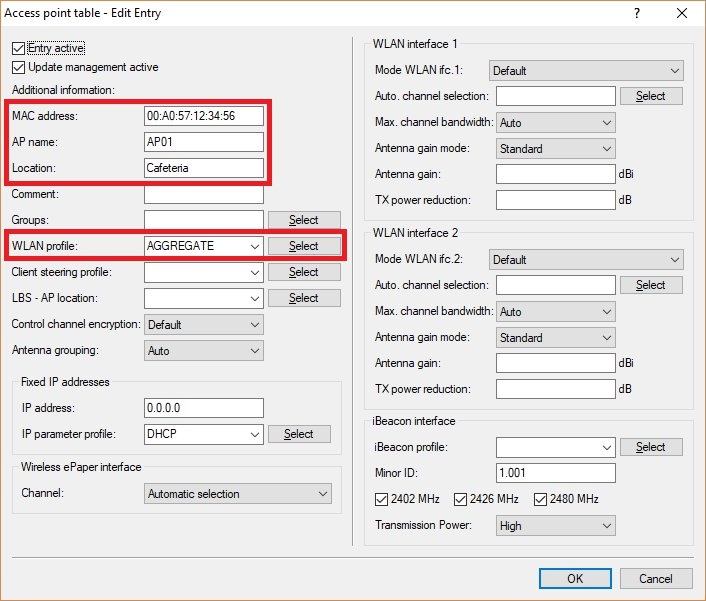
2.2) Create a new entry and enter the
MAC address of the access point and the
WLAN profile.
Info: AP nameLocation- helps to identify the access point later.
 3) Manual acceptance via LANmonitor (configuration and certificate):
 3.1) Start a temporary instance of the LANmonitor by right-clicking in LANconfig and choosing the context-menu item
Monitor device temporarily.
3.2) In LANmonitor, go to
WLAN controller -> New APs, right-click on the access point and assign the desired WLAN profile to it using the function
Assign access point to profile. A certificate is assigned too.
Info: - An entry is created with the
MAC address of the access pointWLAN profileaccess point table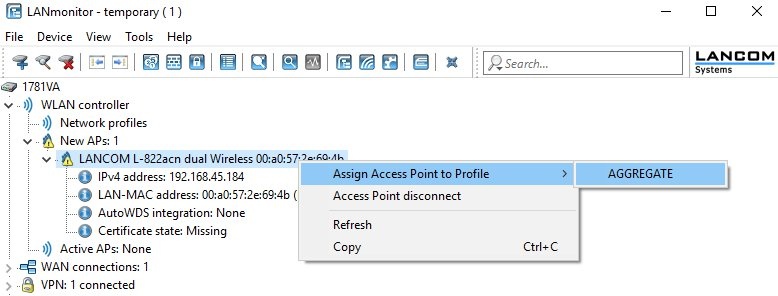 4) Certificate assignment via WEBconfig (certificate only):
 If the
Access point table contains an entry for the access point that includes a
WLAN profile (see
step 1.2 or
step 2), the access point can be assigned the certificate via WEBconfig.
4.1) Use a browser to connect to the web interface of the WLAN controller and go to the menu
LCOS menu tree -> Setup -> WLAN management.
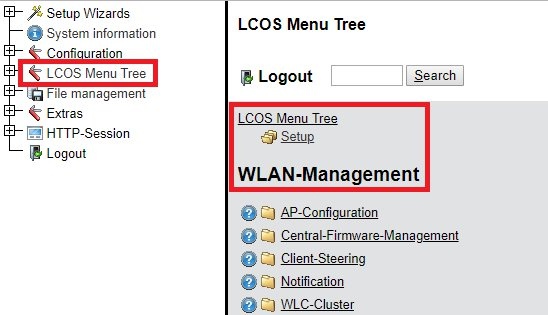
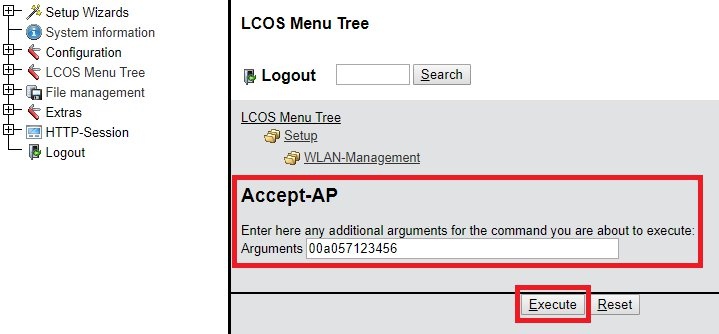
4.2) Click on
Accept AP and enter the
MAC address of the access point under
Arguments. Then click
Execute to assign a certificate to the access point.
 5) Assigning a certificate and configuration via WEBconfig (up to and including LCOS 8.84):
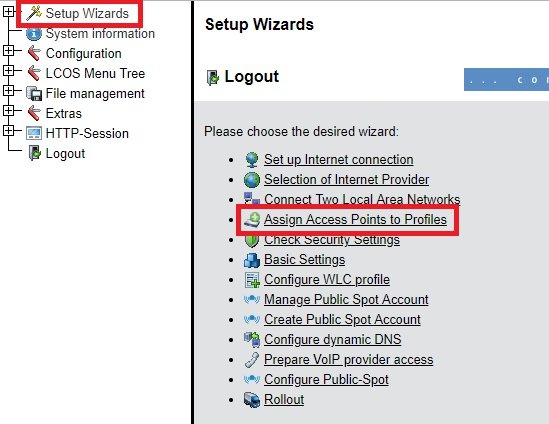
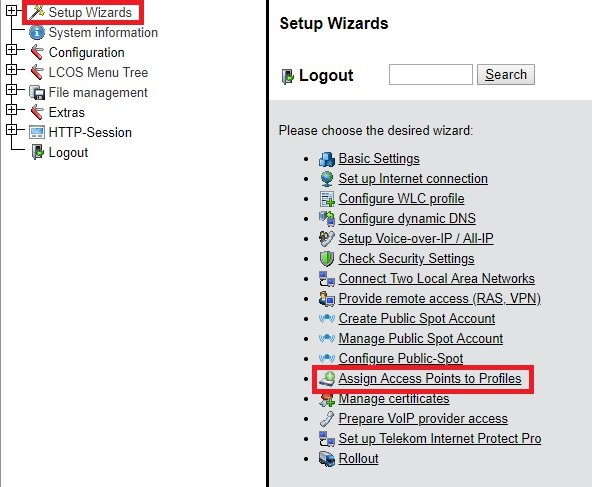
 5.1) Connect to the web interface of the WLAN controller with a browser and go to
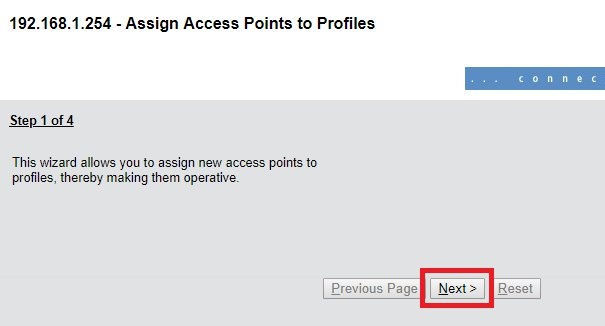
Setup Wizards -> Assign access points to profiles.
5.2.) Click on
Next.
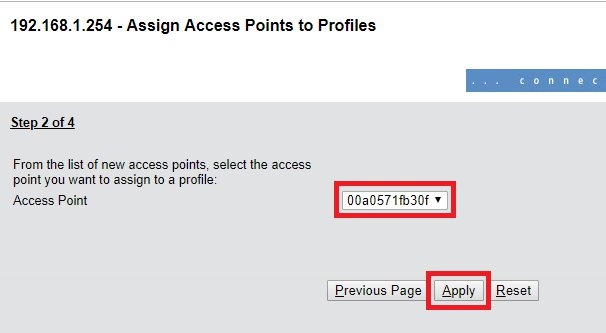
5.3) Select an access point and click
Apply.
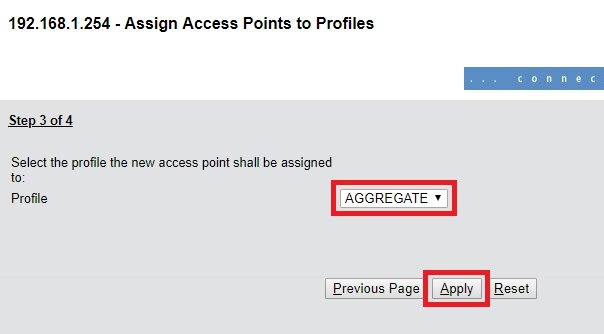
5.4) Select the WLAN profile and then click
Apply.
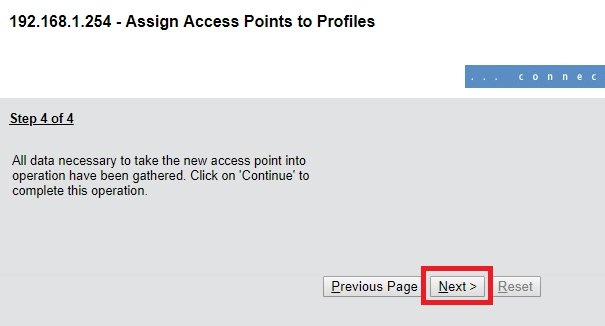
5.5) Click on
Next to close the wizard.
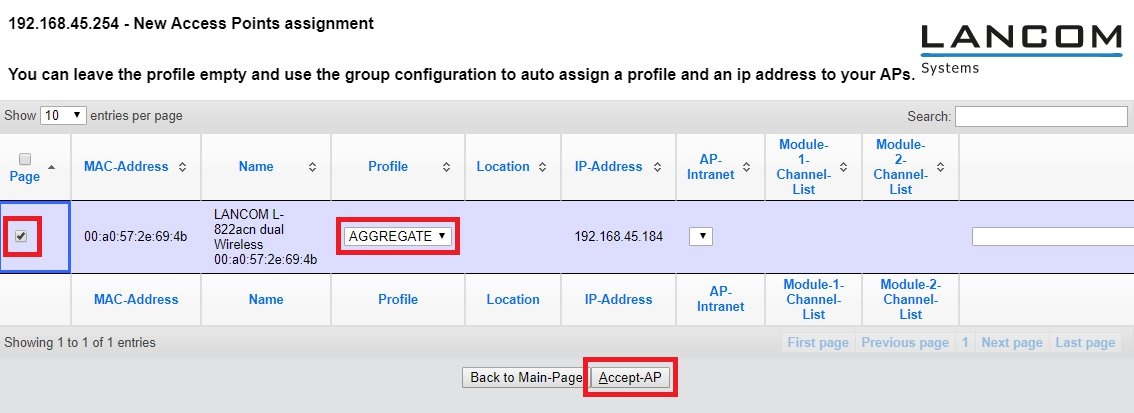
 6) Assigning a certificate and configuration via WEBconfig (as of LCOS 9.00):
 6.1) Connect to the web interface of the WLAN controller with a browser and go to
Setup Wizards -> Assign access points to profiles.
6.2) Mark the access point, use the drop-down menu under
Profile to select the
WLAN profile, and click
Accept-AP.