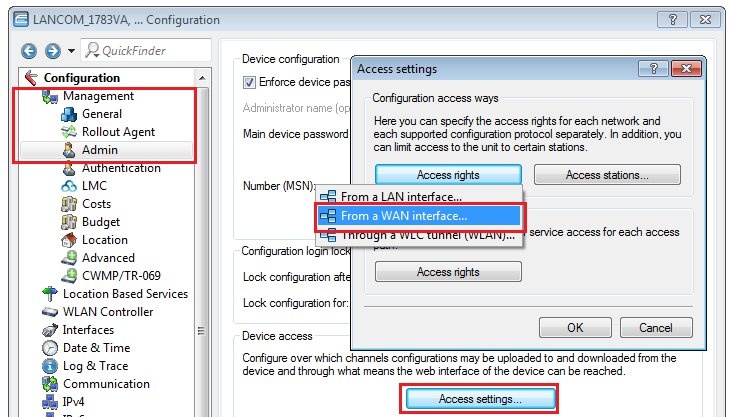
Description: This document describes how you configure the access rights on LANCOM devices. Requirements: For LANCOM routers, WLCs and access points: 1) Open the configuration for your LANCOM device in LANconfig and switch to the menu item Management → Admin → Access settings → Access rights. 2) Select the interface for which you wish to configure the access rights. 3) Set the desired access right for each of the protocols. You can select from: - Allowed
- Denied
- Read only
- Only via VPN
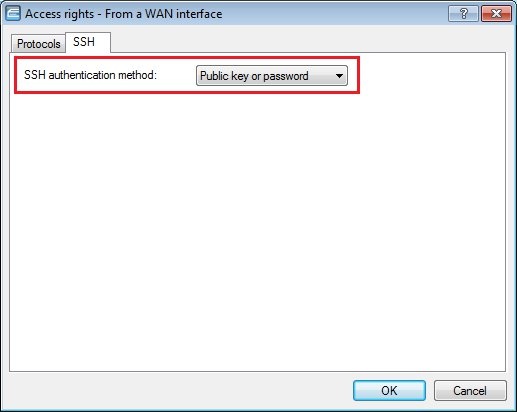
When assigning the access rights to a WAN interface, only the access rights "only via VPN" or "not allowed" should be used for all unsafe protocols (HTTP, Telnet, SNMPv1 / v2 and TFTP) for security reasons. The encrypted services SSH, HTTPS and SNMPv3 can be granted the access rights "allowed" or "read only". 4) On the SSH tab, set the access right for the SSH protocol. The SSH protocol allows authentication by password or by using a public key.
5) A special filter list gives you an additional option for restricting access to the internal functions of a device to specific IP addresses only. In LANconfig, the addresses that are to be permitted access are entered into the Access stations table located under Management → Admin. If you add one or more access stations under "Management → Admin → Access stations", then only these stations have access to the configuration, even if all of the other protocols are enabled.
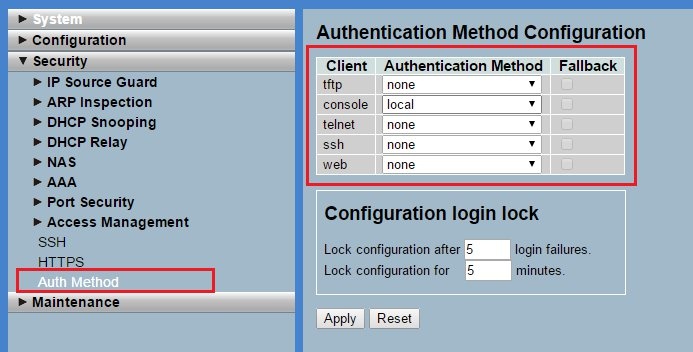
For LANCOM switches of the GS-23xx series: 1) The menu Security → Auth method lets you set the authentication method for different protocols. You can select from: - None: Authentication disabled; it is not possible to login
- Local: Use the local user database in the switch for authentication
- RADIUS: Use a remote RADIUS server for authentication
- TACACS+: Use a remote TACACS+ server for authentication
|