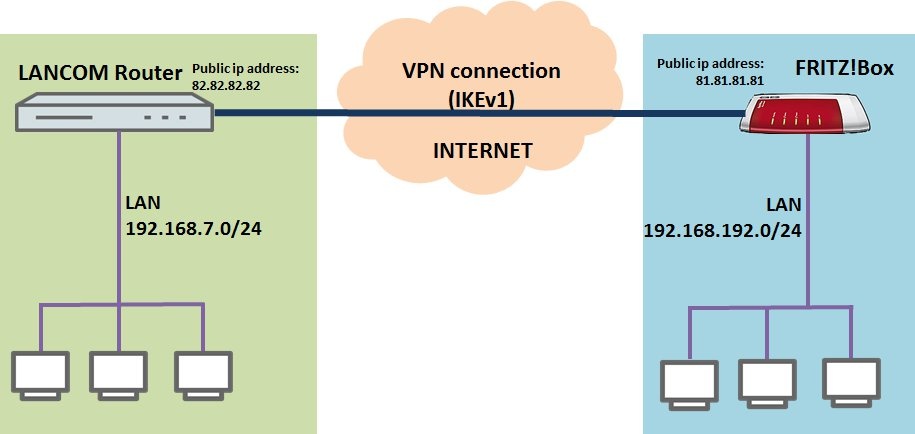
Description: This document uses an example to describe how to set up a VPN connection between a LANCOM router and a FRITZ!Box to set up a bridge between the two local networks. Requirements: Scenario: - The LANCOM router has the public IP address 82.82.82.82 and the local network address range 192.168.7.0/24.
- The FRITZ!Box at the remote site has the public IP address 81.81.81.81. The local area network has the address range 192.168.192.0/24.
- The two local networks are to be bridged over an IKEv1 VPN connection in main mode. It should be possible to reach all of the devices in the two local networks.
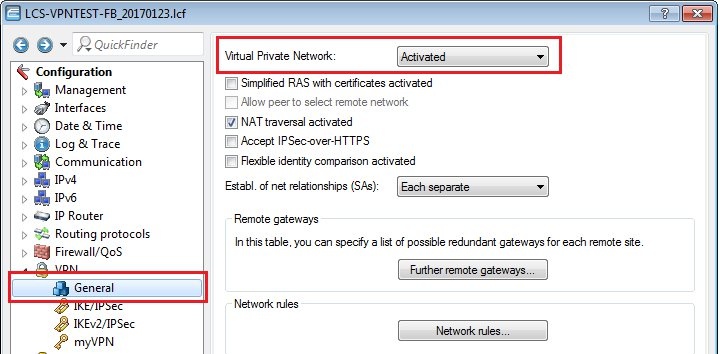
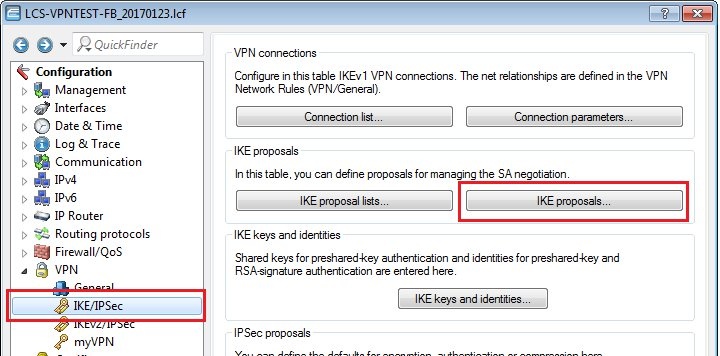
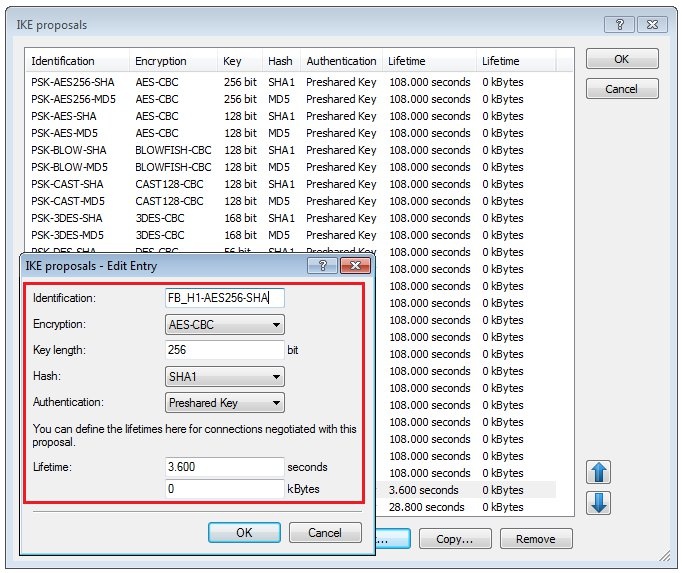
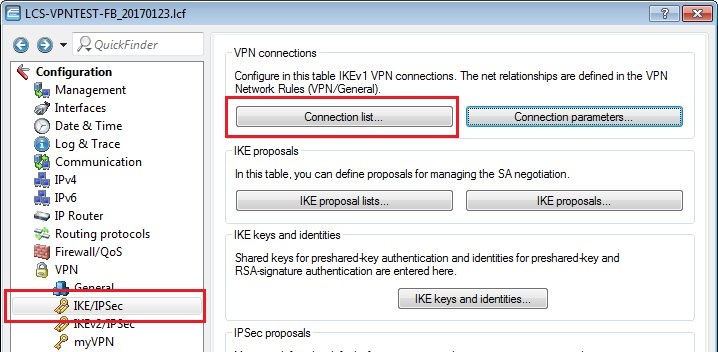
Procedure: 1) Configuring the VPN connection on the LANCOM router: 1.1) Open the configuration for the LANCOM router in LANconfig and switch to the menu item VPN → General. 1.2) Enable the function Virtual Private Network. 1.3) Switch to the menu VPN → IKE/IPSec → IKE proposals. 1.4) Create a new IKE proposal with the following values: - Identification: Enter a unique name for the new proposal.
- Encryption: Select AES-CBC.
- Key length: The value 256 bit must be entered here.
- Hash: The hash algorithm is set to SHA1.
- Authentication: Set preshared key here.
- Lifetime: Enter a lifetime of 3600 seconds and 0 kBytes.
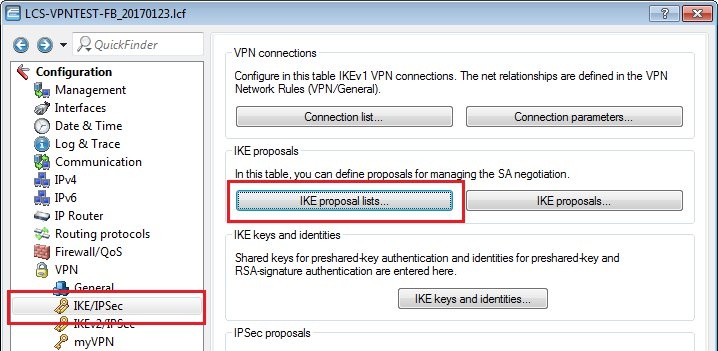
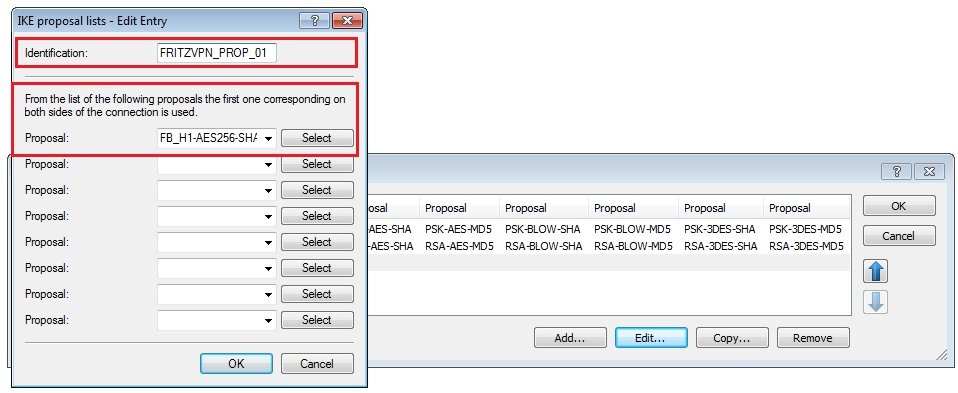
1.5) Switch to the menu VPN → IKE/IPSec → IKE proposal lists. 1.6) Create a new IKE proposal list with the following values: - Identification: Enter a unique name for the new list.
- Proposal: Select the IKE proposal created in step 1.4.
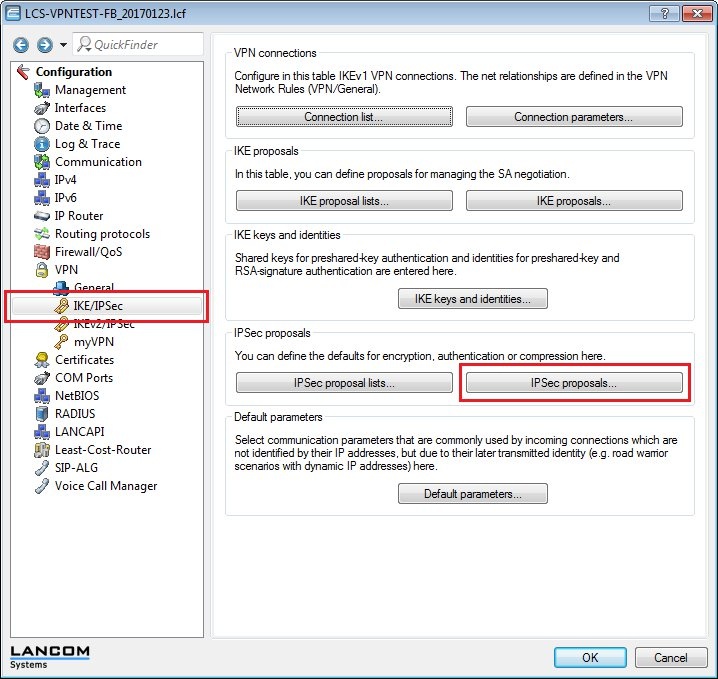
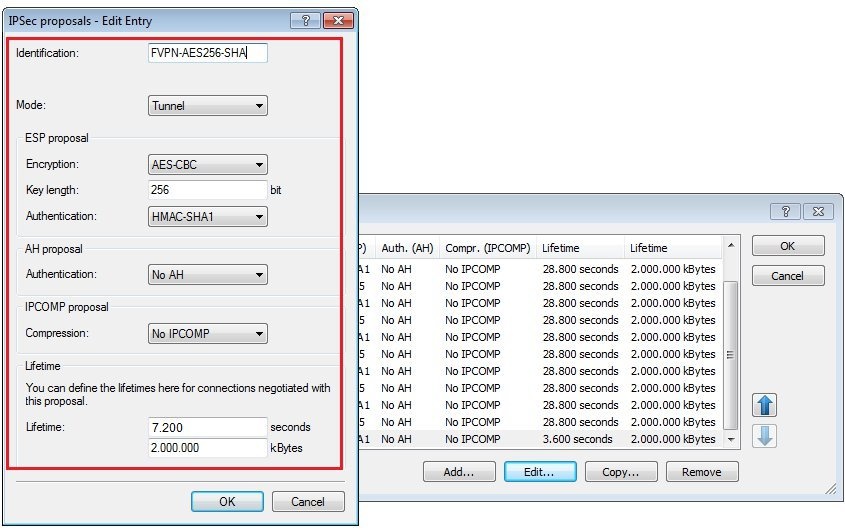
1.7) Switch to the menu VPN → IKE/IPSec → IPSec proposals. 1.8) Create a new IPSec proposal with the following values: - Identification: Enter a unique name for the new proposal.
- Mode: Select Tunnel.
- Encryption: Select AES-CBC.
- Key length: The value 256 bit must be entered here.
- Authentication: Set HMAC-SHA1 here.
- Authentication (AH-proposal): Set No AH here.
- Compression: Set this to No IPCOMP.
- Lifetime: Enter a lifetime of 7.200 seconds and 2,000,000 kBytes.
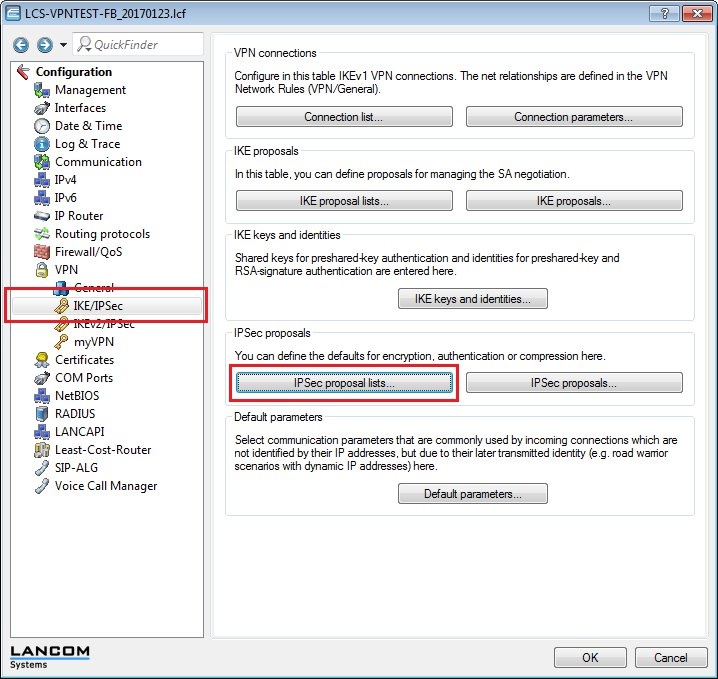
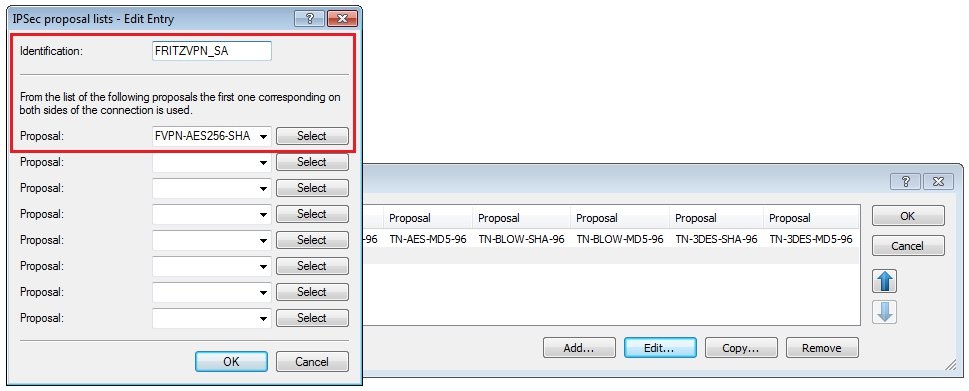
1.9) Switch to the menu VPN → IKE/IPSec → IPSec proposal lists. 1.10) Create a new IPSec proposal list with the following values: - Identification: Enter a unique name for the new list.
- Proposal: Select the IPSec proposal created in step 1.8.
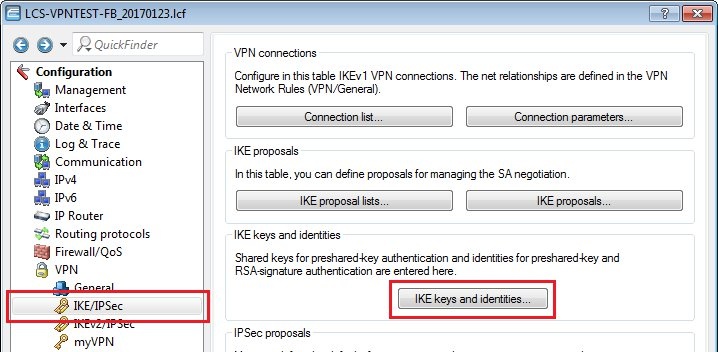
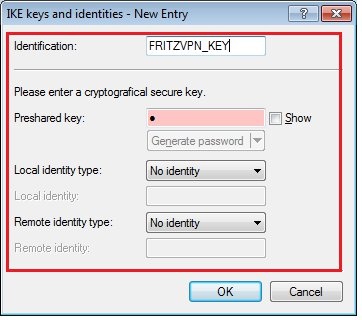
1.11) Switch to the menu VPN → IKE/IPSec → IKE keys and identities. 1.12) Add a new entry with the following values: - Identification: Enter a unique name for the new entry.
- Pre-shared key: Set a complex password that is used as a preshared key.
- Local identity type: Please set this field to No identitiy.
- Local identity: This field has to stay empty.
- Remote identity type: Please set this field to No identitiy.
- Remote identity: This field has to stay empty.
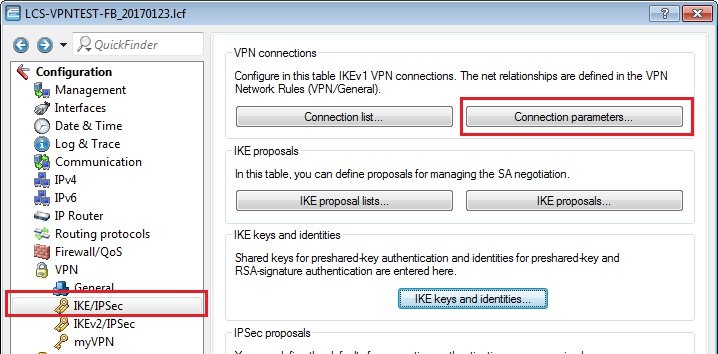
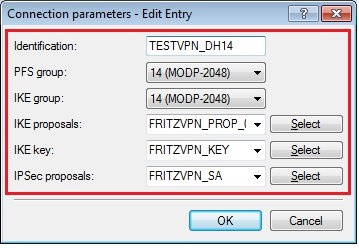
1.13) Switch to the menu VPN → IKE/IPSec → Connection parameters. 1.14) Add a new entry with the following values: - Identification: Enter a unique name for the new entry.
- PFS group: Set this to group 14.
- IKE group: Set this to group 14.
- IKE proposals: This is set to the IKE proposal list created in step 1.6.
- IKE key: This is set to the entry created in step 1.12.
- IPSec proposals: This is set to the IPSec proposal list created in step 1.10.
1.15) Switch to the menu VPN → IKE/IPSec → Connection list. 1.16) Add a new entry with the following values: - Connection name: Enter a unique name for the new entry.
- Short hold time: This is set to value 0. This means that the LANCOM router does not actively establish the VPN connection, but it accepts a request to connect from the FRITZ!Box.
- Dead Peer Detection: This value is set to 60 seconds.
- Gateway: Enter the public IP address or the public DNS address of the FRITZ!Box.
- Connection parameters: Here you select the profile created in step 1.14.
- This example uses No dynamic VPN.
- The IKE exchange mode must be set to Main mode.
- Rule creation: Set this option to Manual.
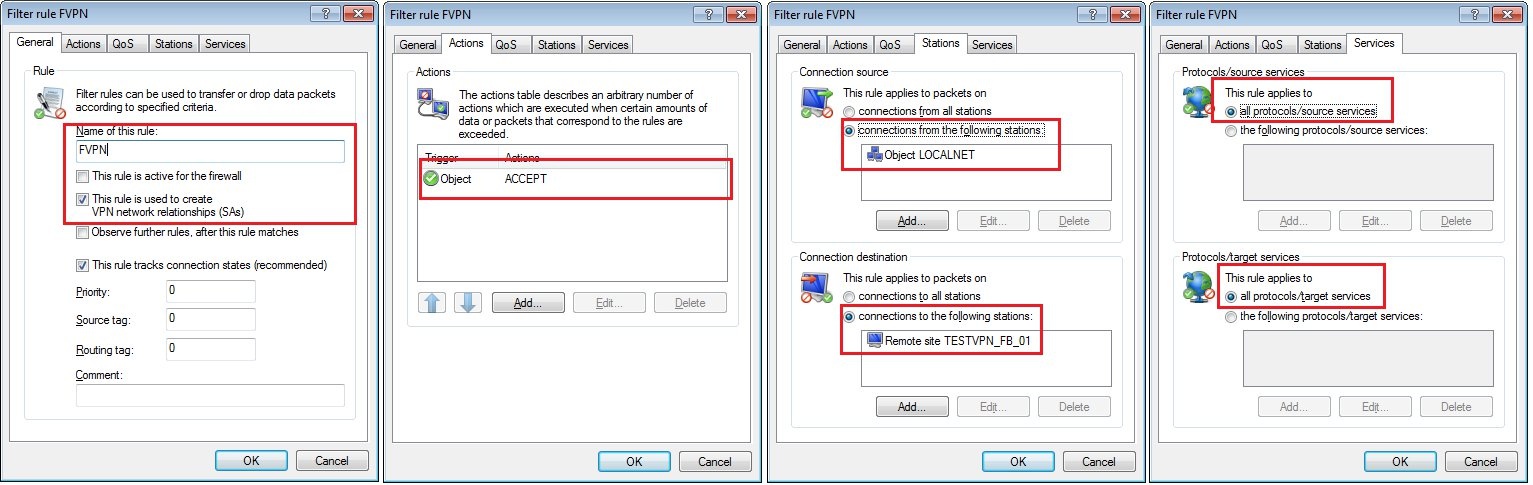
1.17) Navigate to the menu Firewall/QoS → IPv4 rules → Rules. 1.18) Create a new firewall rule with the following parameters: - On the General tab, set a name for the rule and specify that This rule is used to create VPN network relationships (SAs).
- Go to the Actions tab and set the action to ACCEPT.
- On the Stations tab, set the upper box to the object LOCALNET. In the lower box, select the VPN remote site created in step 1.16.
- On the Services tab, the default settings are left unchanged.
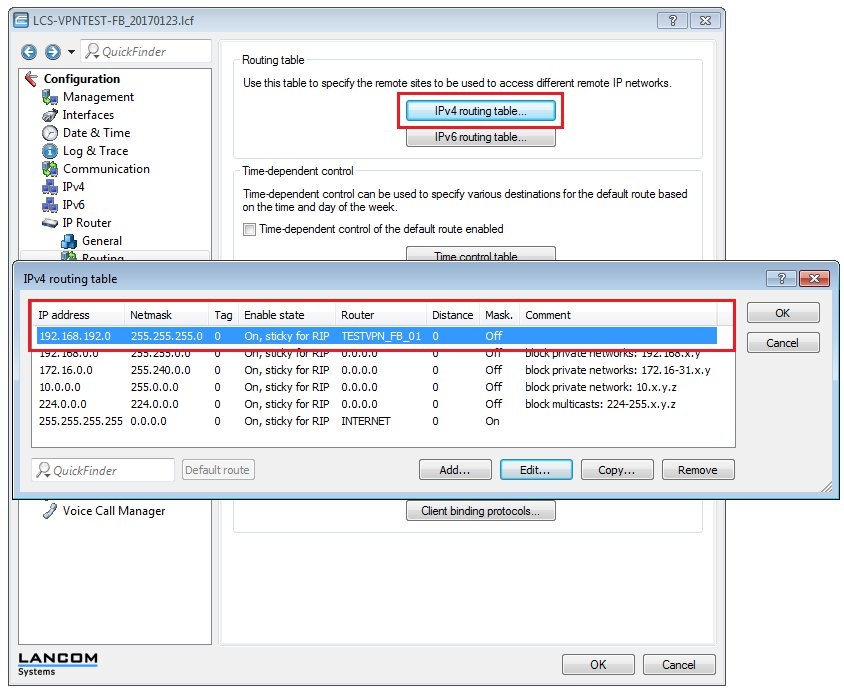
1.19) Navigate to the menu IP router → Routing → IPv4 routing table. 1.20) Create a route that points to the local network at the remote site. - In this example, this is the network with the IP address range 192.168.192.0/24.
- Set the router as the VPN remote site created in step 1.16.
1.21) Close the dialog using the OK button and write the configuration back to the LANCOM router.
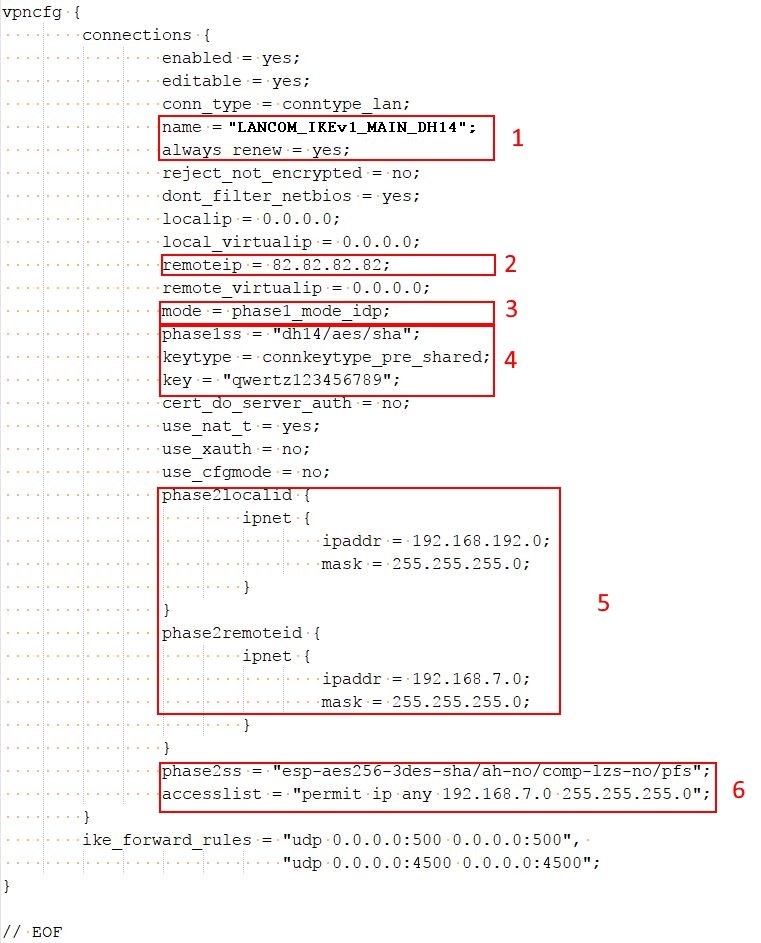
2) Configuring the VPN connection on the FRITZ!Box: 2.1) Use the configuration file attached below and use a text editor to adjust the following items:  fritzbox_DH14AES256-20171128.cfg fritzbox_DH14AES256-20171128.cfg - name: Enter a name for the VPN connection.
- always_renew: Enter yes here, so that the FRITZ!Box can actively establish the VPN connection after a disconnect.
- remoteip: Enter the public IP address of the LANCOM router. In this example, this is the IP address 82.82.82.82.
- mode: In this example a main-mode connection is established, so you enter the value phase1_mode_idp.
- phase1ss: Here you enter the parameter dh14/aes/sha.
- keytype: The value connkeytype_pre_shared is required here. This specified that a preshared key is used.
- key: Here you enter the preshared key that you set in step 1.12.
- phase2localid: Here you enter the address range of the local network at the FRITZ!Box and the corresponding net mask. In this example, the address range is 192.168.192.0 and the net mask is 255.255.255.0.
- phase2remoteid: Here you enter the address range of the local network at the LANCOM router and the corresponding net mask. In this example, the address range is 192.168.7.0 and the net mask is 255.255.255.0.
- phase2ss: Here you enter the parameters esp-aes256-3des-sha/ah-no/comp-lzs-no/pfs.
- accesslist: Since all of the devices of the network at the remote are to be reached, the parameter here must be set to permit ip any 192.168.7.0 255.255.255.0.
 2.2) Open the configuration interface for the FRITZ!Box and navigate to the menu item Internet → VPN. 2.3) Add a new VPN connection. 2.4) Select the option Import a VPN configuration from an existing VPN setup file. Click on Next. 2.5) Upload the newly created configuration file to the FRITZ!Box. 2.6) After uploading the configuration file, the FRITZ!Box establishes the VPN connection to the LANCOM router. |