Description: 802.1X authentication is required in order to authenticate with username and password when using WPA3.
This article describes how to set up 802.1X authentication with WPA3.
Requirements: - Configured and functional Wi-Fi.
Procedure: RADIUS authentication in conjunction with WPA3 can be operated with single WLAN router/access point scenarios as well as in WLAN controller scenarios.
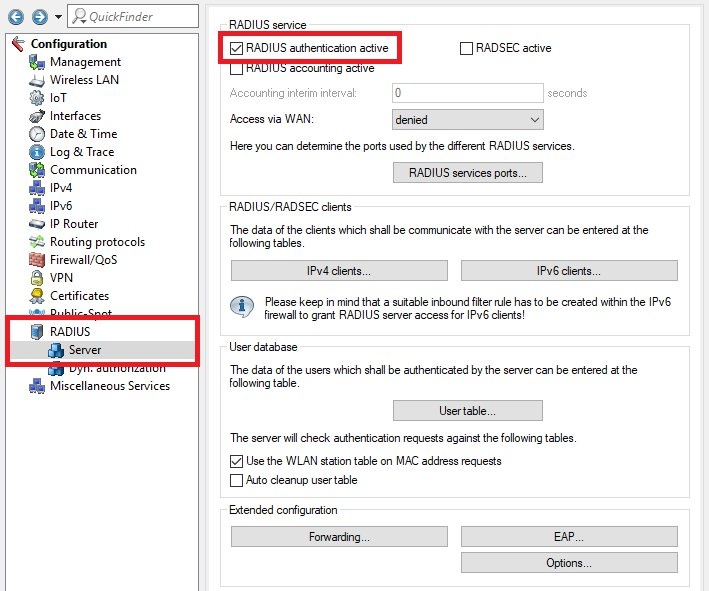
1) Common configuration steps: 1.1) Go to the menu
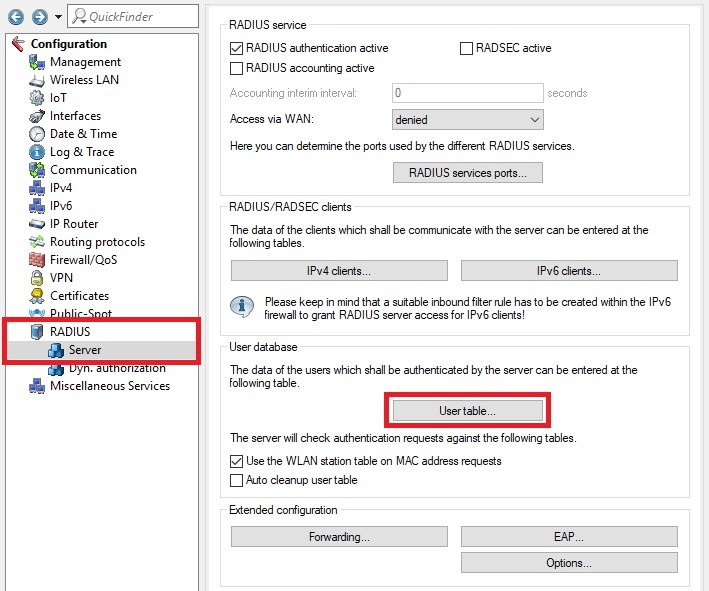
RADIUS -> Server and set a checkmark for
RADIUS authentication active.
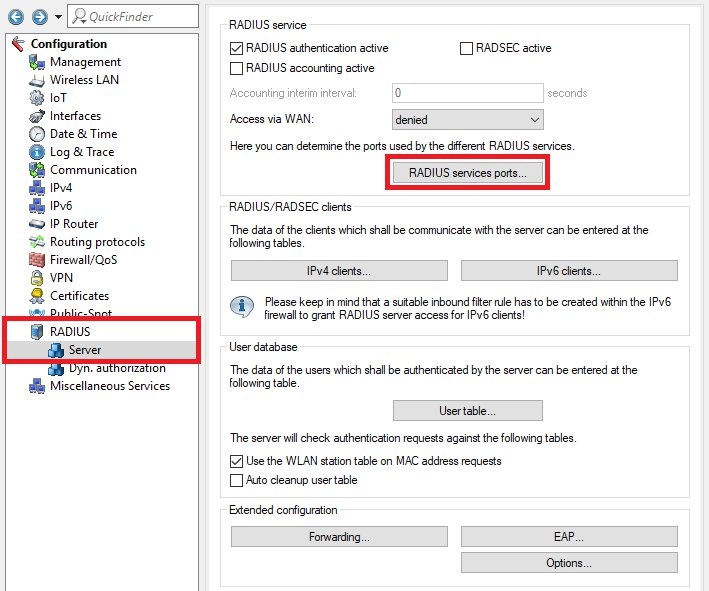
1.2) Navigate to the menu
RADIUS services ports.
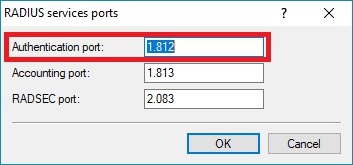
1.3) Make sure that the
authentication port is set to the port
1812.
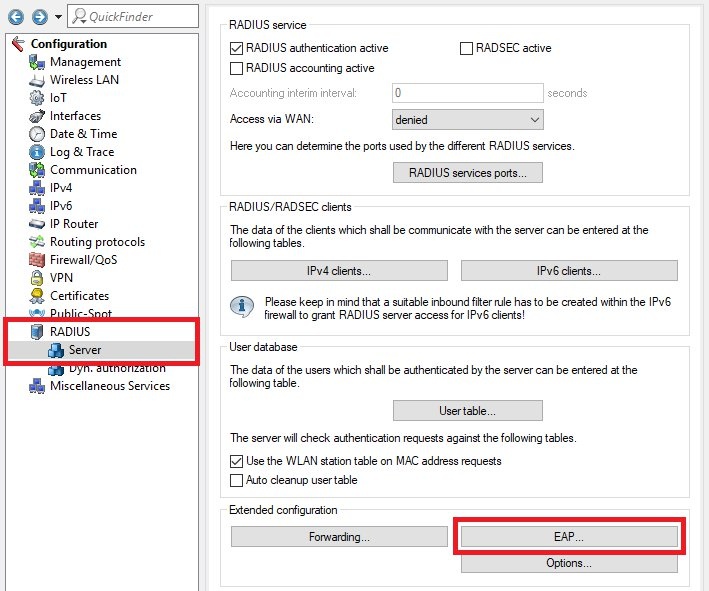
1.4) Switch to the menu
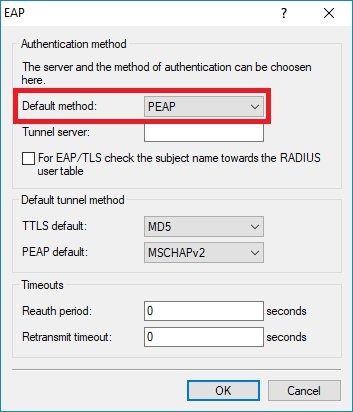
EAP.
1.5) Change the
Default method to
PEAP to use authentication by username and password.
1.6) Go to the menu
User table.
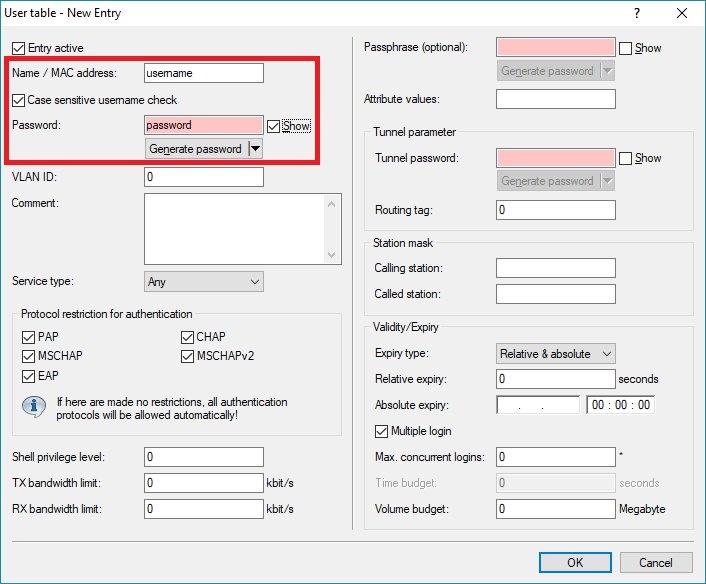
1.7) Create a new user and enter the following parameters:
- Name / MAC address: Enter a user name.
- Password: Specify the password for the user.
 2) Single WLAN router or access point:
 2.1) Create an
EAP/TLS certificate and upload it to the device. The procedure is described in the following article:

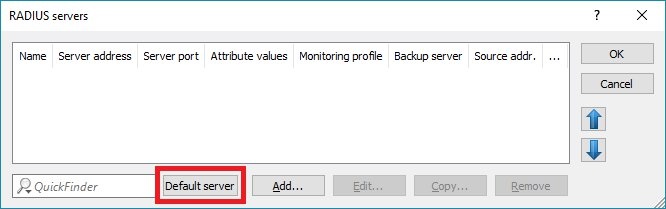
2.2) Open the configuration for the router in LANconfig and switch to the menu item Wireless LAN -> 802.1X -> RADIUS servers.
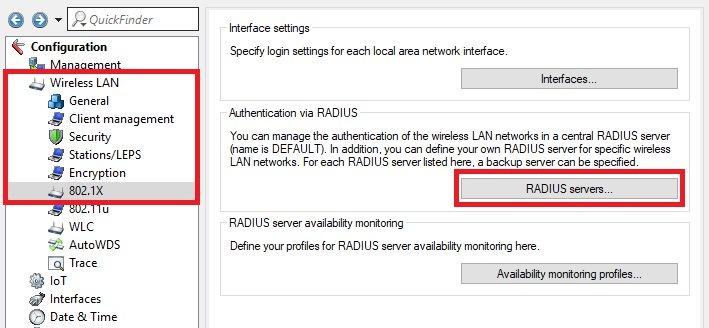
2.3) Click on the button Default server to open a template for the RADIUS server.
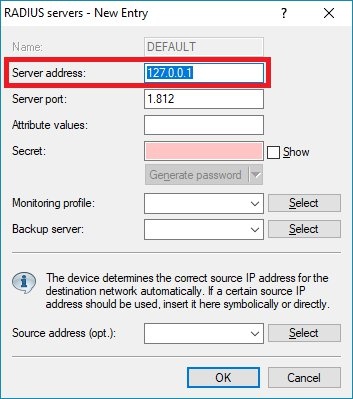
2.4) Set the Server address to the loopback address 127.0.0.1 to use the integrated RADIUS server.
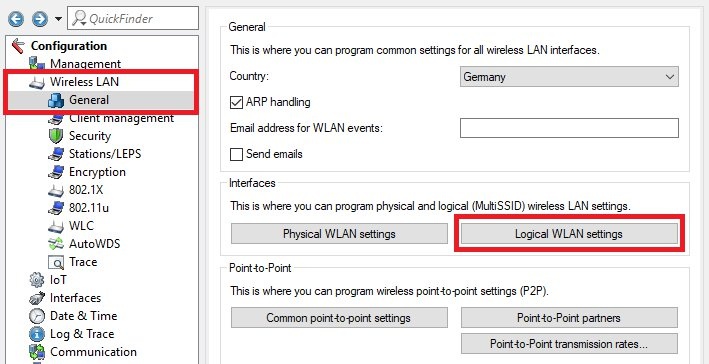
2.5) Switch to the menu Wireless LAN -> General -> Logical WLAN settings.
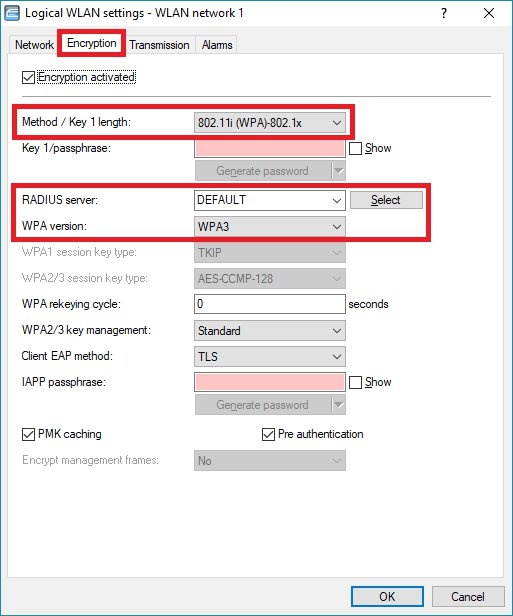
2.6) Open the desired logical WLAN network, switch to the tab Encryption and change the following parameters:
- Method / Key 1 length: From the drop-down menu, select the value 802.1i (WPA)-802.1x
- RADIUS server: From the drop-down menu, select the DEFAULT profile created in step 2.4.
- WPA version: From the drop-down menu, select the value WPA3.
2.7) This concludes the configuration. You can now write the configuration back to the device.
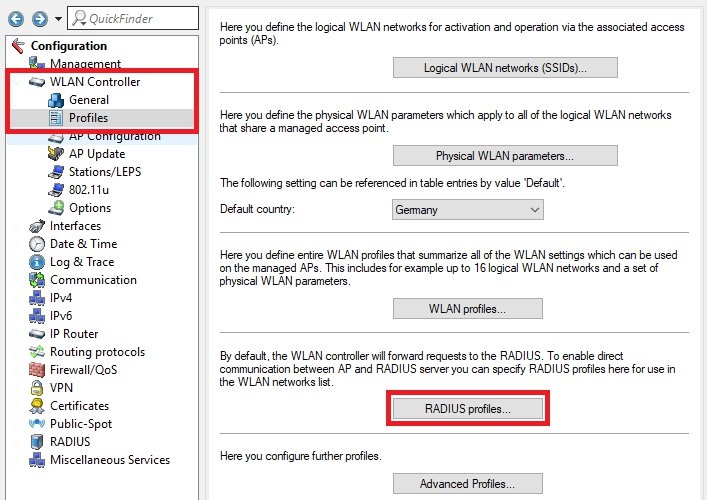
3) WLAN controller: 3.1) Open the configuration of the WLAN controller in LANconfig and navigate to the menu
WLAN controller -> Profiles -> RADIUS profiles..
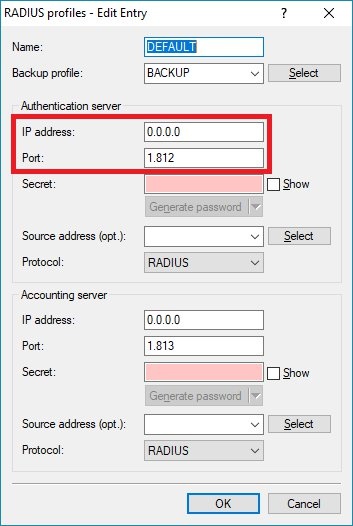
3.2) Edit the entry
DEFAULT and modify the following parameters:
- IP address: Check that the IP address is set to 0.0.0.0. This ensures that all requests are processed by the WLAN controller.
- Port: Check that the port is set to 1812.
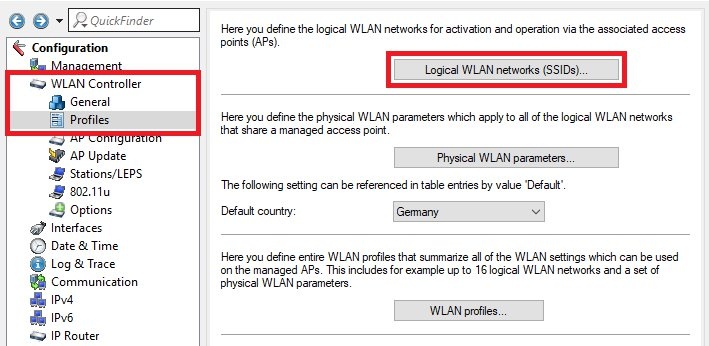
3.3) Navigate to the menu
WLAN controller -> Profiles -> Logical WLAN networks (SSIDs).
3.4) Edit the desired logical WLAN profile and modify the following parameters:
- Encryption: In the drop-down menu, select 802.11i (WPA)-802.1x.
- RADIUS profile: Make sure the profile is set to DEFAULT (also see step 3.2)
- WPA version: Select WPA3 from the drop-down menu.

3.5) This concludes the configuration. You can now write the configuration back to the device.
